
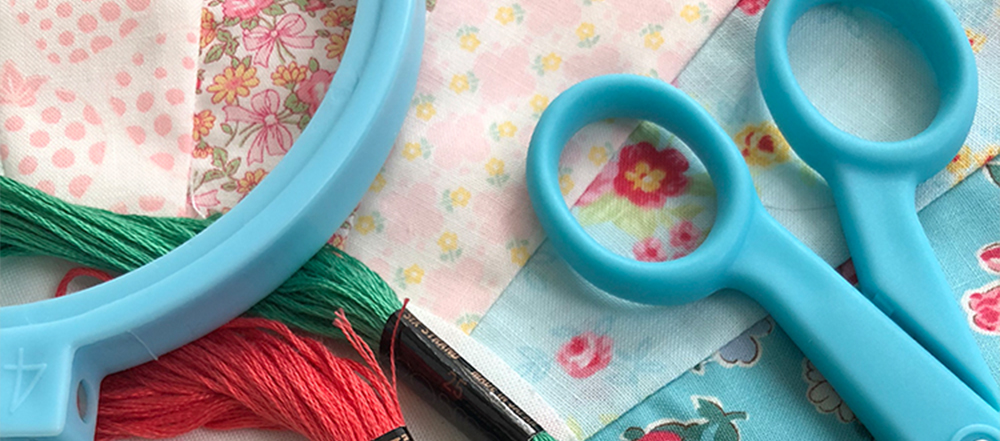
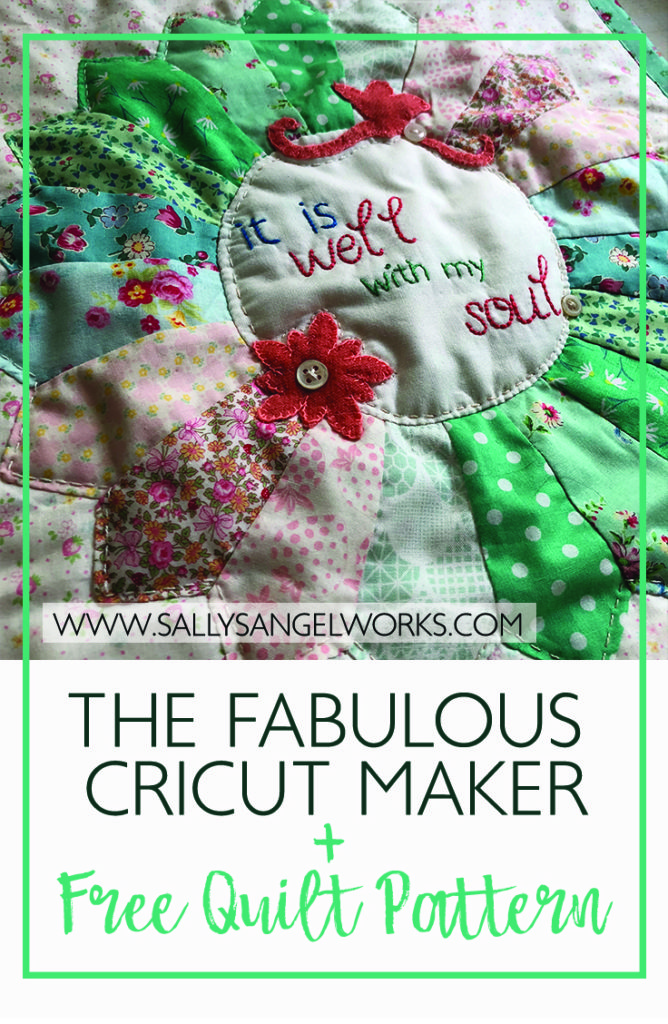
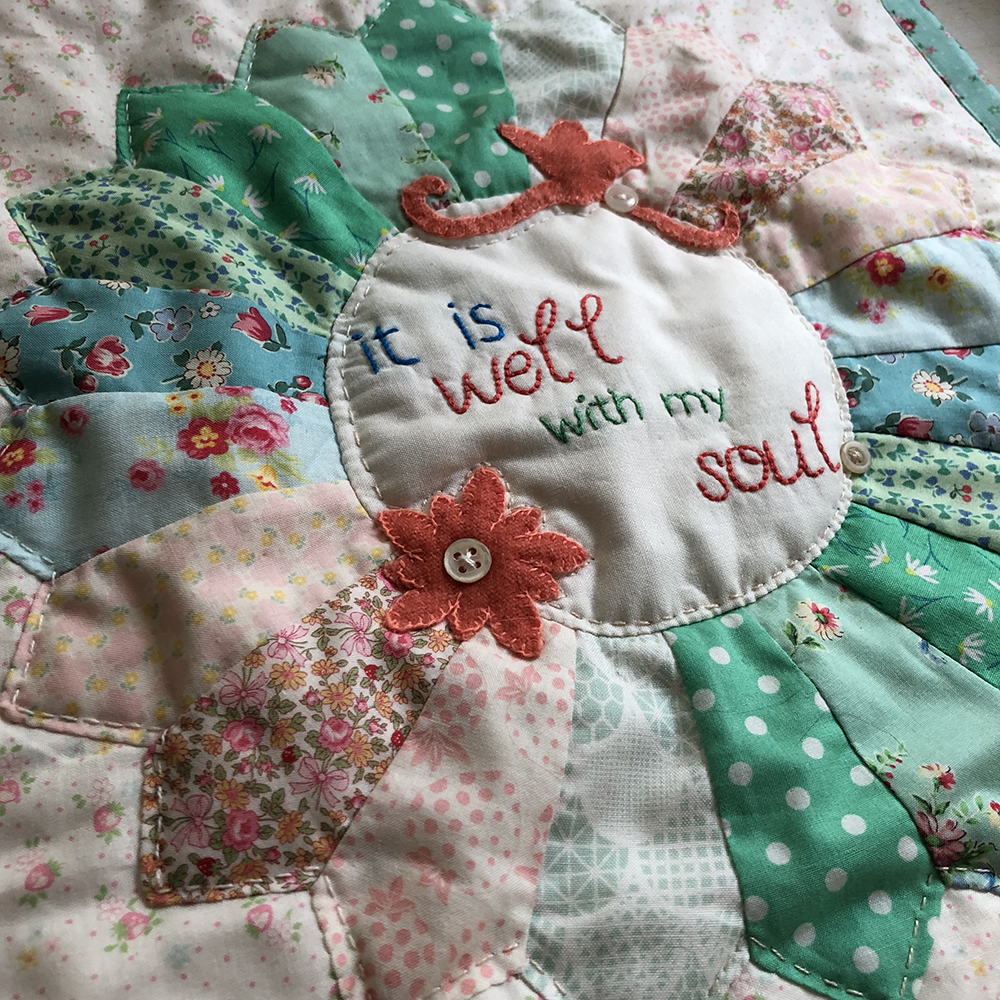
I cannot wait to share one of my favorite finishes this year. I created it with some of my favorite fabrics, embroidered inspirational words, and even added antique buttons to top it all off!! But the best part of this mini quilt is that is was so much easier to make using my Cricut Maker!
{Pin this!! Let’s get the word out! yipeeee!!}
{Cricut has sponsored this review. They are awesome! All opinions and beliefs are my very own. Also, all Cricut links here are affiliate links: which means you don’t pay more when you buy this amazing machine, but I get a little something to help with my Dave Ramsey Baby Steps!}
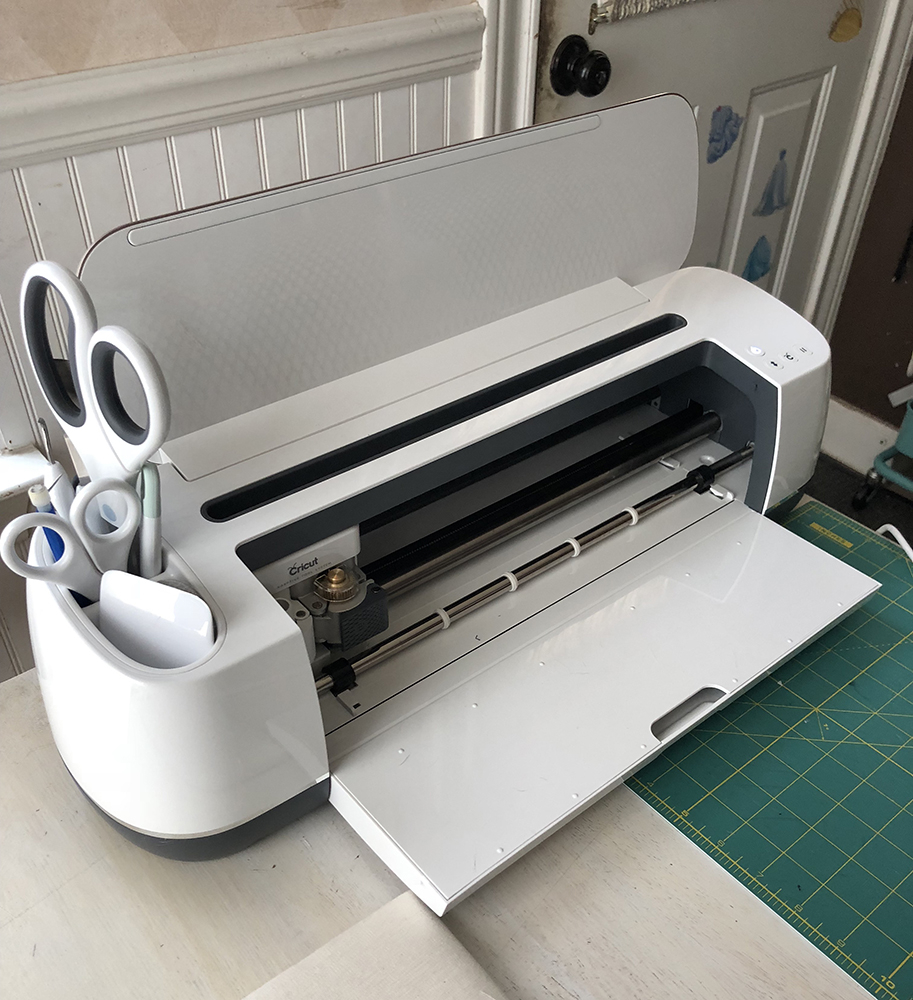
If you aren’t familiar with the Cricut Maker, read my Intro POST HERE all about it. If you are local in the Houston area, I’ll be doing a Cricut Maker demonstration at the Houston Modern Quilt Guild at our April Meeting (April 21st).
This post is all about how to use a Cricut Maker to make a mini quilt with embroidery. Are you ready? Here’s a fun free quilt tutorial for you to help you learn how to use your Cricut Maker. Don’t have one yet? OOOooooo you can pick up a Cricut Maker RIGHT HERE
Let’s start:
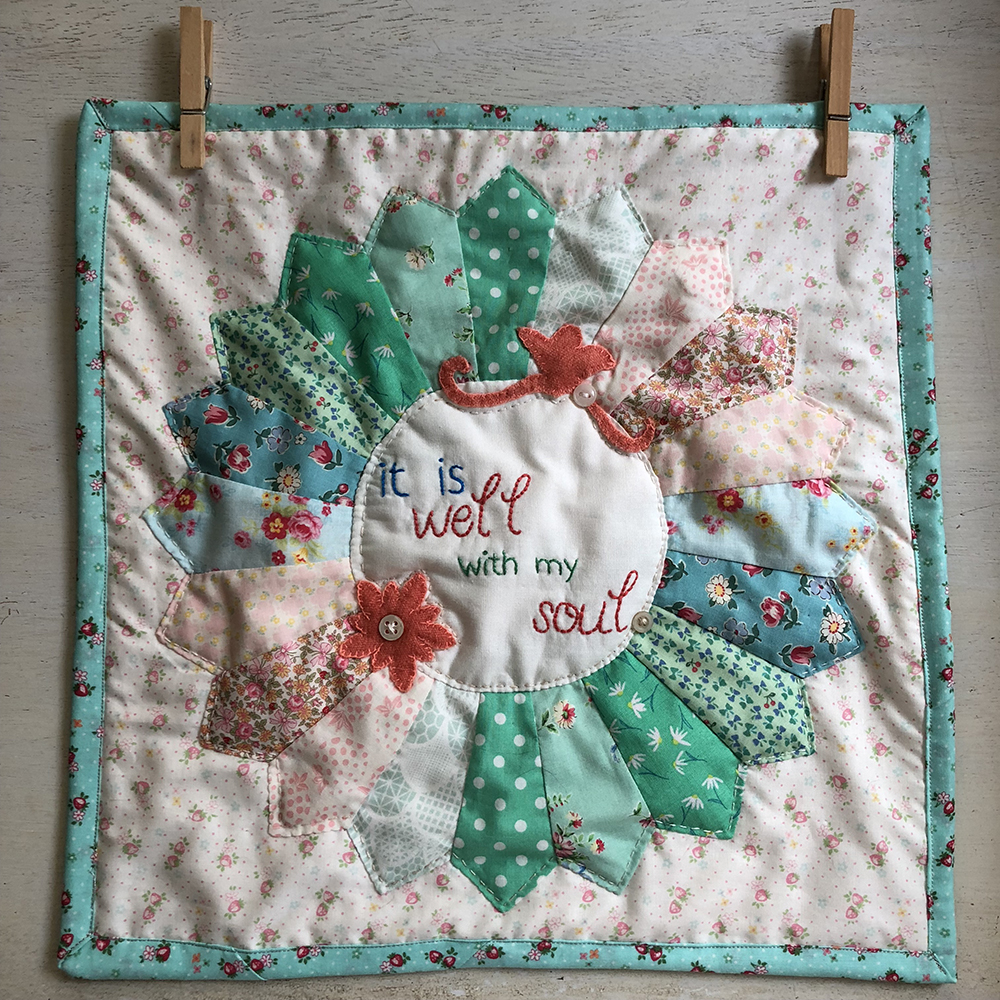
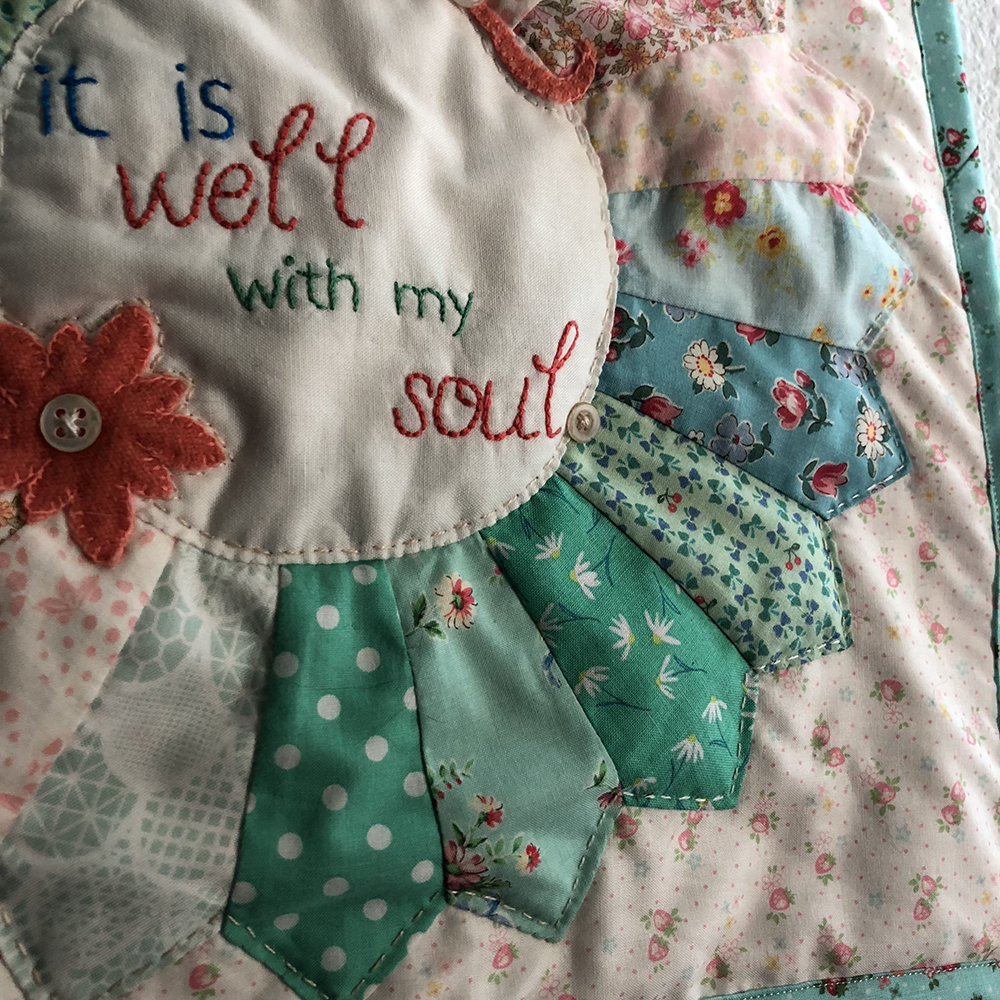
It is Well With my Soul Mini Embroidered Quilt Tutorial
Design your Cricut cutting:
The first thing I did was to design the dresden plate the size I wanted it. I created a png in Adobe Illustrator that is 5″ high and saved it as a PNG to upload it into Cricut Design Space. (I will share that link with you at the end of the tutorial!).
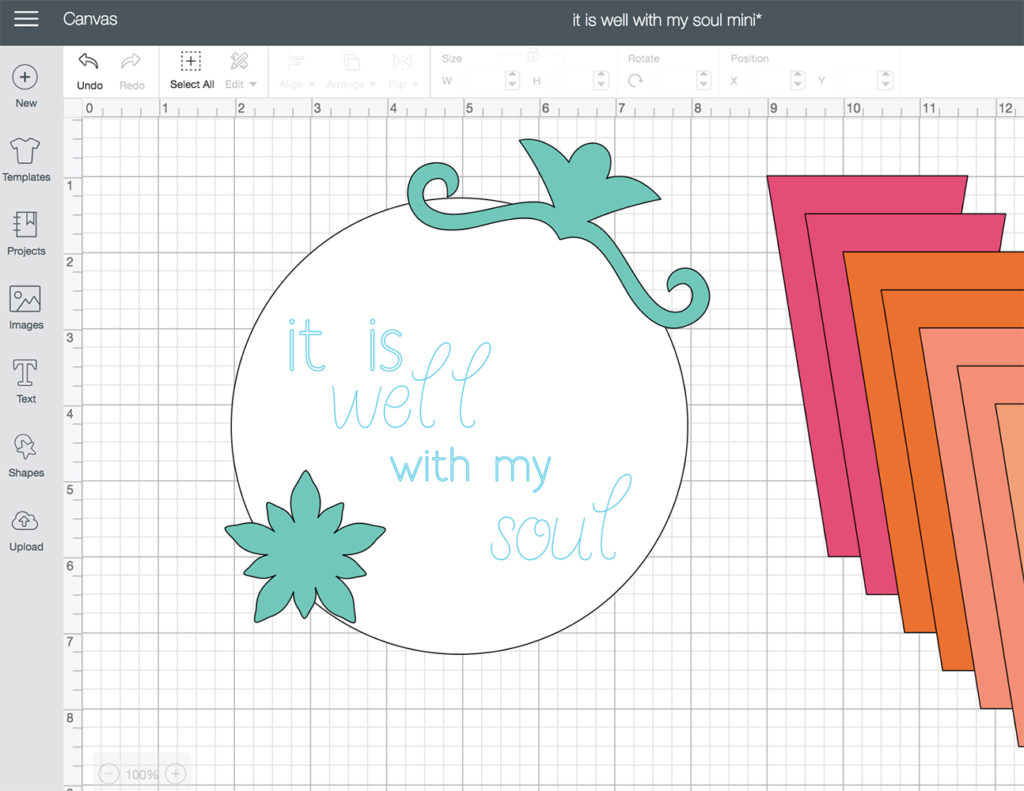
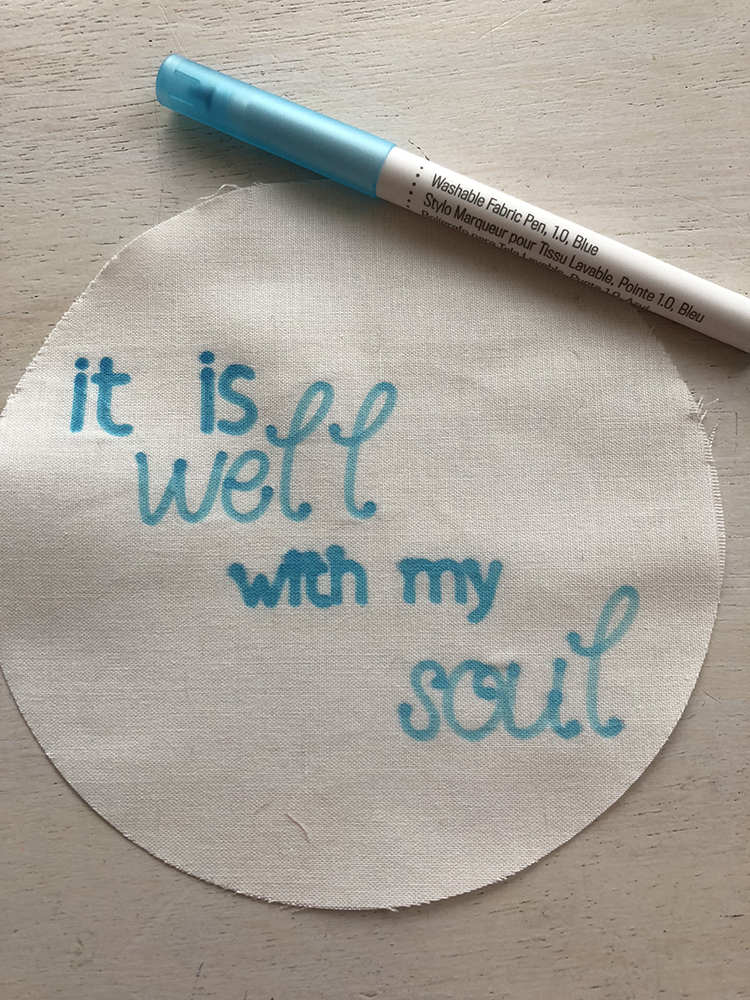
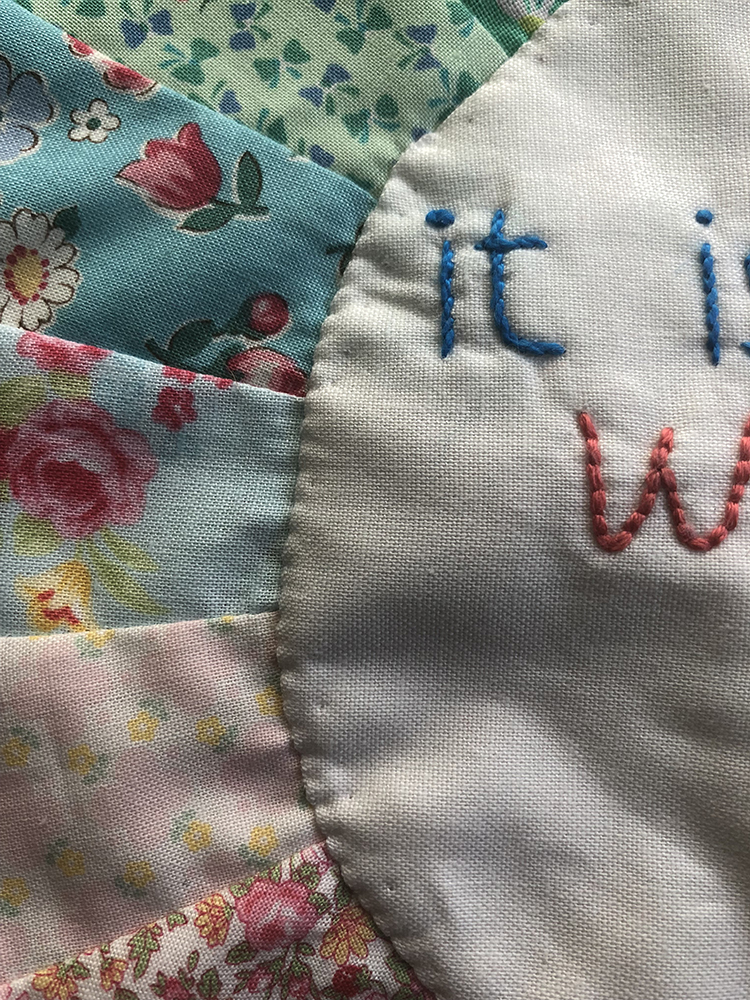
Next, I created the embroidery circle in Cricut Design Space. This is where the Cricut is AMAZING!!! In Design Space, it is not hard to design shapes to cut. And as I showed in my last post, you can put text on the fabric pieces and the Maker will write it directly on the fabric using a washable fabric marker!!!
Here’s a 4 minute video on how I created my embroidery circle with breakout instructions afterwards:
So, first, create a 6″ circle in Design Space. Click on Shapes on the left toolbar. Then at the top, where it says Size, put 6″ into the W window and hit Enter (Return).
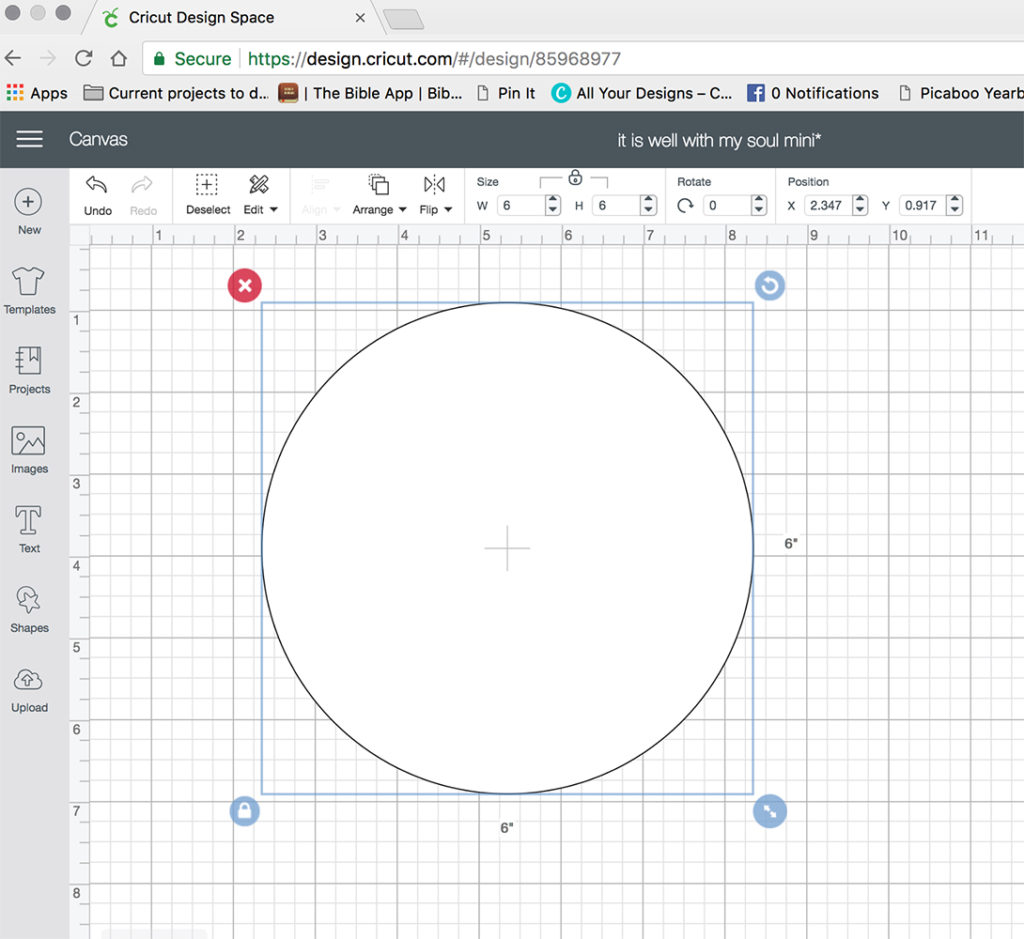
This is what your screen should look like (above).
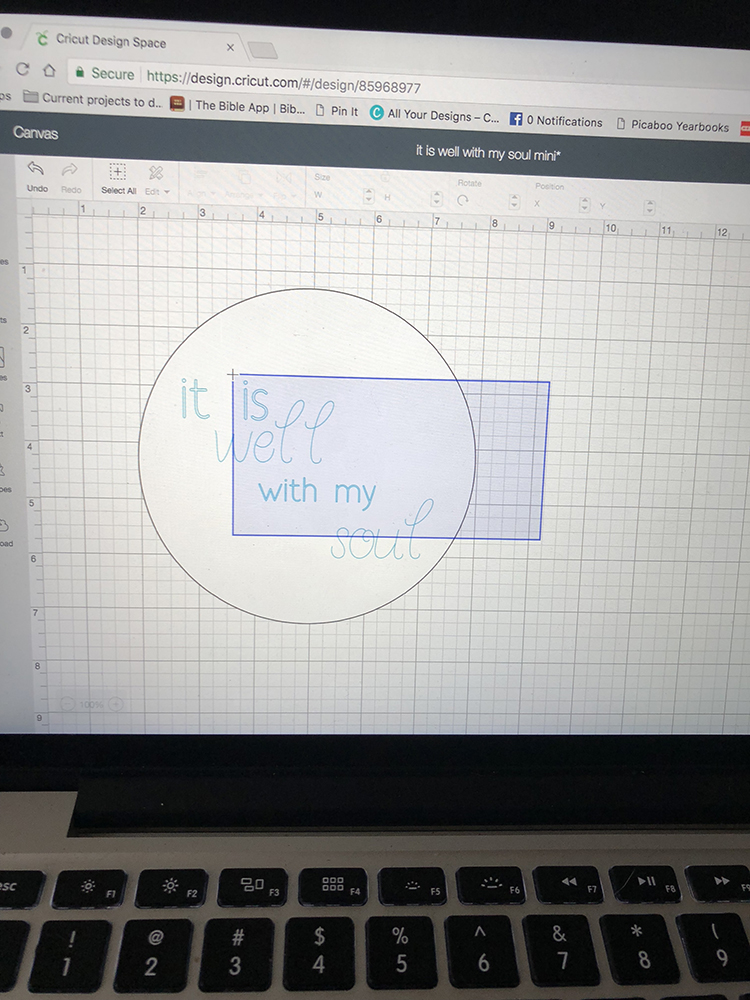
Next, let’s put some text on there!
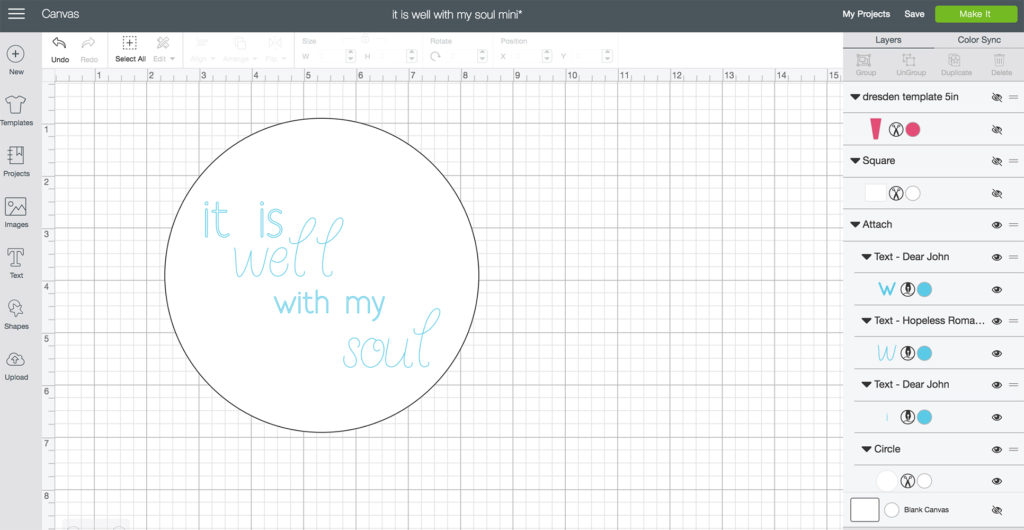
I used two different fonts to create my embroidery. If you want to create your own text, play with it! Click on the text button on the left menu. A box will pop up, and you can write whatever you want. As for font choice, you have two choices…Cricut fonts that you can purchase (or that come with your subscription to Design Space) and System fonts that are on your computer (or phone/tablet if you are on a mobile app – so many options, right???).
I picked Cricut fonts that I have through my Cricut Access Subscription (Check out all about Cricut Access Membership HERE).
After you pick your fonts, change your ‘pen’ color to “washable fabric pen”.
Here’s another important tip: In order for your text to be written on the shape that you have created, you must ATTACH the writing onto your shape. Drag your cursor over all of the layers – the shape and all of the lines of text. Then right click on the shape and select “Attach”. (also shown in the above video).
Next, we are going to upload the PNG of the dresden blade into our design space.
Here’s a quick 50 second video of me uploading my dresden blade into Design Space:
Notice in the video how after the png is on design space, I change the size to a 5″ height. That is important for the perfect dresden blades!!
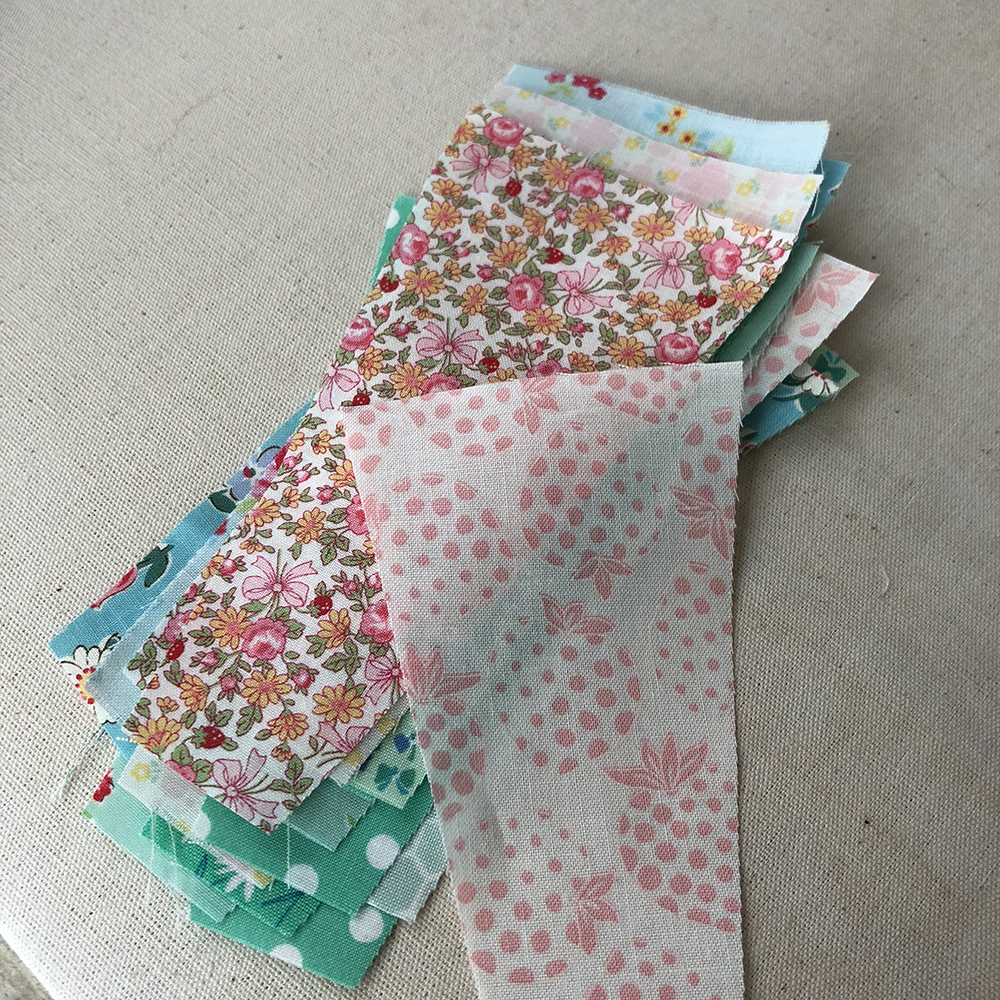
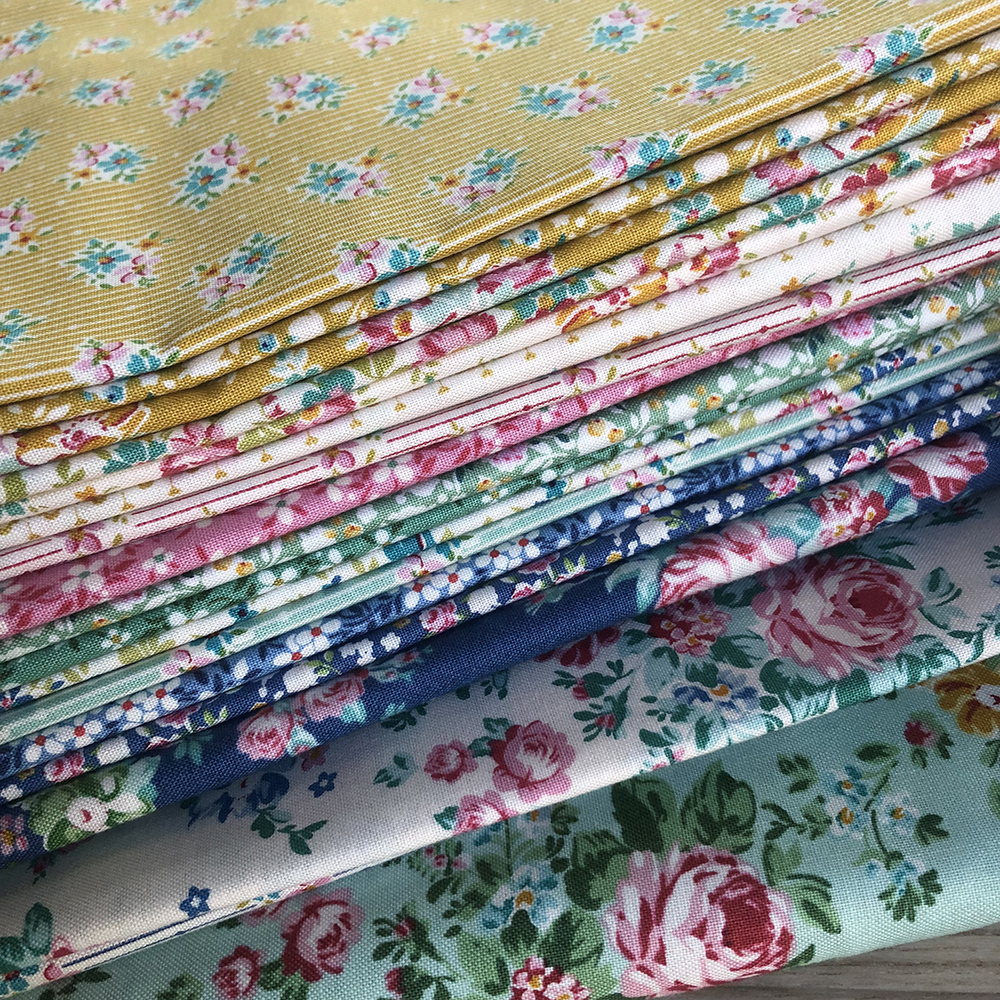
After uploading and changing the size, change the color to the color of fabric you want to use. I used 10 different fabrics and cut 2 blades per fabric. If you want 20 different fabrics, go for it.
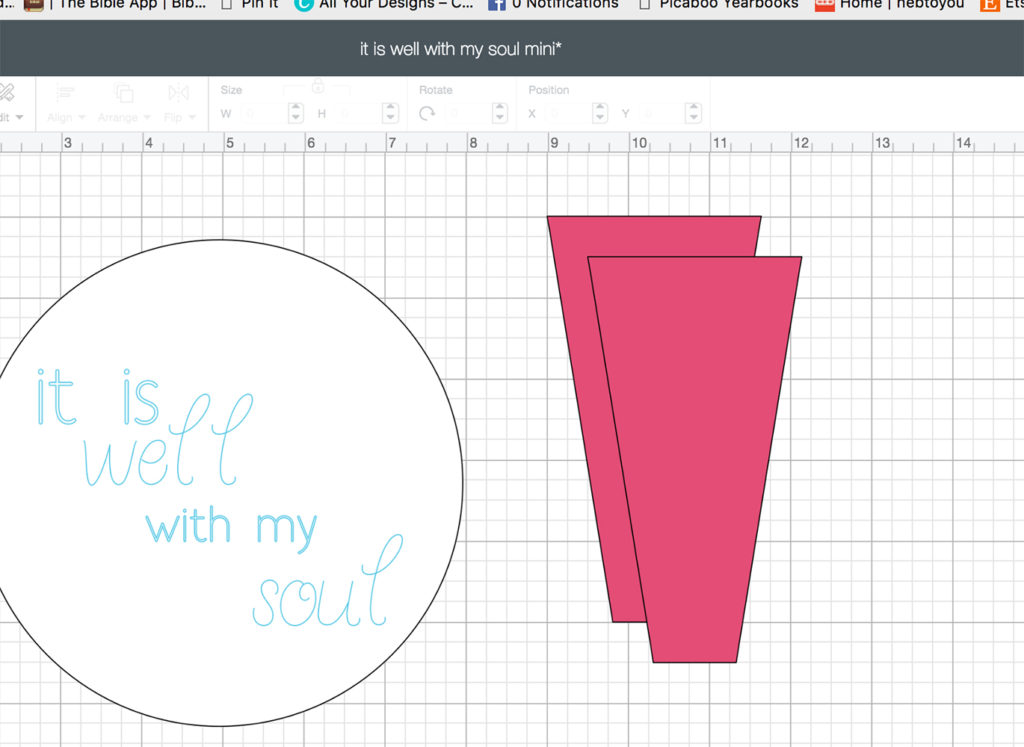
Here’s where I added all 20 blades:
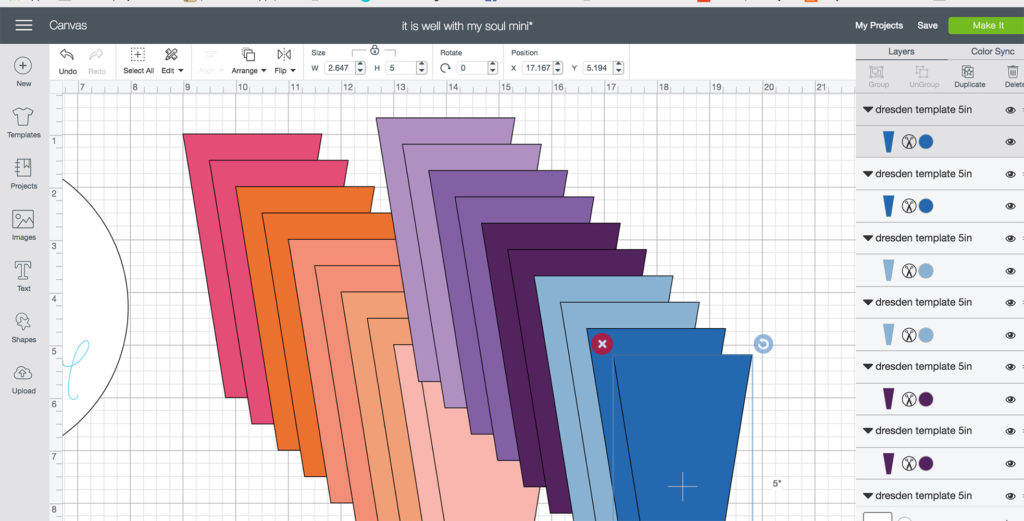 Each different color represents the different fabrics I’ll cut.
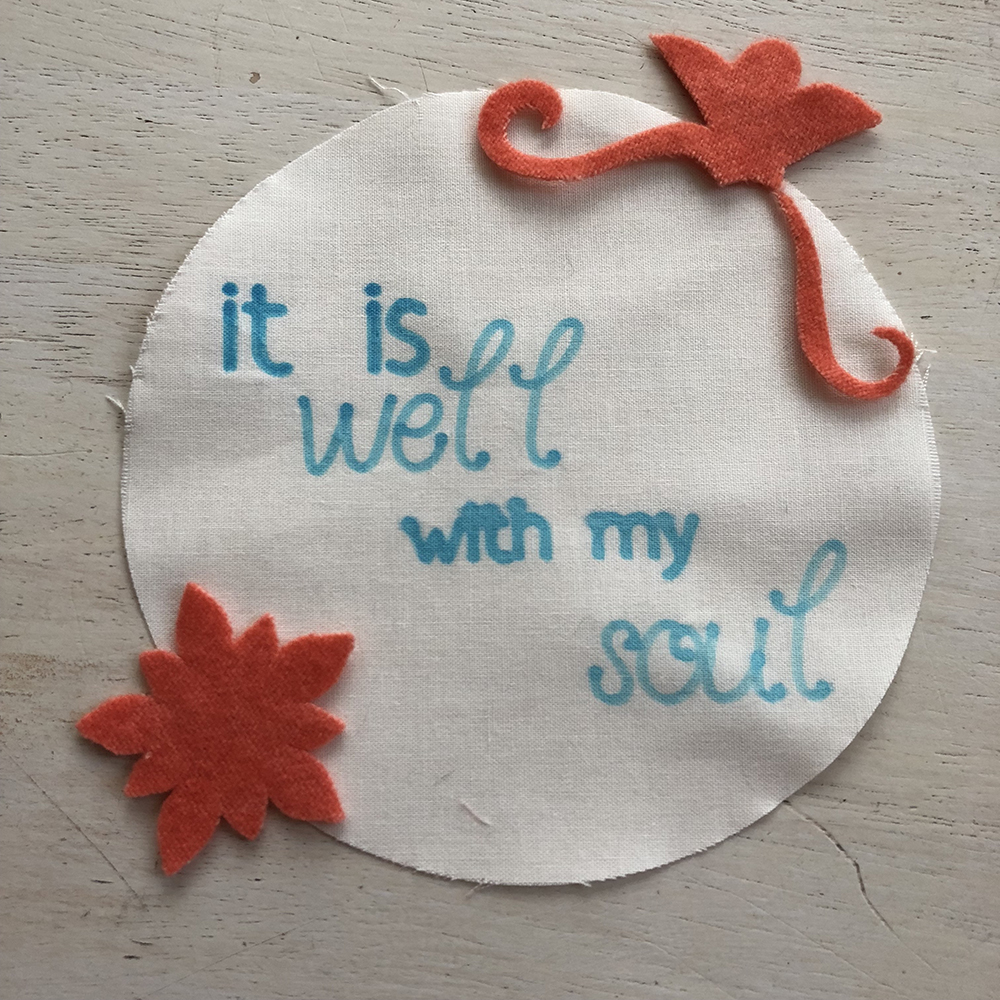
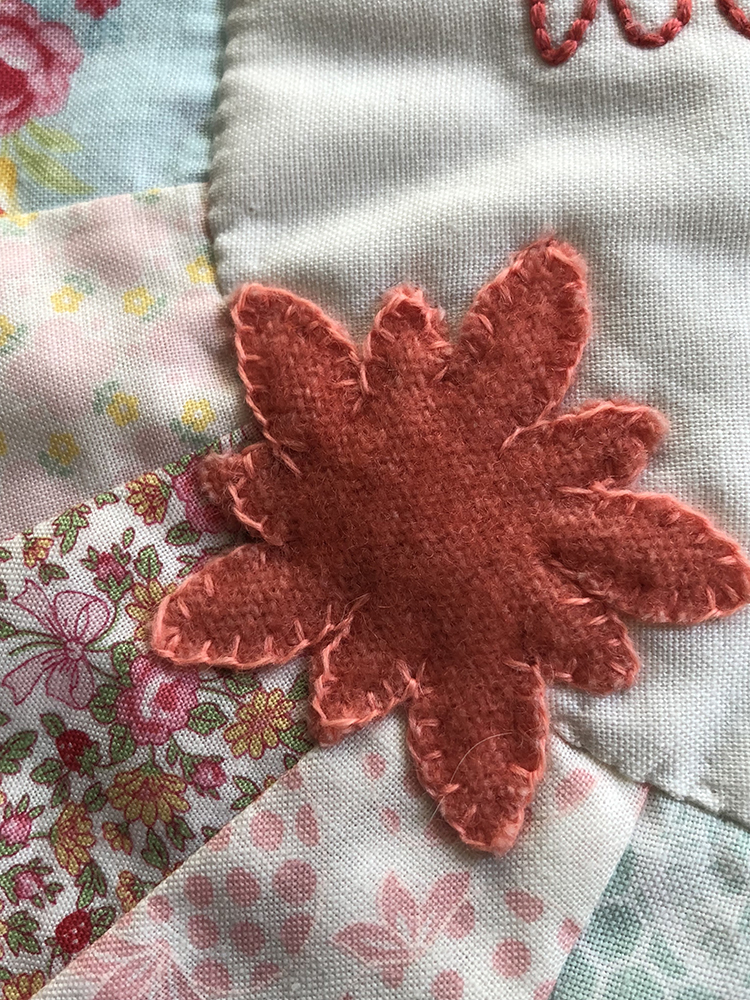
I also added two flowers to applique in wool onto my embroidery circle:
 They are available with a Cricut Access Membership. Worth it!!
Once your Design Space has everything you want to cut and write, click on the button that says “Make it.” Your computer will show you how many mats of fabrics you will need. (See pic below on the left!) Then Design Space will ask you what kind of material you are putting through first. For each mat, make sure your ‘Material set’ matches what material you are putting through.
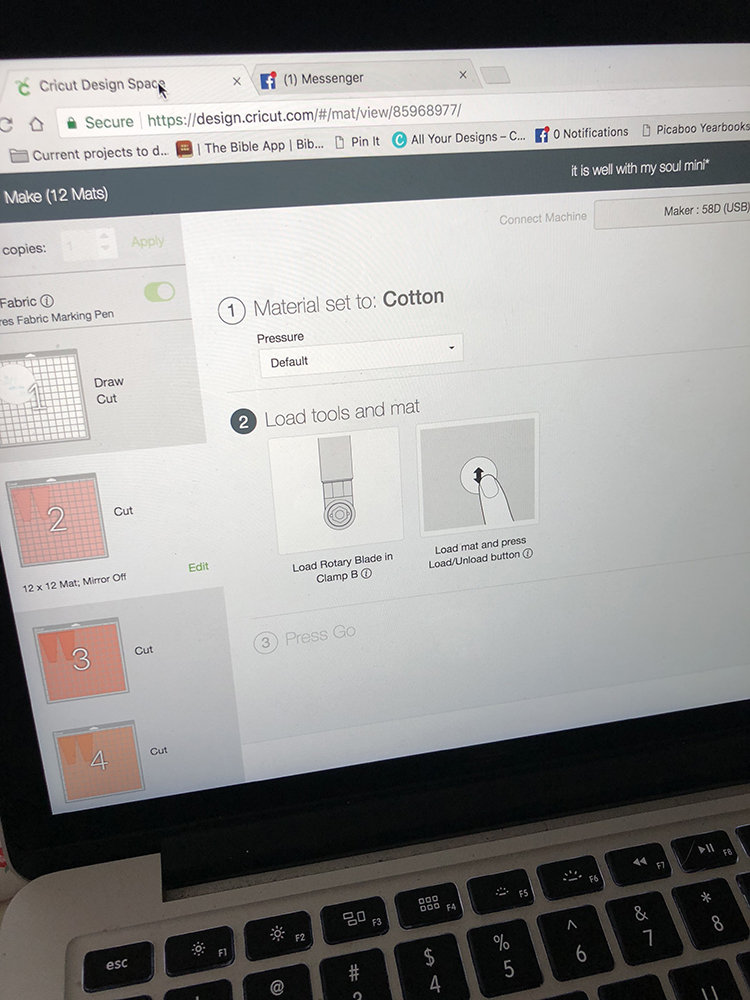
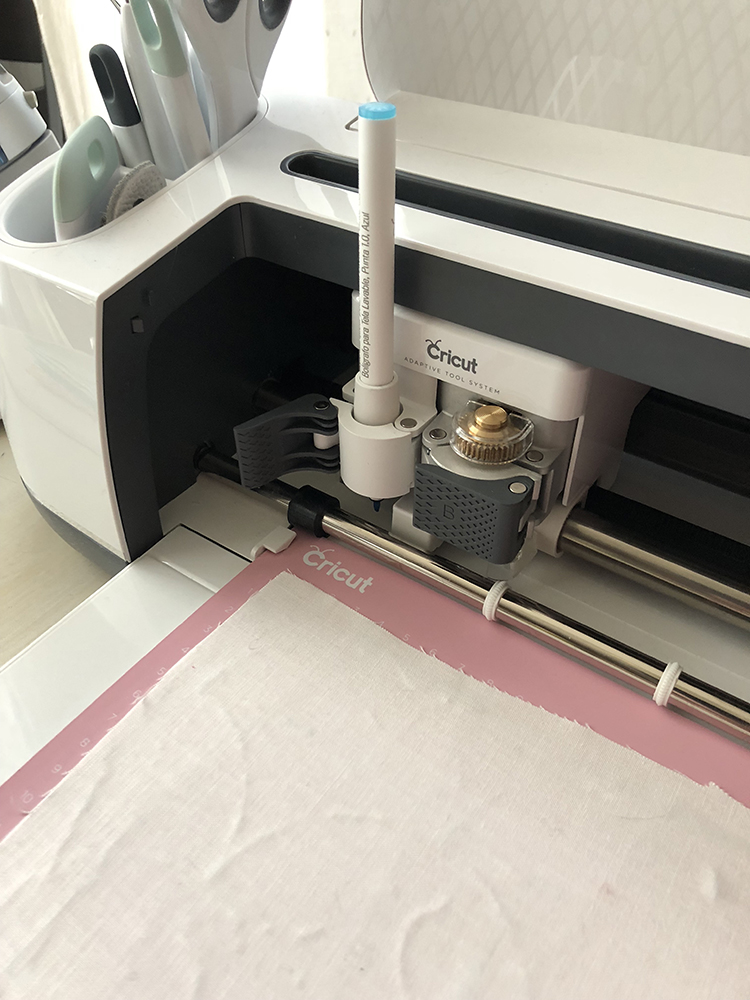
Also, make sure where it says “Load tools” you have all of the tools that are required. For example, for the first cut, you are also writing your embroidery text. Make sure you have your washable fabric pen in slot A. It clicks into the little baby tube. AMAZING!
When it is through cutting and writing, this is what you have! (above)
Don’t forget to change your material to Wool Felt (or Felt, wool) when you send that mat through.
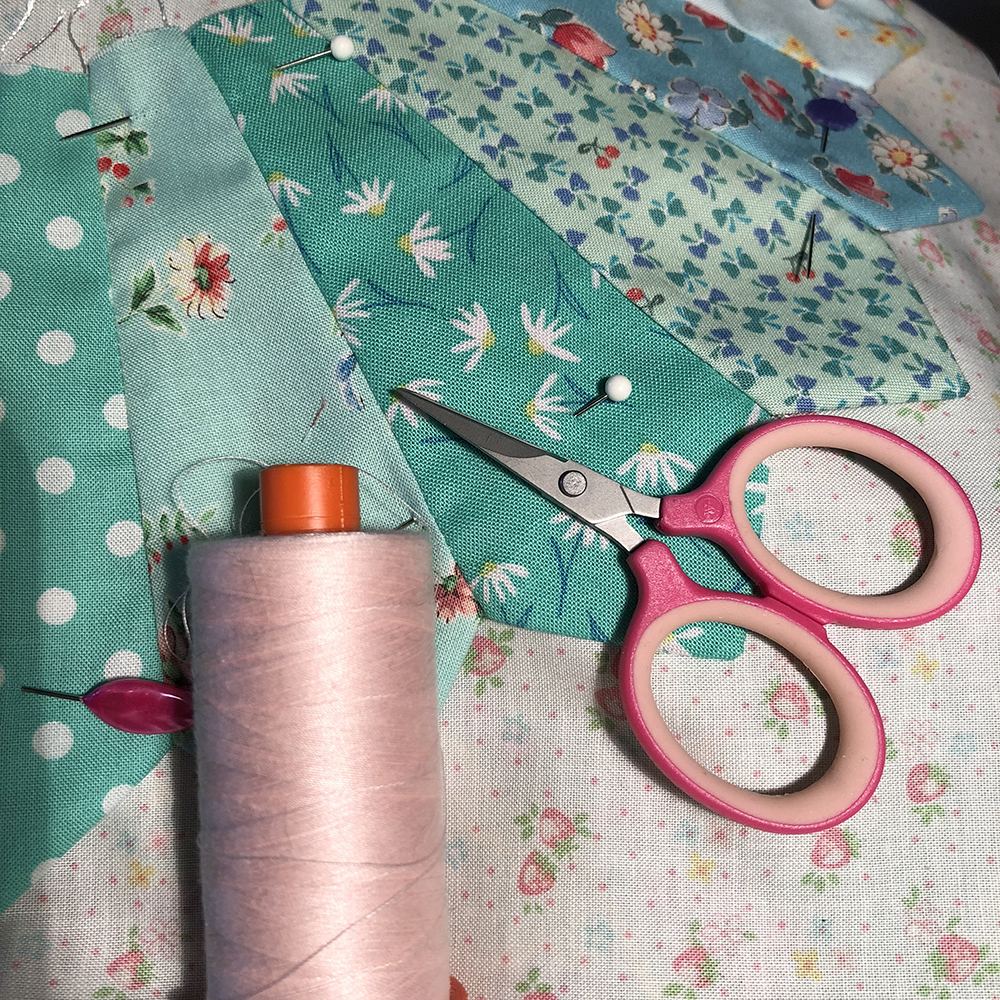
Arrange your fabric blades in the order you want them to be sewn. I made a pile before I sewed the points.
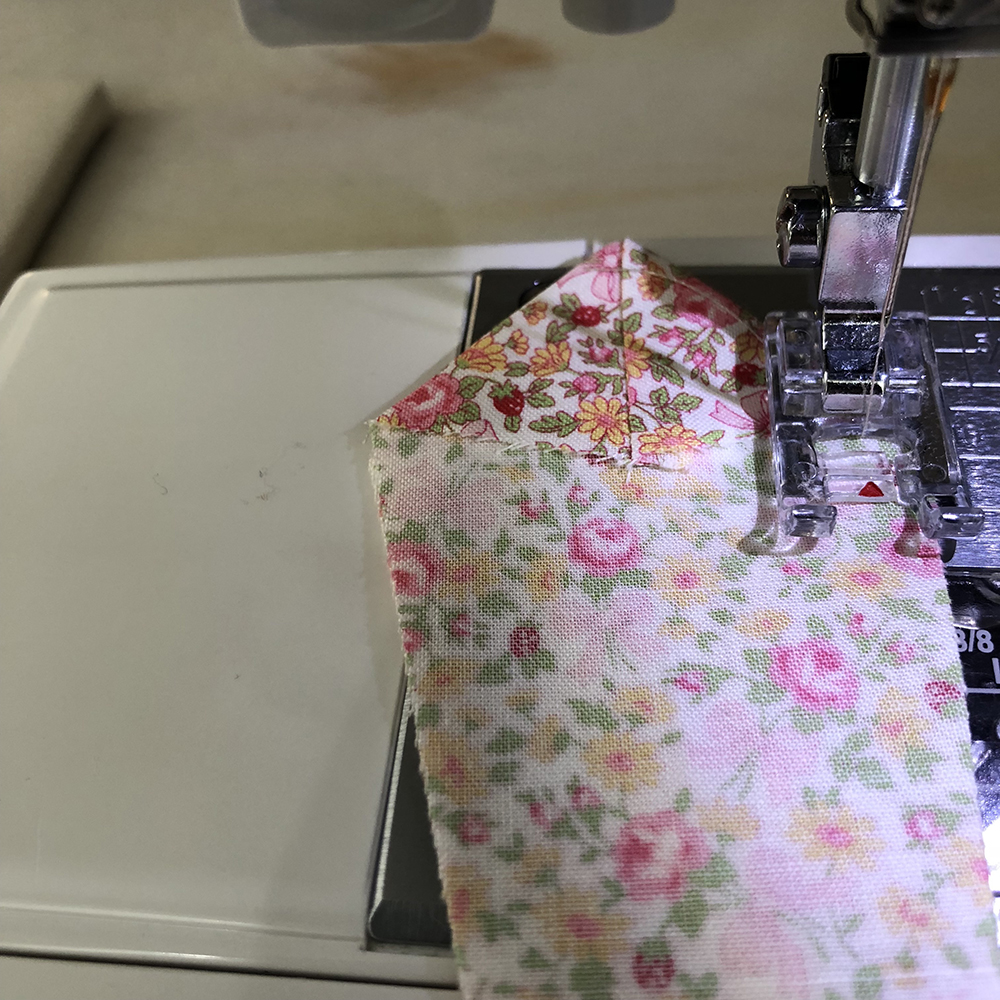
Sew the top of the blades on the wide end to form points. Always use a 1/4″ seam.
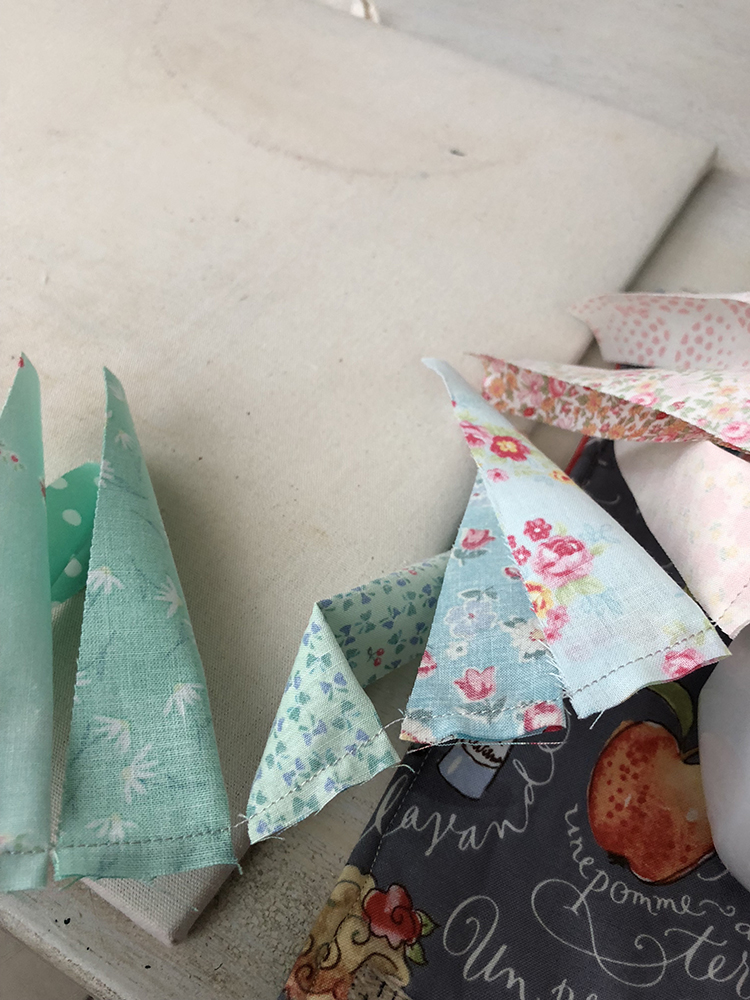
I chain pieced these little buddies!! It went fast!

Then I snipped the folded corner off close to the seam to make it lay better when turned right side out.
Here’s another fun tip when doing dresden blades I learned from Lee Monroe of May Chappell quilts: Use a piece of cardboard with a corner to iron your blades evenly.
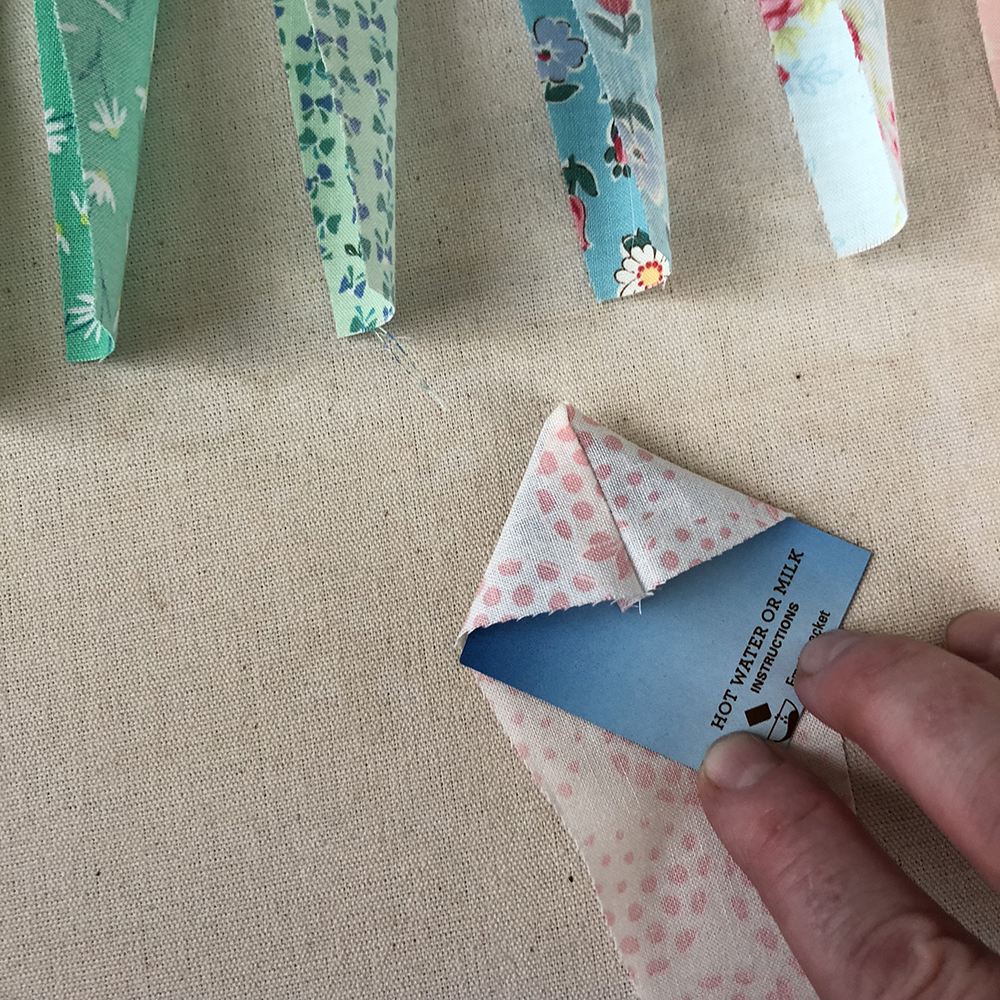
I made sure with each blade that it was centered as I ironed them flat.
Next, you will sew the blades together in the order you had initially set them out. Right sides together, remember. Another Lee Monroe tip: When sewing blades together, start about 1/4″ down from the top of the blades and make a few stitches. Using your reverse button, sew up to the top of the blades and then back down to finish the blades:
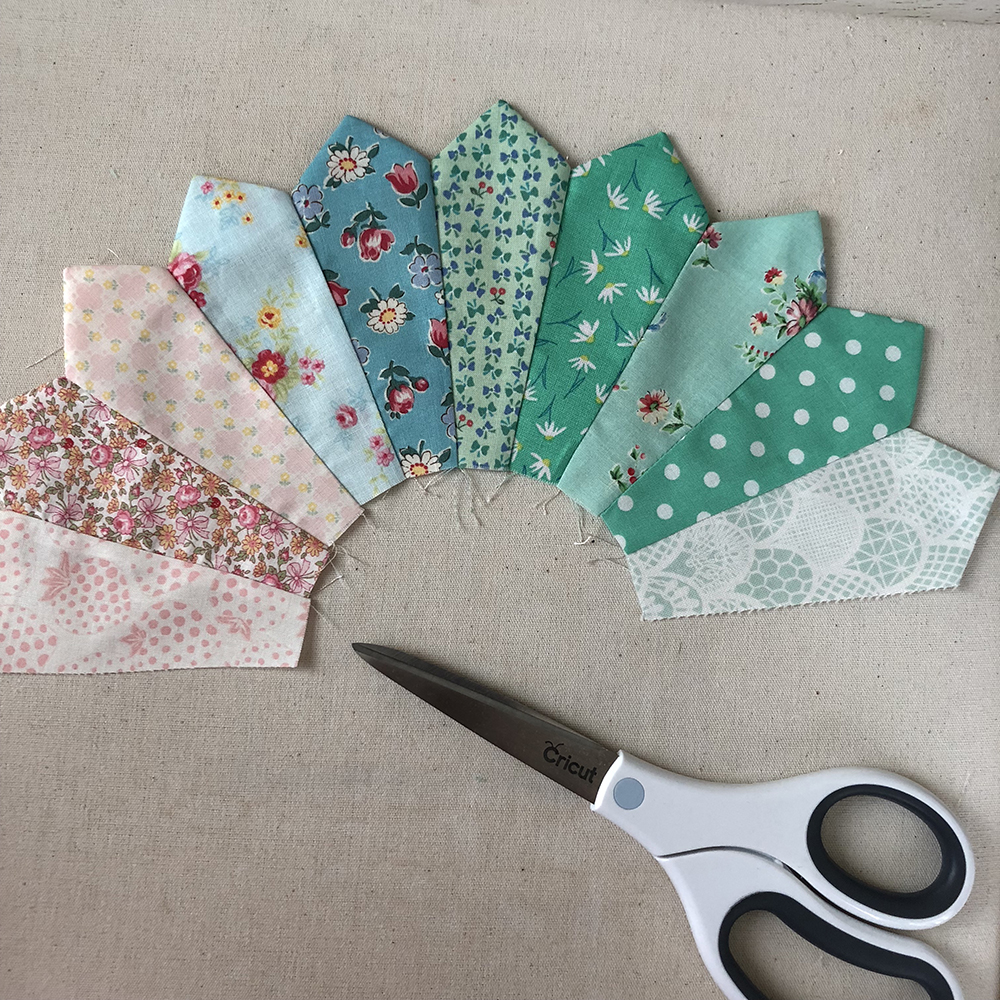
Sew 10 blades together, then sew the other 10 blades. Then sew the two halves together.
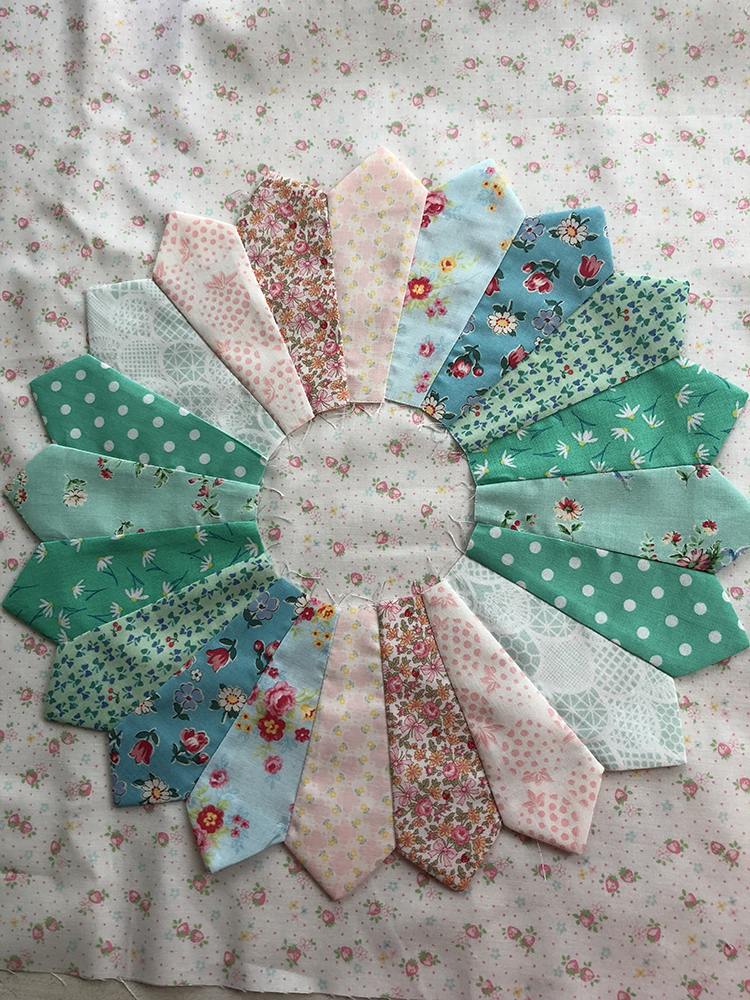
Cut your background 15″x15″ and place your dresden blades on there. Lookin’ good!!! You can fold your background fabric in quarters and use those folded lines to match your blade points and center the plate. (Did I mention that I LOVE dresdens?)
Time to embroider! Put a piece of batting behind your circle and get to work!
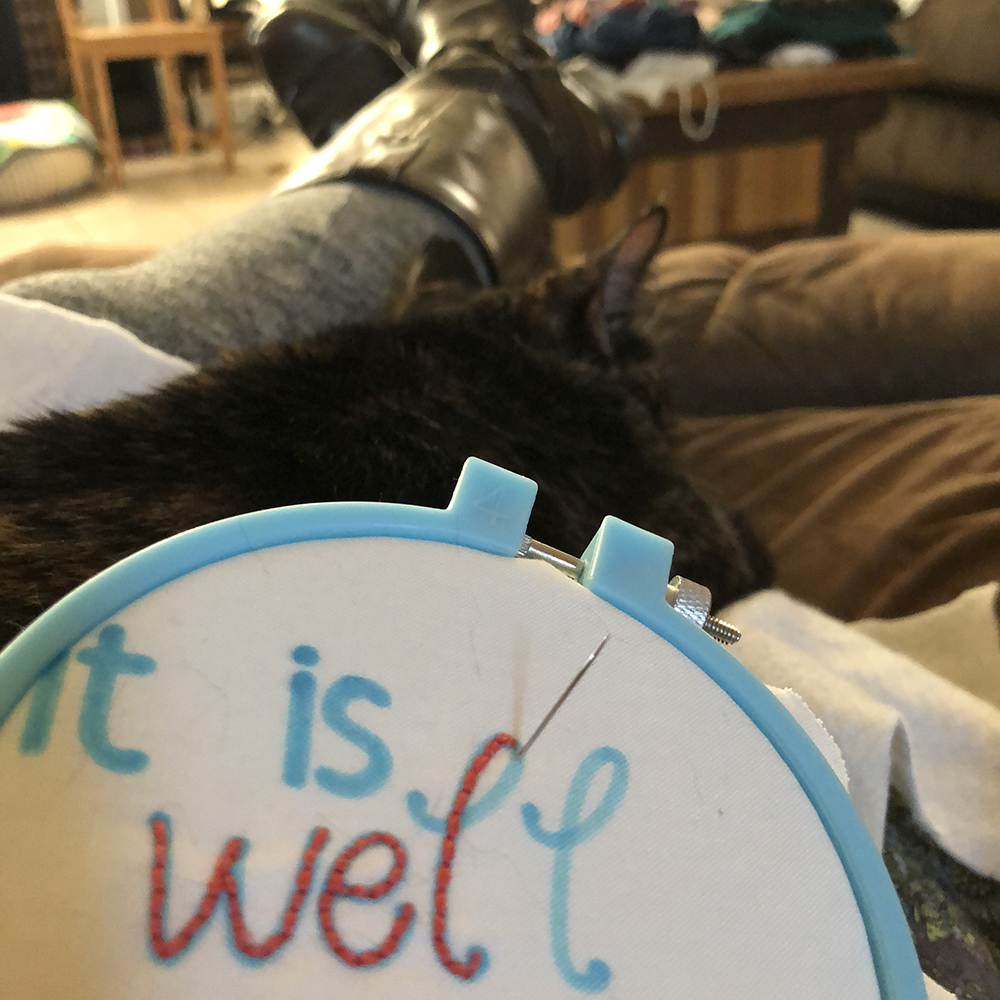
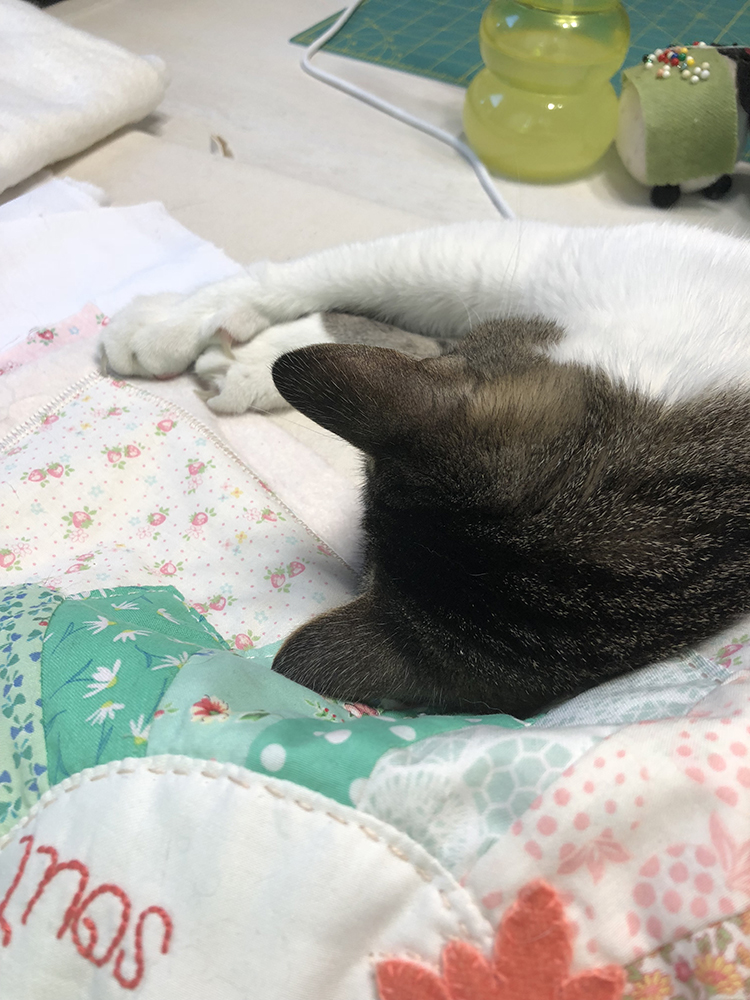
Grab your kitty and put on your favorite movie…the embroidery is one of the best parts of this project!
Next, we are going to hand applique our blades to our background fabric.
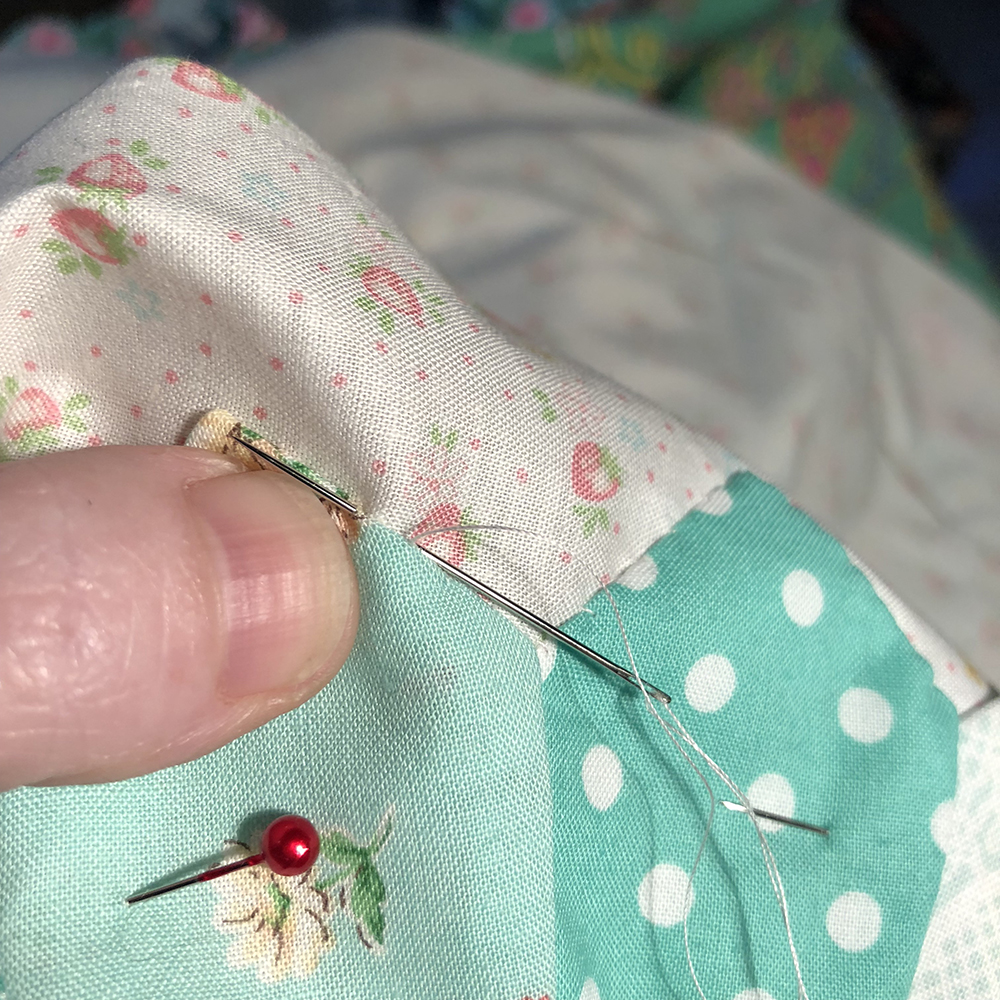
Using a slipstitch you can applique that puppy directly to the background without seeing the thread. Pretty cool! And if you like handwork, this is right up your alley!
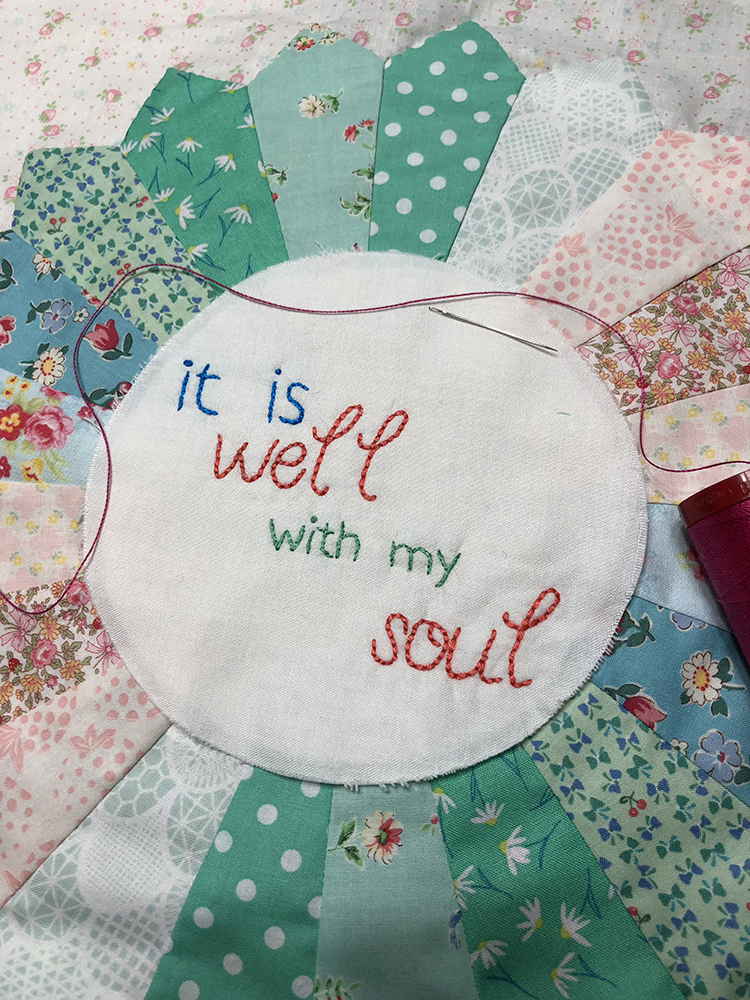
Now pin your center embroidery onto your blades. Using another color thread, baste the center onto the blades using a generous 1/4″ seam from the raw edge. Fold that raw edge under slipstitching the folded edge down – needle-turn applique.
It’s okay if you see those thread holes where the basting thread was. It’s the perfect place fot your quilting! Applique the felt flowers onto the quilt.
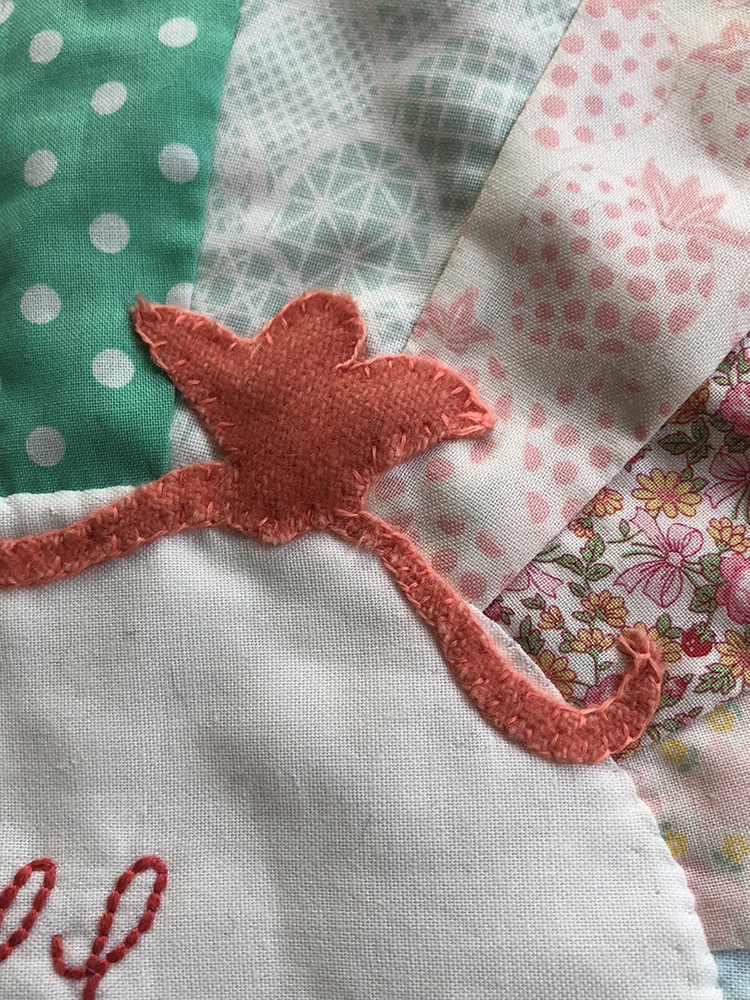
I used a blanket stitch and wool thread to applique them. So pretty!
Time to QUILT! yipee! I chose to handquilt this piece.

I only quilted around the blade points 1/4″ inside of the edges and a 1/4″ inside of the plate center. Then I used a zigzag stitch around the edges of the whole quilt to get ready for the binding! yipeeeee!!!

Add your binding. I used 2.5″ strips and did machine binding (ie…sew strips onto the back and fold over to the front and sew down).
I love this sweet little quilt. And I loved making it. And I loved designing it in Cricut Design Space.
Remember, if you don’t have a Cricut Maker, you can grab one HERE. You need one, don’tcha think???
Here is the PNG I promised you:
A FREE Dresden Blade pattern PNG
For my finishing touches, I added three antique buttons.
If you don’t want your mini to be as puffy, use denser quilting.
Kitties will love this quilt! I promise!! I had two kitties sit on it multiple times. Thank goodness for lint brushes, right??
If you have any questions at all about the Cricut Maker, do not hesitate to contact me! I love it, and I use it for everything!! Stay tuned for many more posts with gobs of Cricut Maker Magic!!
I’m linking up to Amanda Jean’s Finish It Fridays, too!
This is a sponsored conversation written by me on behalf of Cricut. The opinions and text are all mine.
Blessings,


wow, wow, wow!!
so impressed…might even have to try it!!
hugs!
I hope you do! It’s soooo fun and easy! Hugs and love!!!
This is beautiful! I love the song “It is well with my soul”
Thank you so much!!! It’s one of my very faves, too!!
Blessings!!!