This is a sponsored post written by me on behalf of Cricut. All opinions are 100% mine.
Introducing the new Cricut Joy, Cricut’s new little petite cutie die cutting machine!! You are so going to love all of the perks of Cricut Joy! Read on!!

I’m super excited to show you four fun wedding projects I created with my Cricut Joy in just minutes!!! But first, a little back story…

We were so looking forward to a huge wedding celebration in May. My son and his fiancée have been planning for over a year for their big day on May 24th. But alas, Covid-19 had other plans. A few weeks ago, the wedding venue told us they couldn’t have the ceremony of their dreams. A very common story in this day. While I was planning for Cricut Joy projects, I had come up with a bunch of quick wedding ideas for the Bride to give to her bridesmaids and use for decor for the bachelorette party, etc. None of them made any sense with the way weddings are playing out during this Stay-At-Home-Order Era. Then my oldest daughter, an event planner and maker gave me the awesome idea of a HOME PARTY PACK.
What is a HOME PARTY PACK? In this instance, I’ve created a little pack of fun celebratory items that brides can make using their Cricut Joy for their bridesmaids to celebrate with the bride and groom on the day of their wedding while staying at home! The Cricut Joy makes the making part fun, quick, and adorable!!
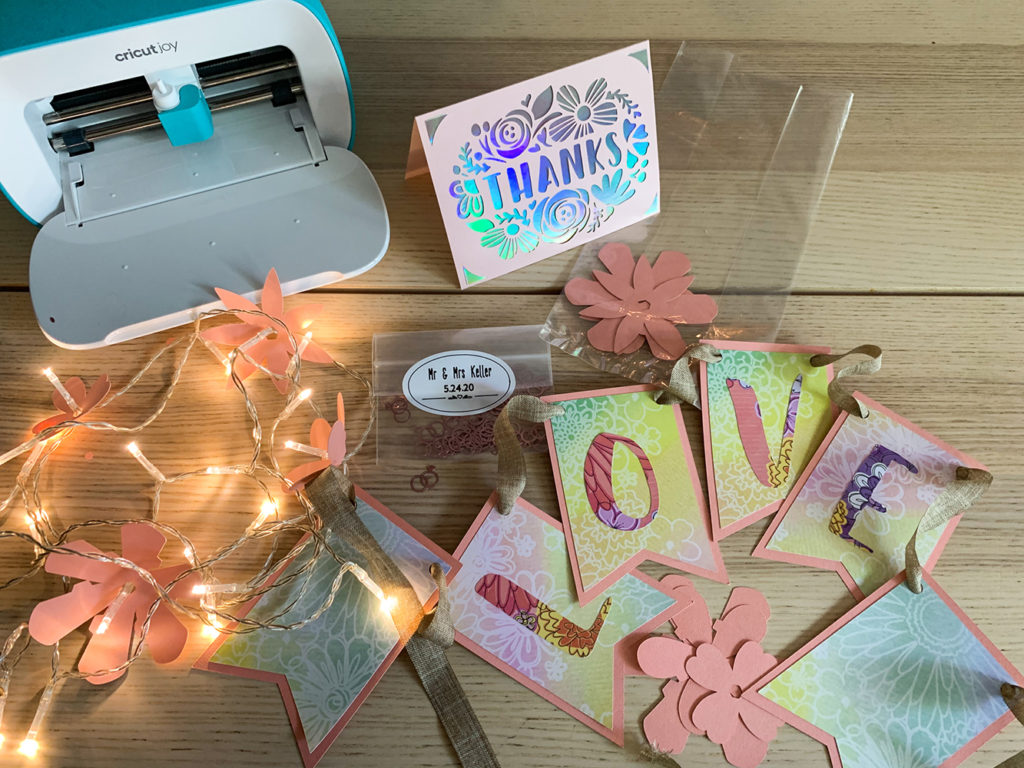
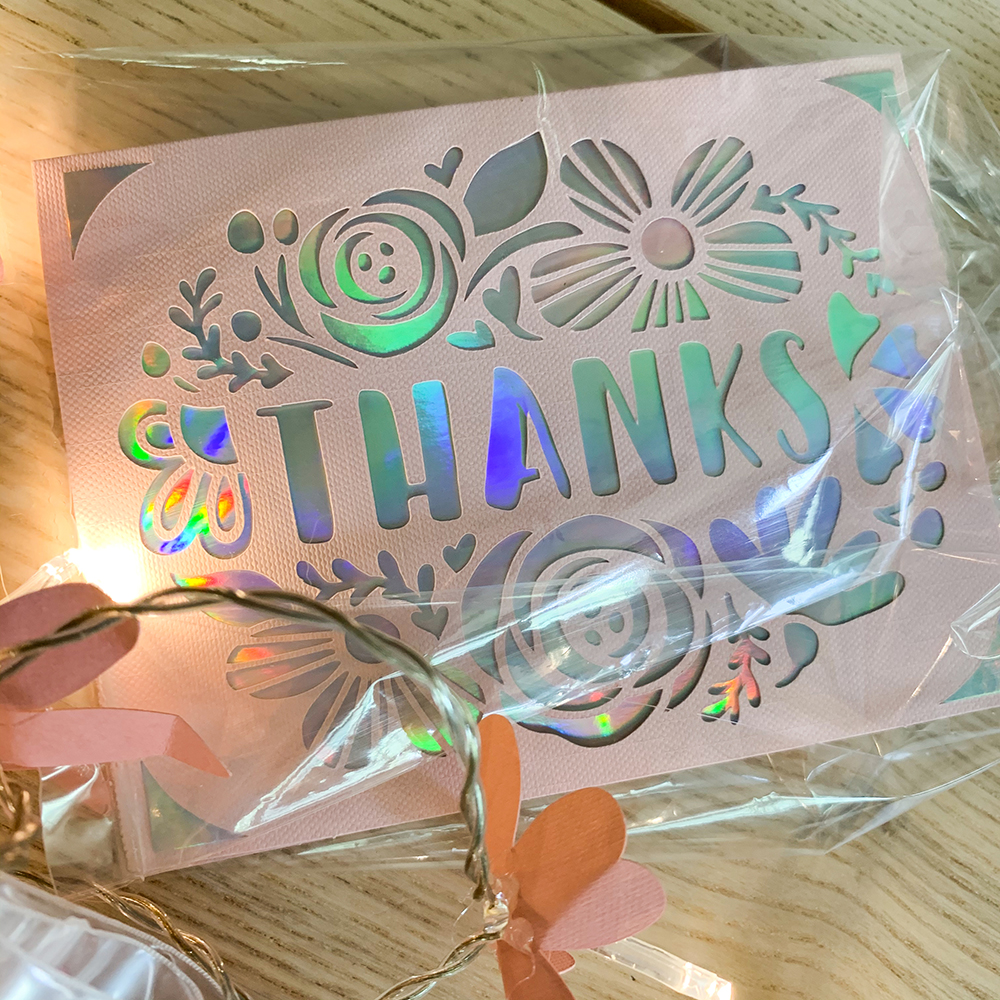
PROJECT number ONE: Thank You Card
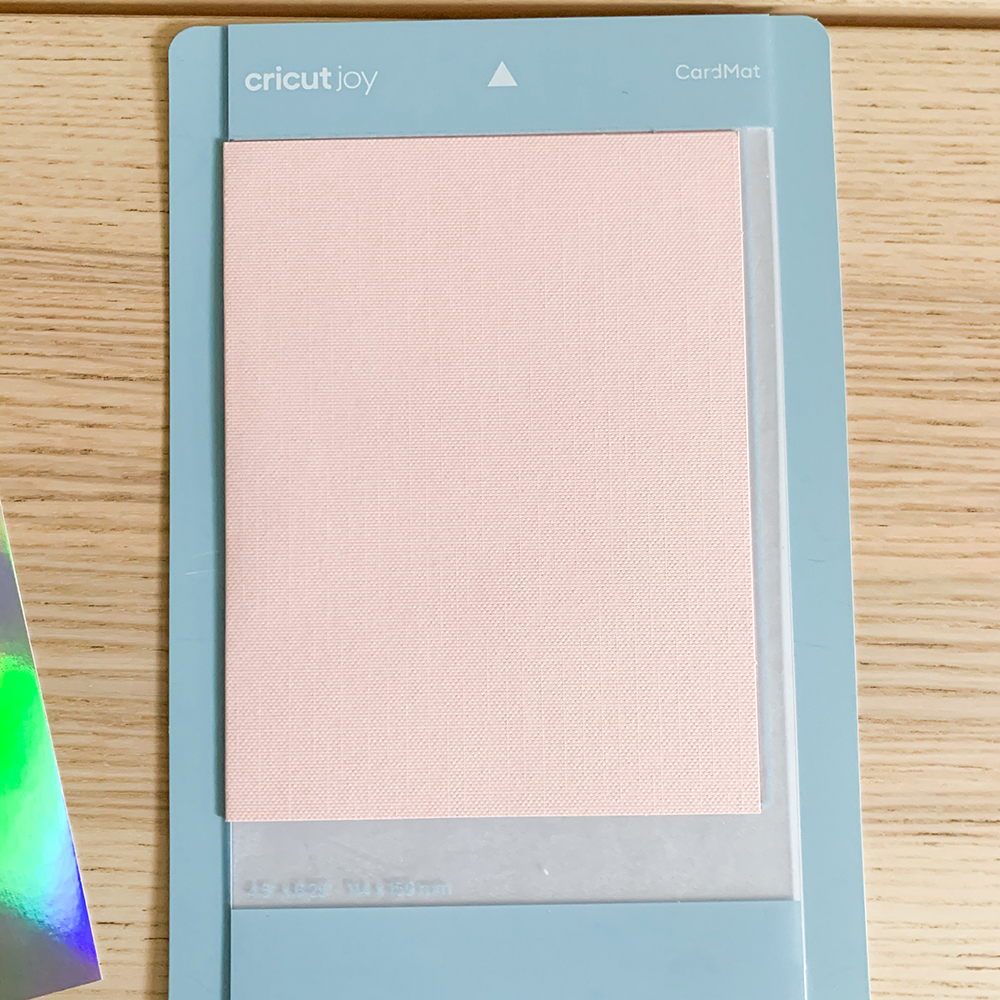
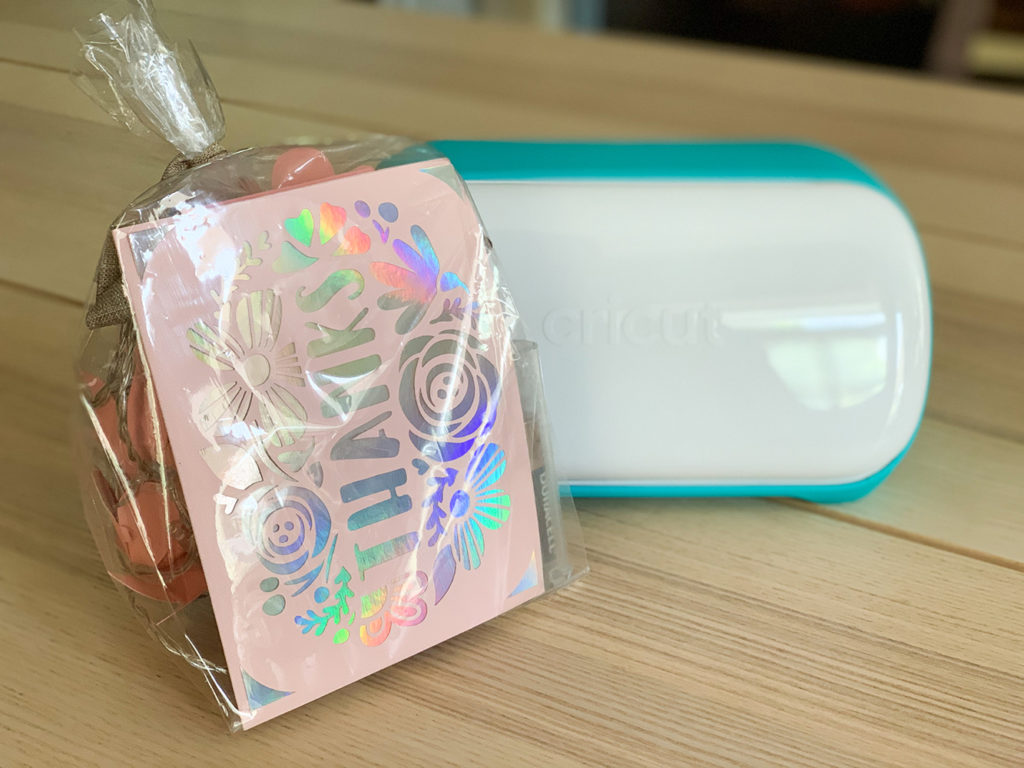
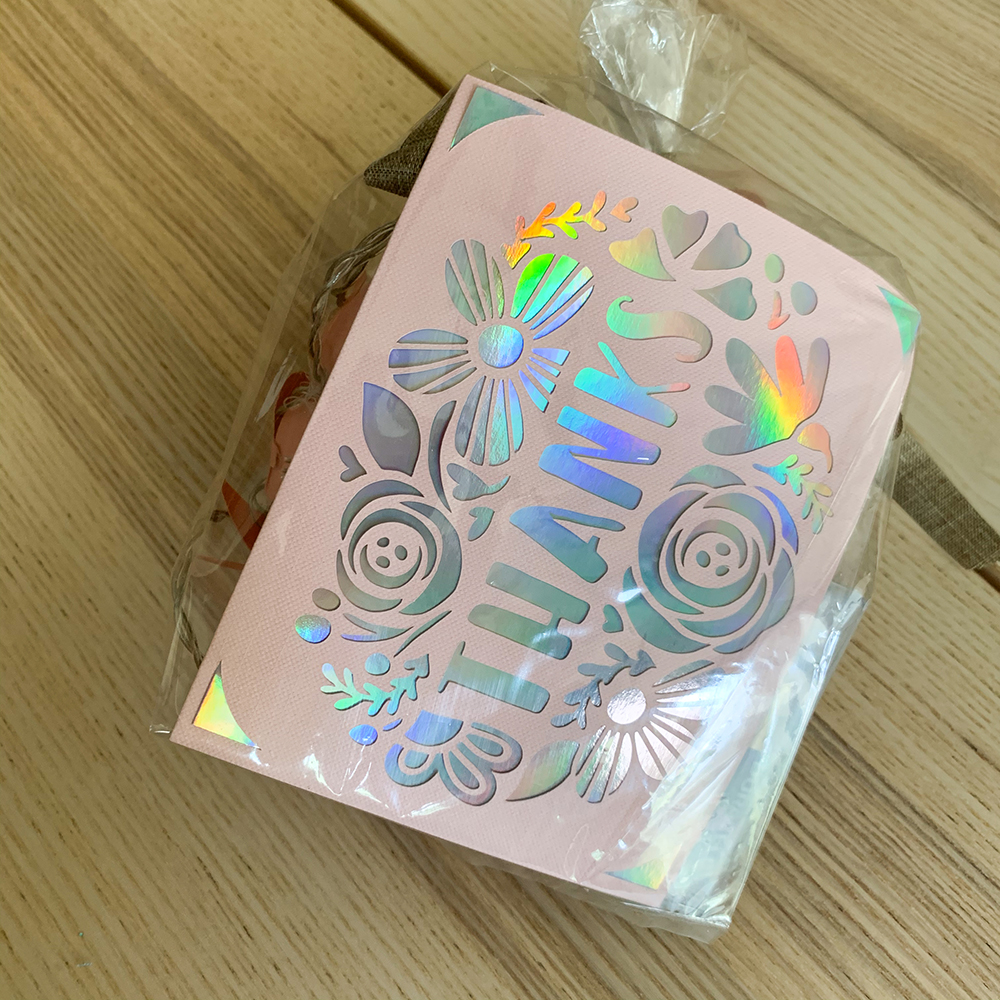
Our first project shows how amazingly fast and gorgeous the Cricut Joy can make cards!! Cricut has these pre-cut cardstock and inserts made specifically for the Joy called Insert Cards.
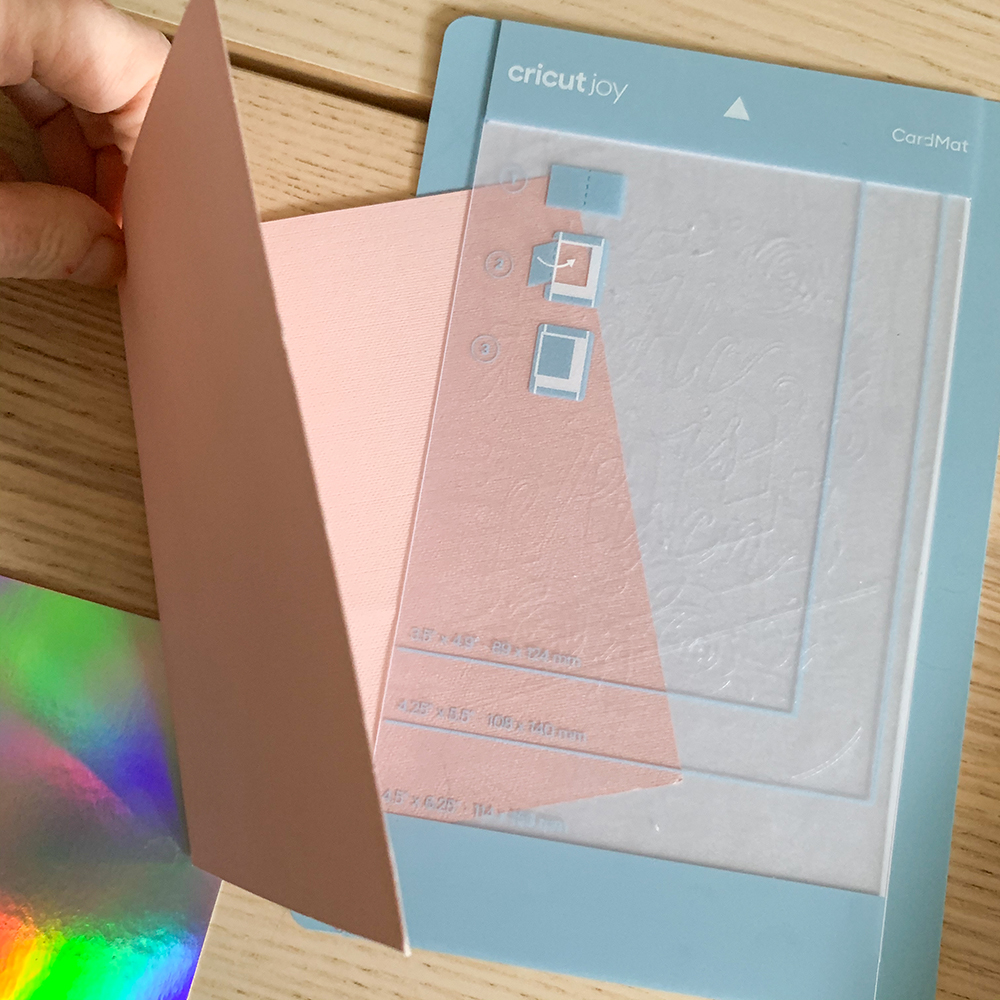
One of the wonderful advantages of the Cricut Joy is the fast card-making capability. Using the Card Mat, you can create a beautiful card in minutes. First, place the card with the plastic insert section of the mat in between your front and back of the card, nestling the card fold up to the edge of the plastic mat.
Select the card you’d like to make in Cricut Design Space and click Make.
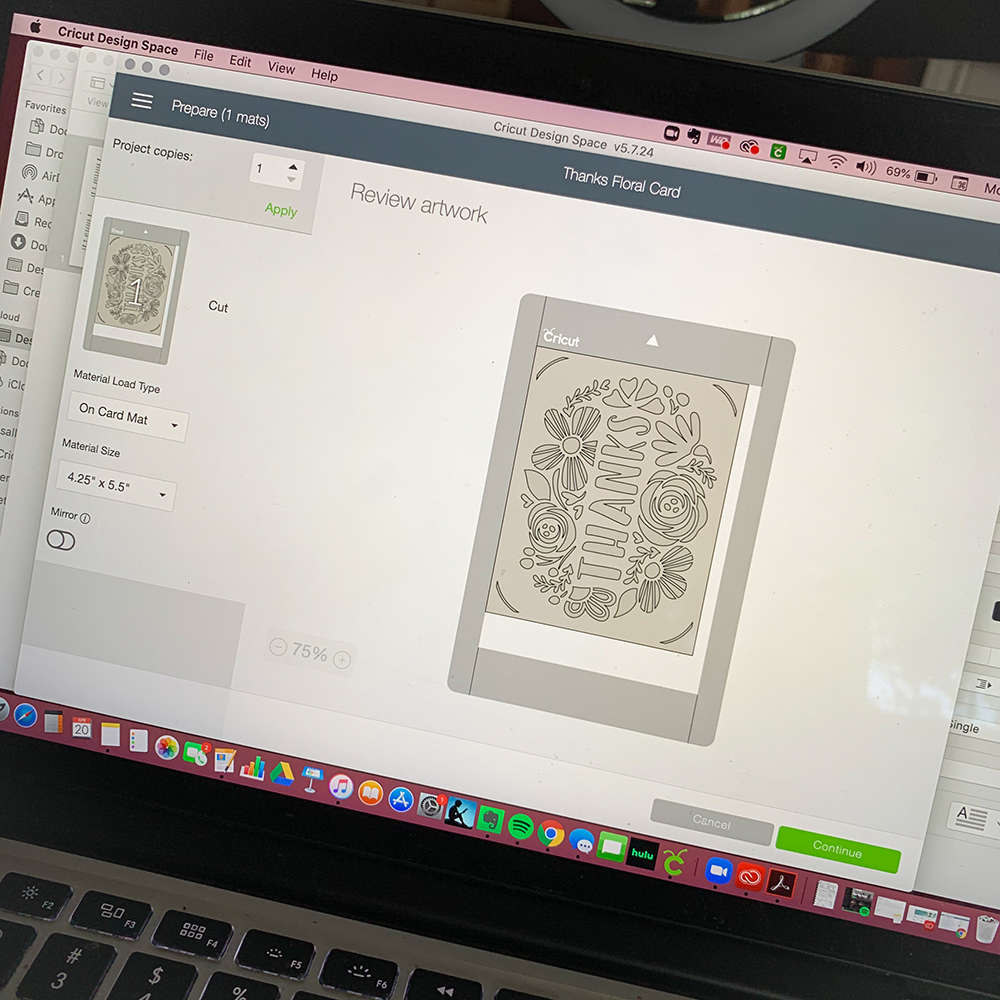
After you review the artwork and check to make sure your card is placed correctly on the mat, your Design Space will connect with the Cricut Joy via bluetooth.
Next, you choose your materials. We’re using Insert Cards (the first square on the top left – below).

Next, you will be prompted to insert the CardMat into the Cricut Joy.
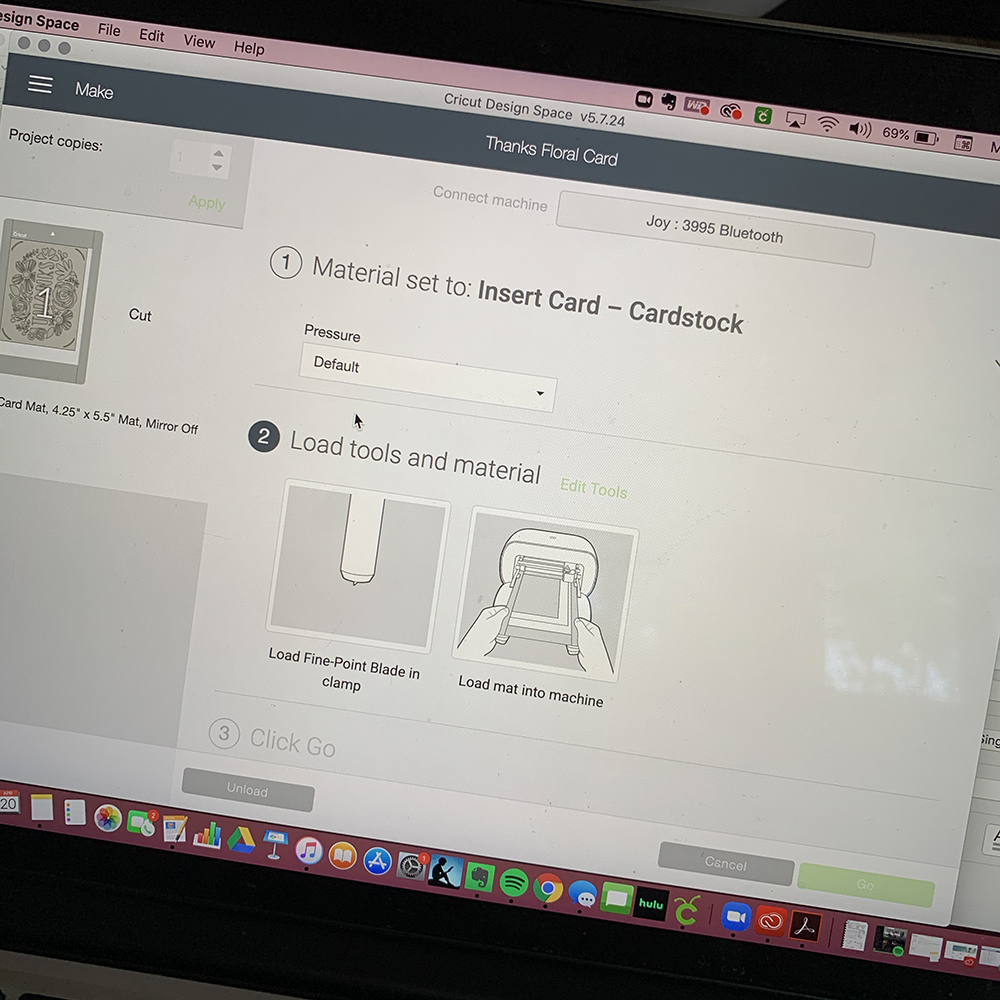
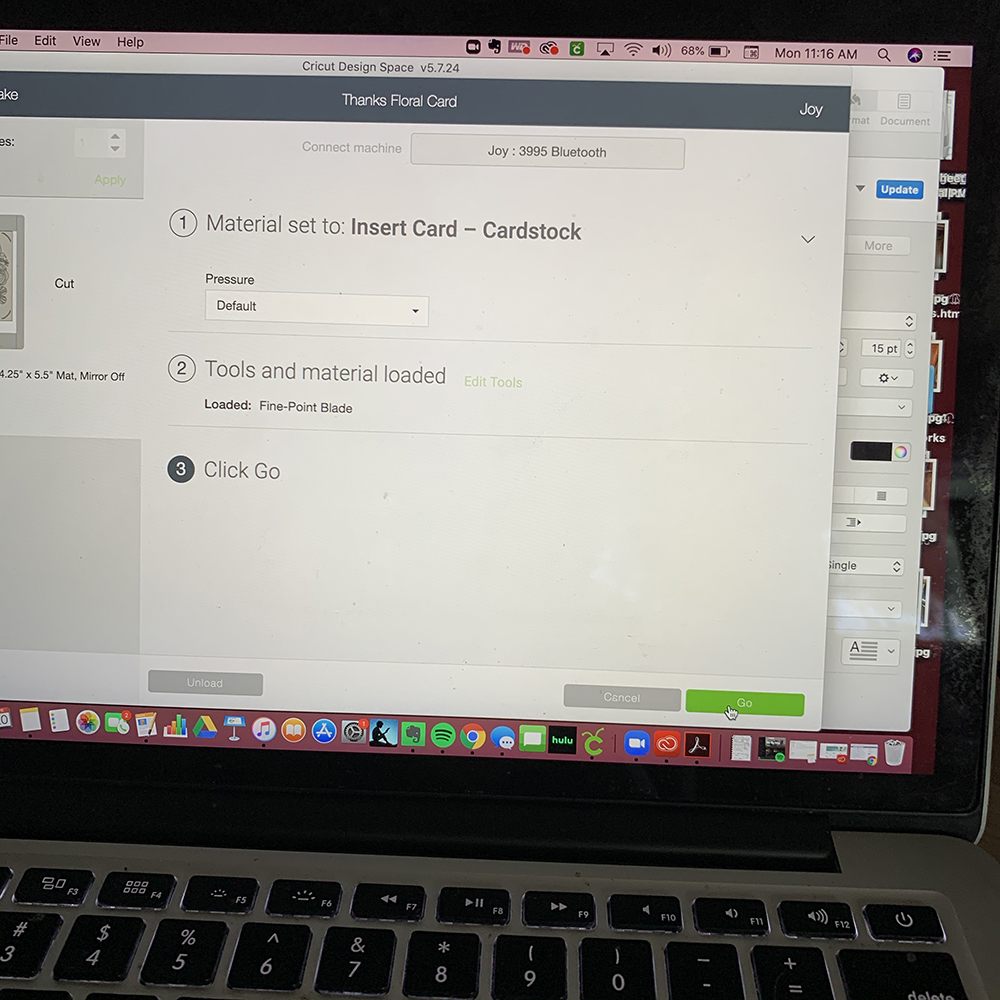
After inserting, click GO. Your card will be cut out beautifully.

After the front of the card is cut out, you “insert” the holographic insert into your card front. Voilá!!!
We always start our Home Party Packs with a card!!
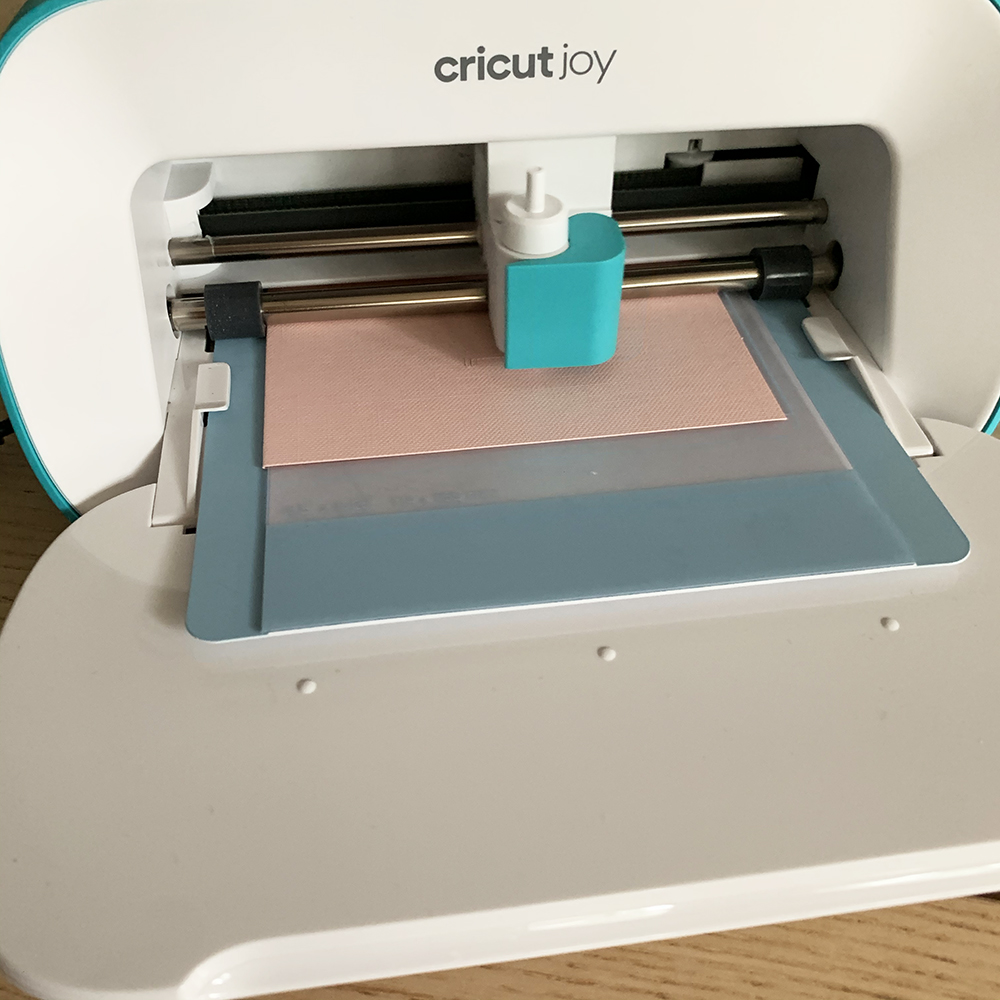
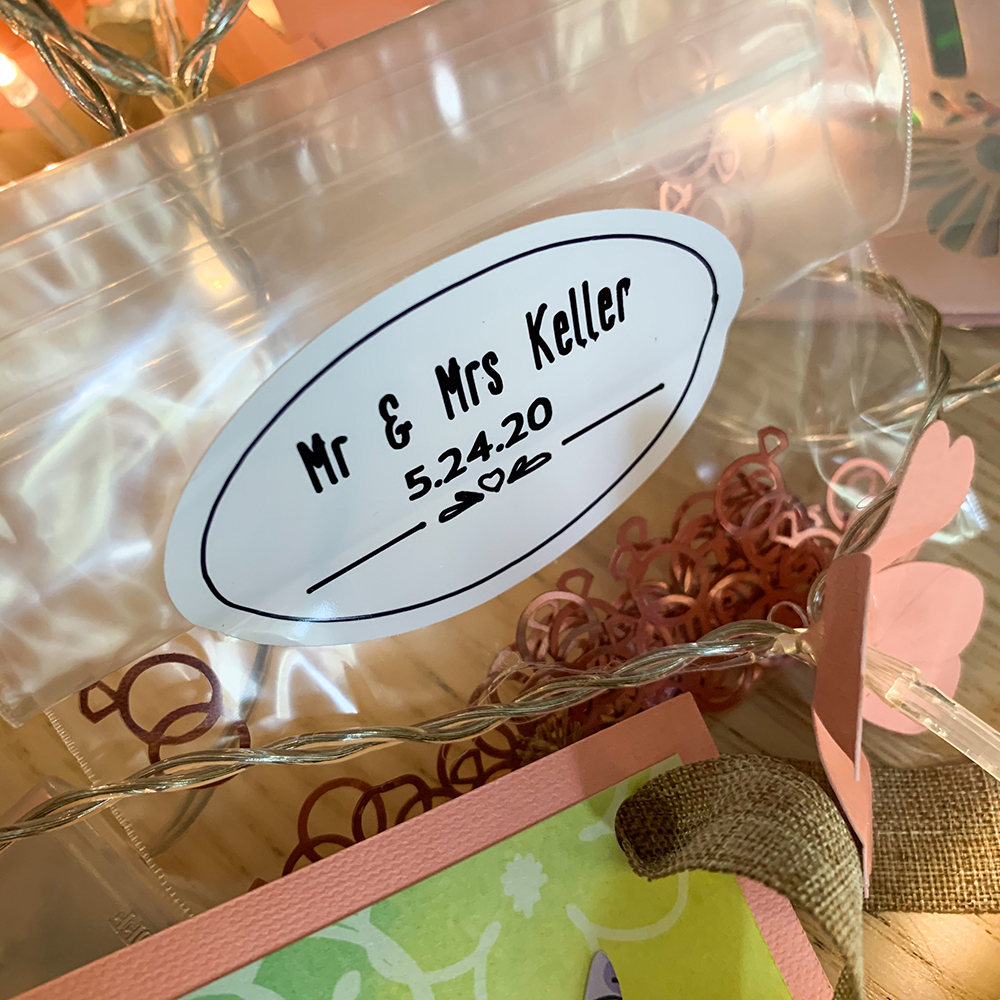
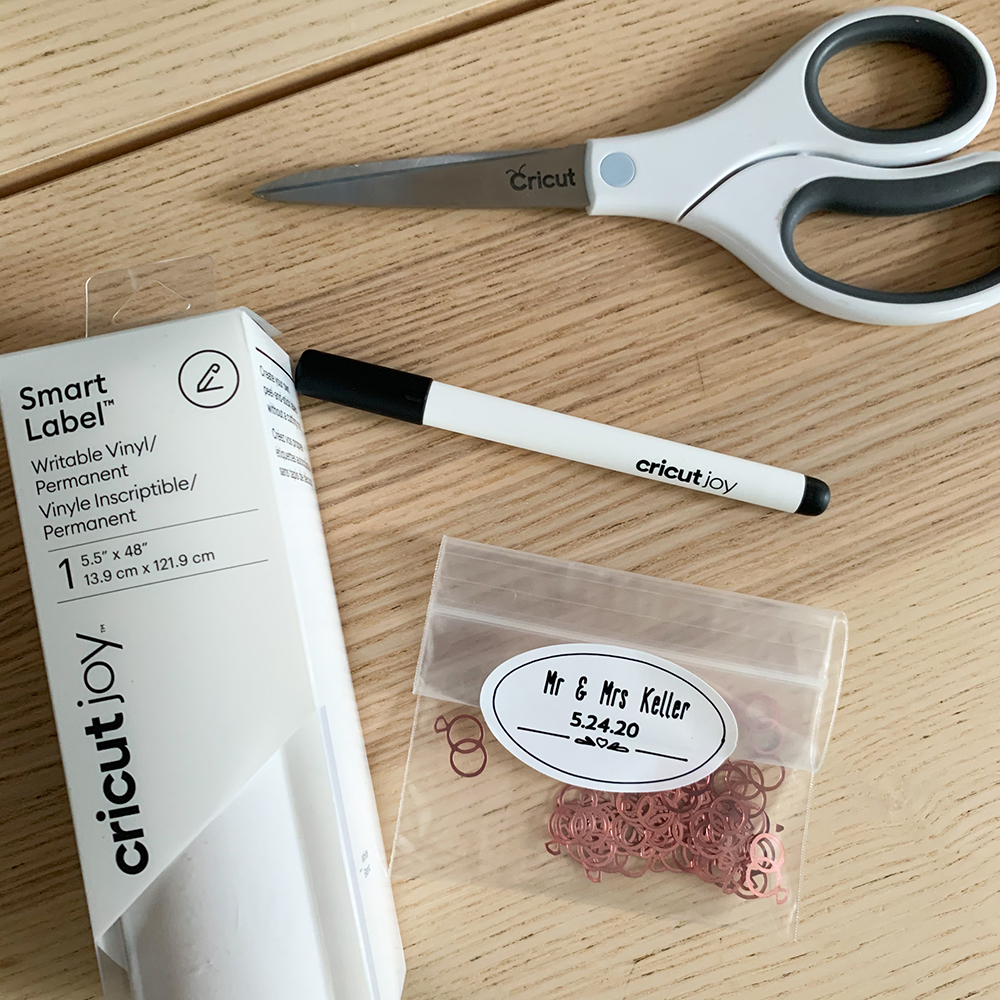
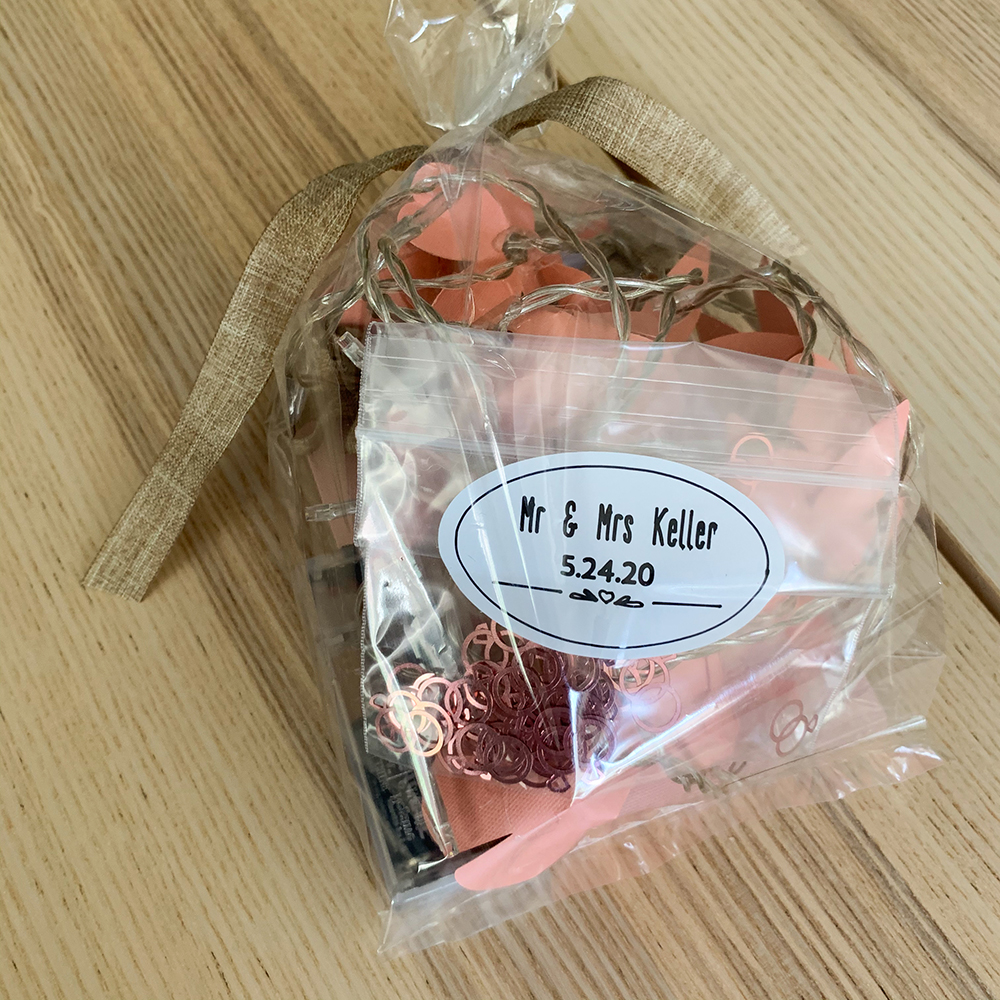
PROJECT number TWO: wedding confetti with personalized labels
To create this little bag of wedding confetti, we first want to make the labels. Go here to Cricut Design Space.
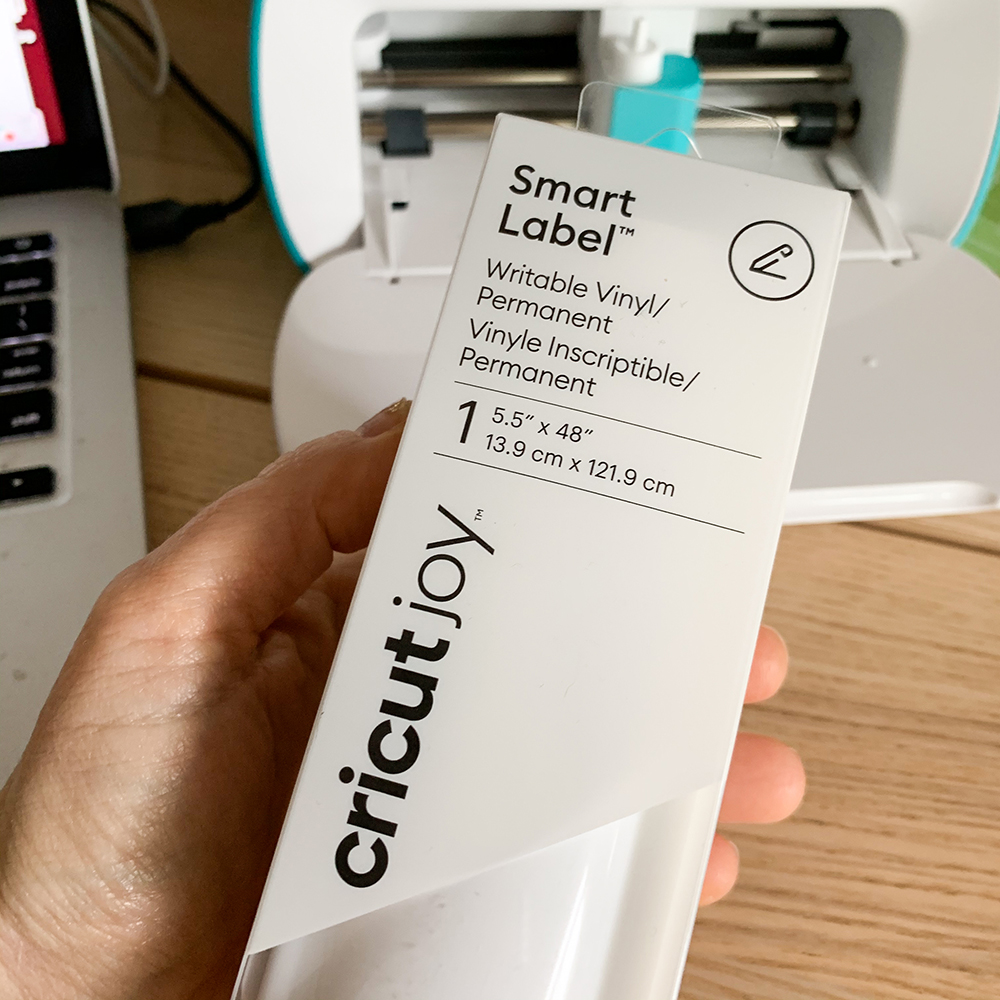
Another great advantage to using the Cricut Joy is the fact that there are materials that do not need mats. They are called Smart materials. For the label, I used the Smart Label – Writable Vinyl.
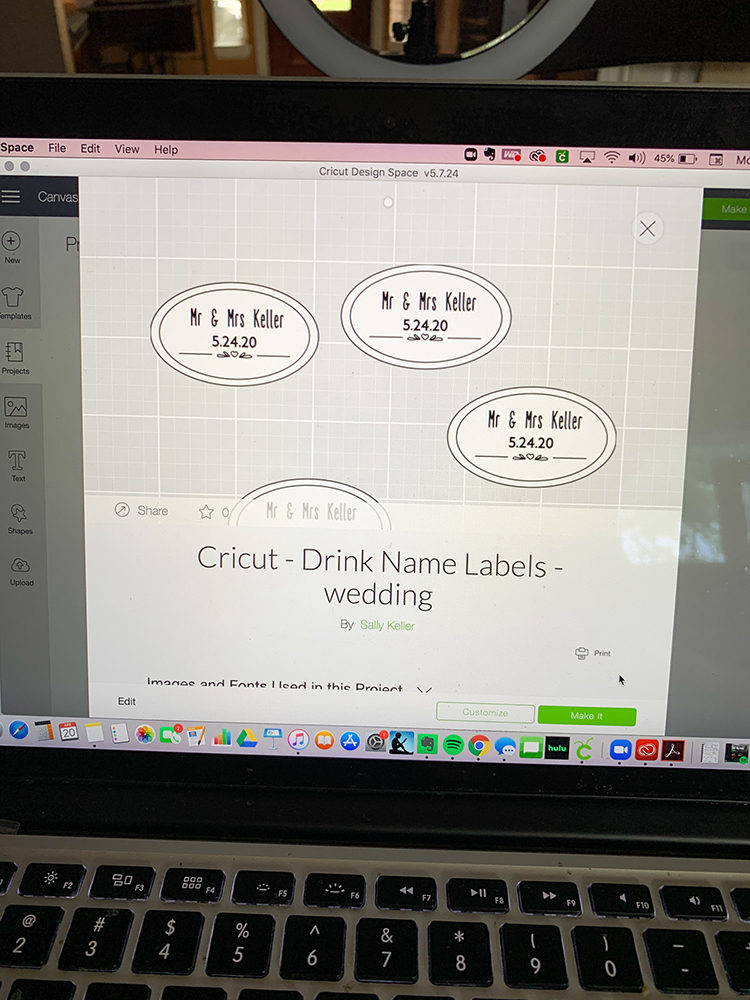
I customized the Drink Labels to add the sweet couple’s names and date!
- Click “Customize”.
- Add the text onto the labels.
- Make sure the Linetype chosen is “Draw”.
- Click both the label and the text, then choose ‘Attach’.
- Click “Make”.
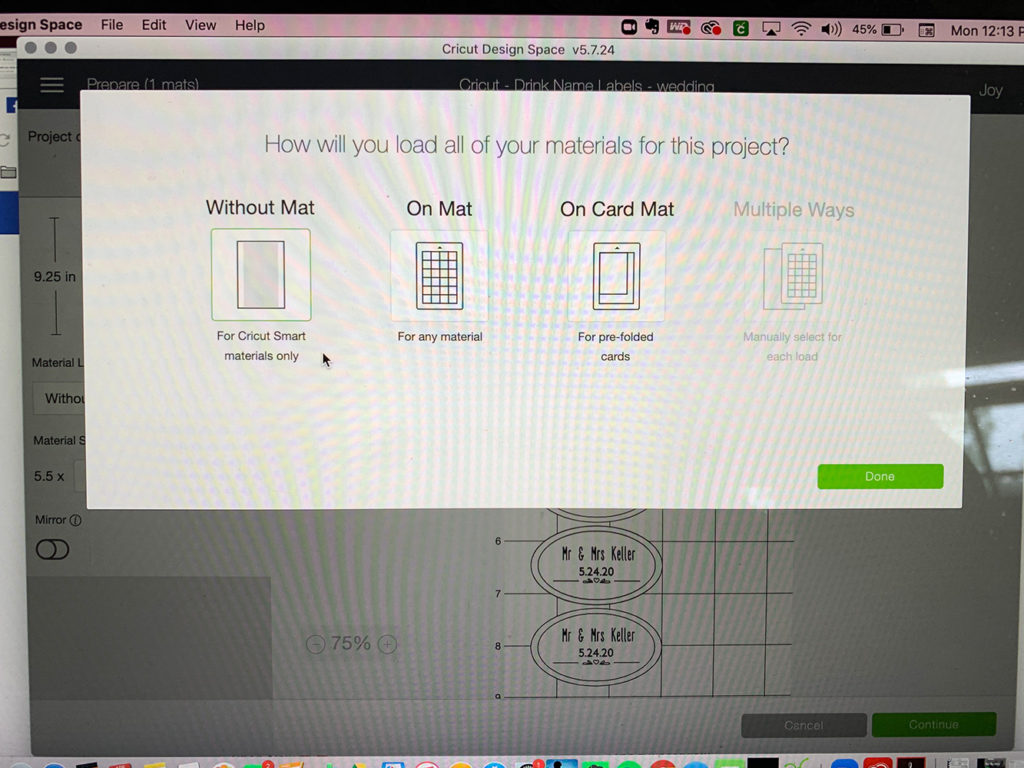
Click “Without Mat” since you will be using a Smart material! (Such a neat new feature of the Joy!!)

I cut my smart material down to 9.5″ and loaded it up. Along with the length of the material, Cricut Design Space tells you when to switch the tool to the pen to write, too.
Next, we want to make the confetti. If you have a Cricut Access pass, you can access the images section in Cricut Design Space and search for wedding rings. There is a set called Granted that has the rings I used in my confetti. Just add that image to your Design Space and size it to 3/4″. When you get them the size you want, hit “Duplicate” and create as many rings as you can fit on your 4.5″ x 12″ mat (or 2 or 3!!).
You can also use materials in your stash (like I used this party foil) that you had been using with your Maker or Explore.
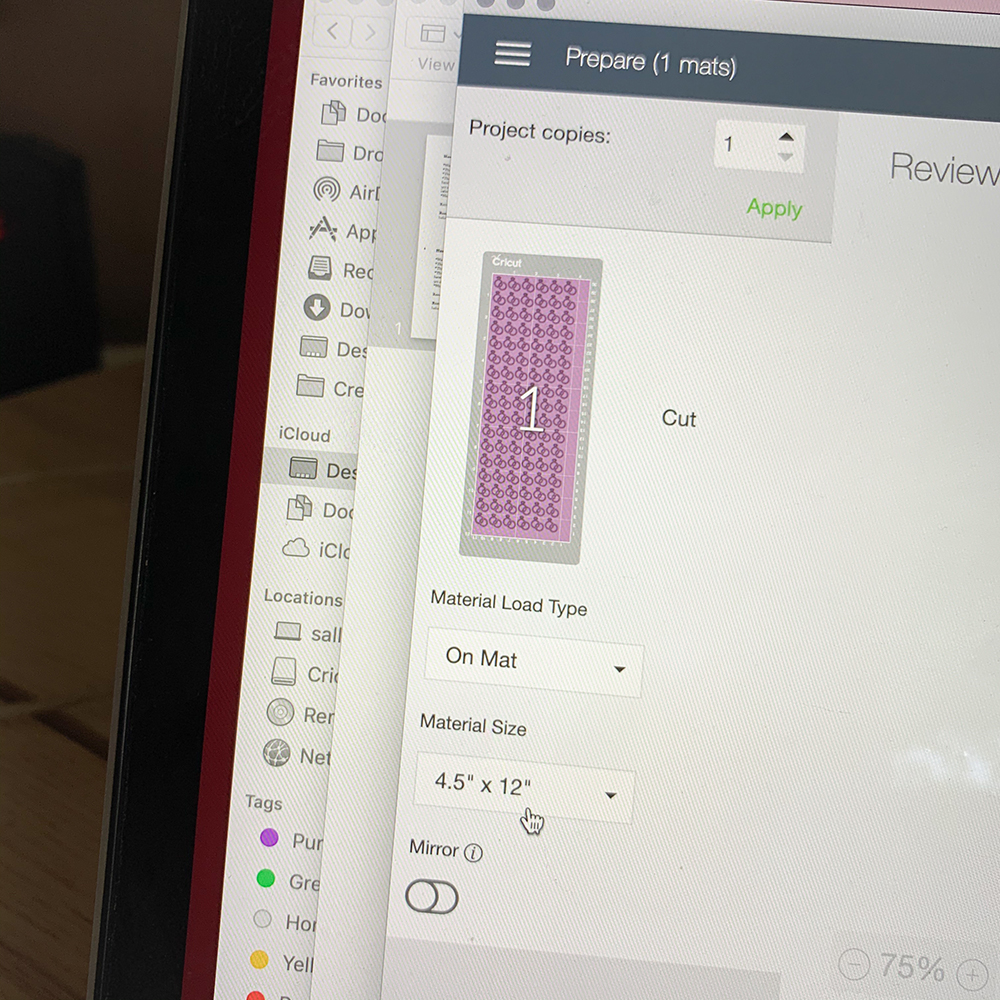
Make sure you have chosen 4.5″ x 12″ as your material size.
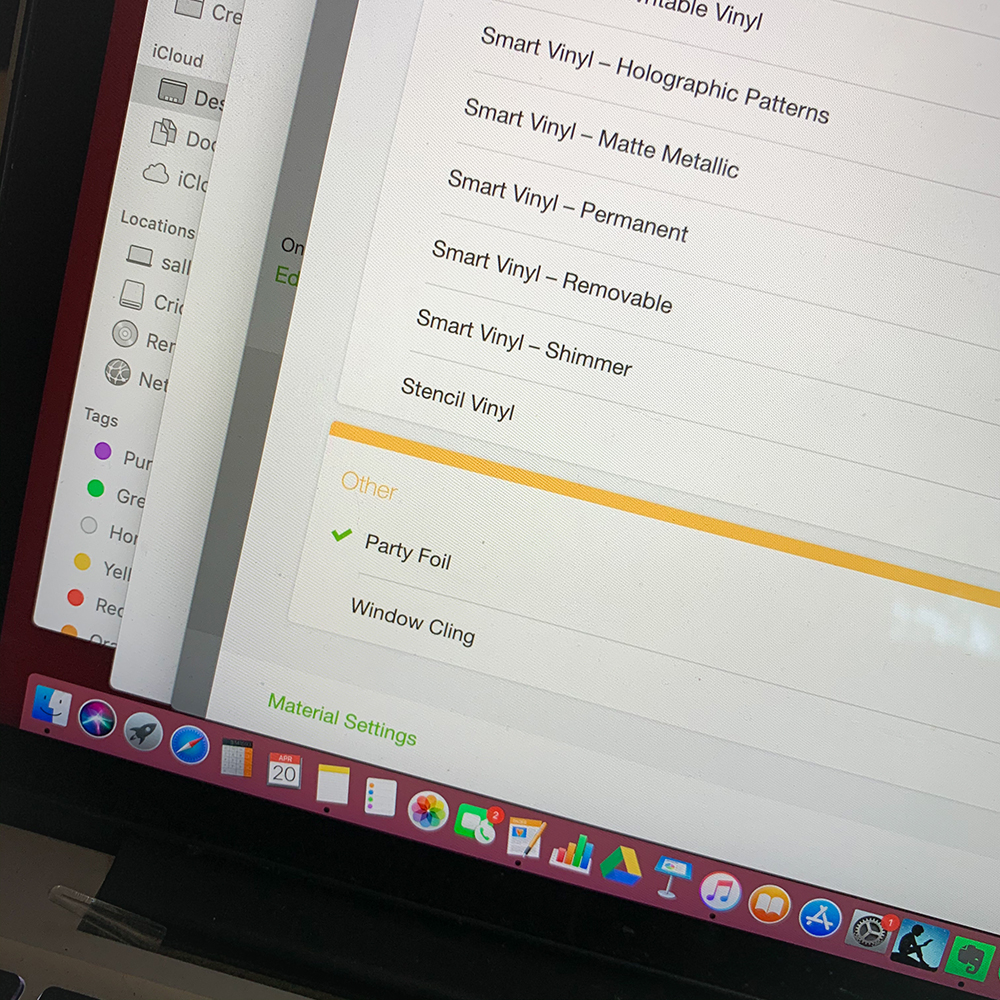
And make sure you choose Party Foil as your material. I used my Cricut portable trimmer to cut my party foil down to 4.5″ x 12″.
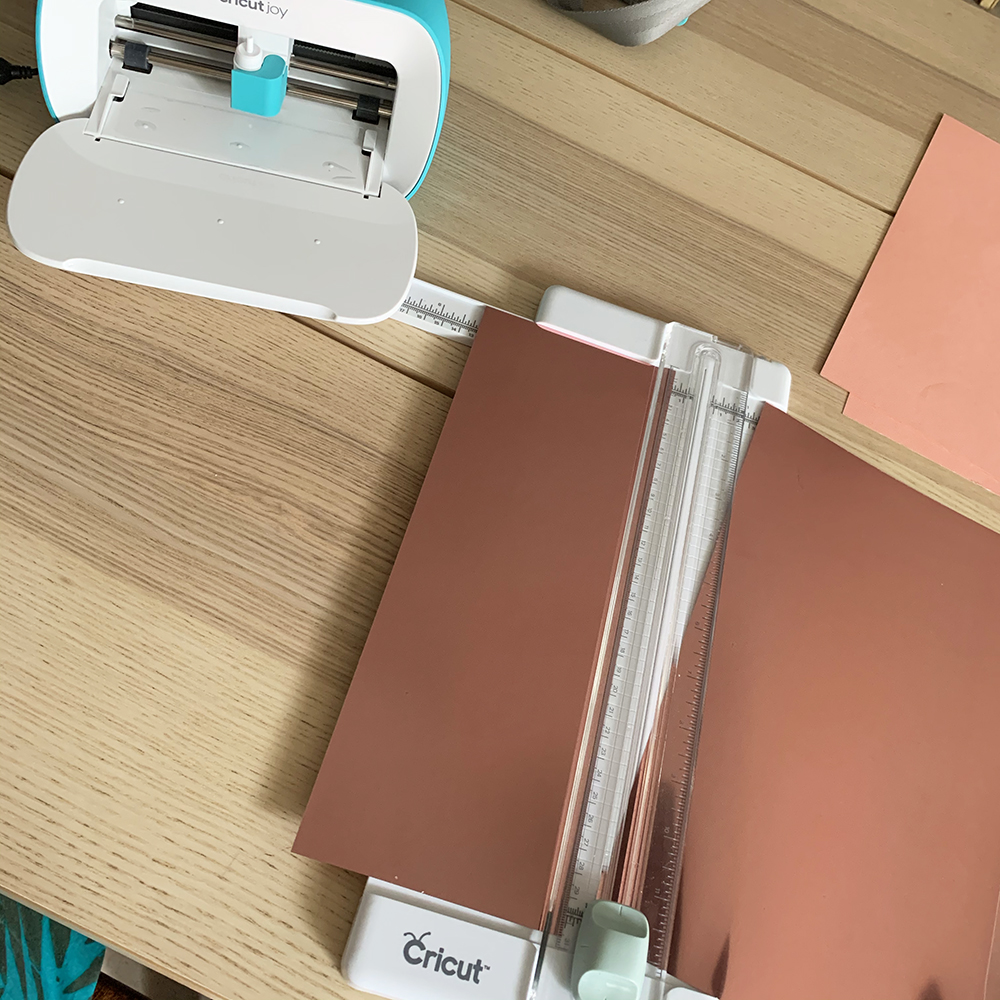
I learned a new thing with the Joy. TIP: When cutting foil, make sure with smaller cuts, the foil doesn’t get stuck under the blade. You can pause the cutting at any time.
A fast way to get your confetti off of the mat after the cut is to use your Cricut Joy Spatula which is part of the starter tool set. Watch:
In minutes you have a labeled baggie with confetti inside:
PROJECT number THREE: Love Banner
Again, with the Cricut Joy Smart products, these projects are so super fast!!!
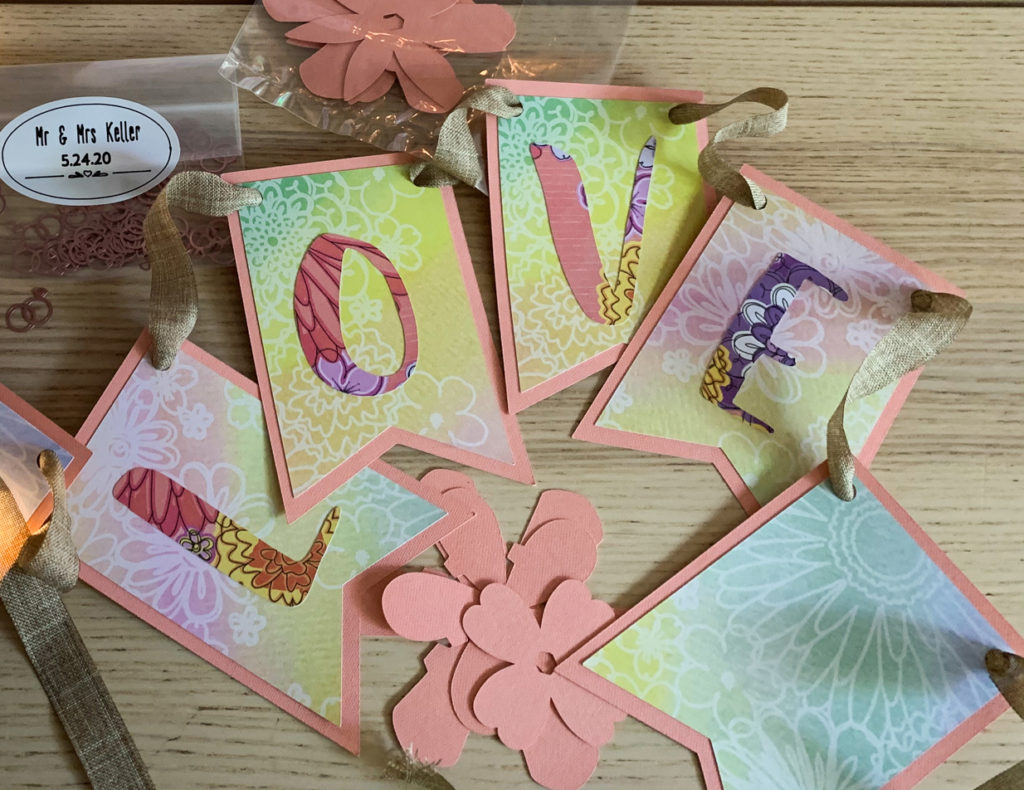
To make this project, use Cricut Joy’s Deluxe Paper (adhesive backed!) and a pattern on Cricut Design Space called Summer Pennant Banner. You can customize the banner to cut out any word you’d like to put on there. I chose LOVE.
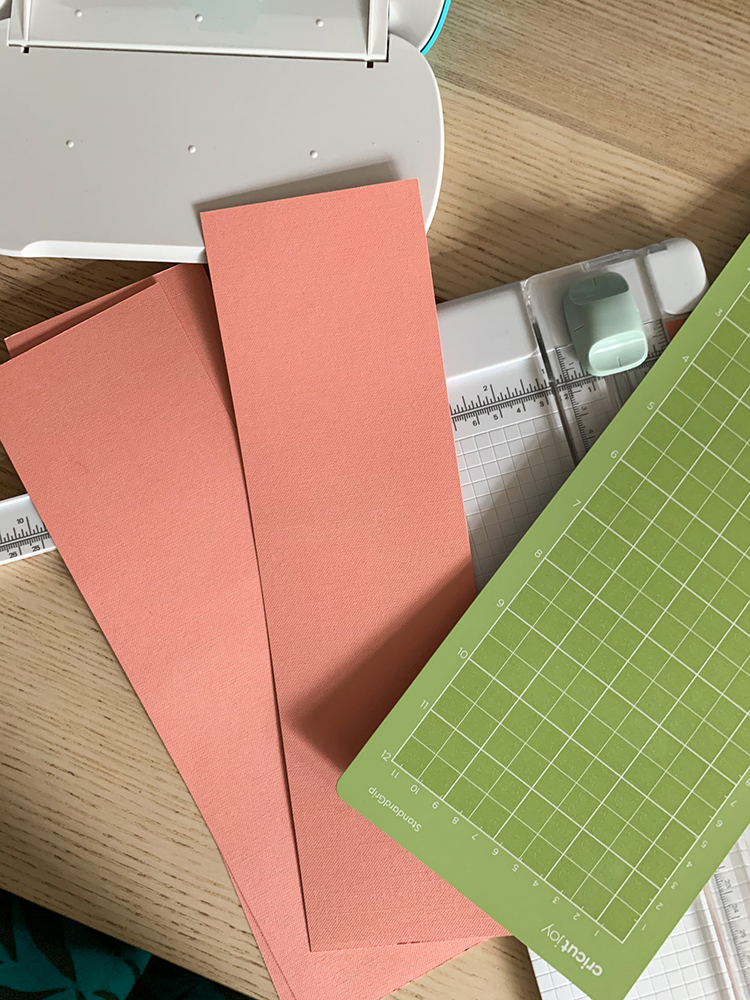
I also used two pieces of 12″x12″ Cricut Cardstock and cut it into 4 – 3.5″x12″ strips for the base of the banner.
It’s so easy to just put your adhesive-backed deluxe paper on your mat, and cut. It even cuts out the holes!! Add ribbon and voilá!!! (Even faster than the card!!!!)
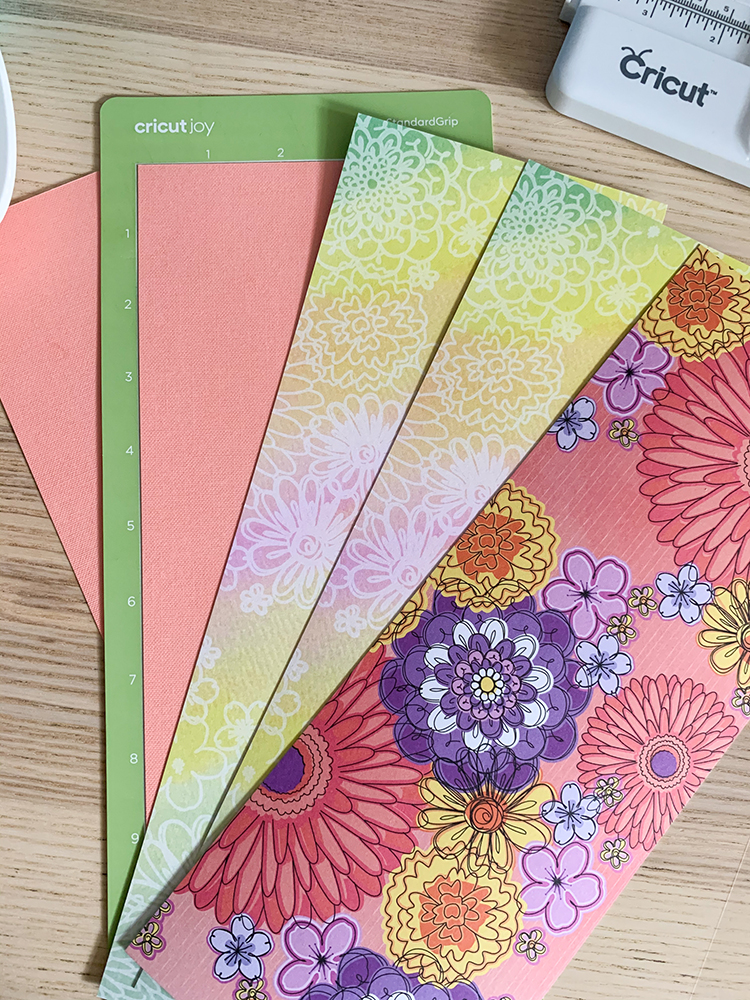
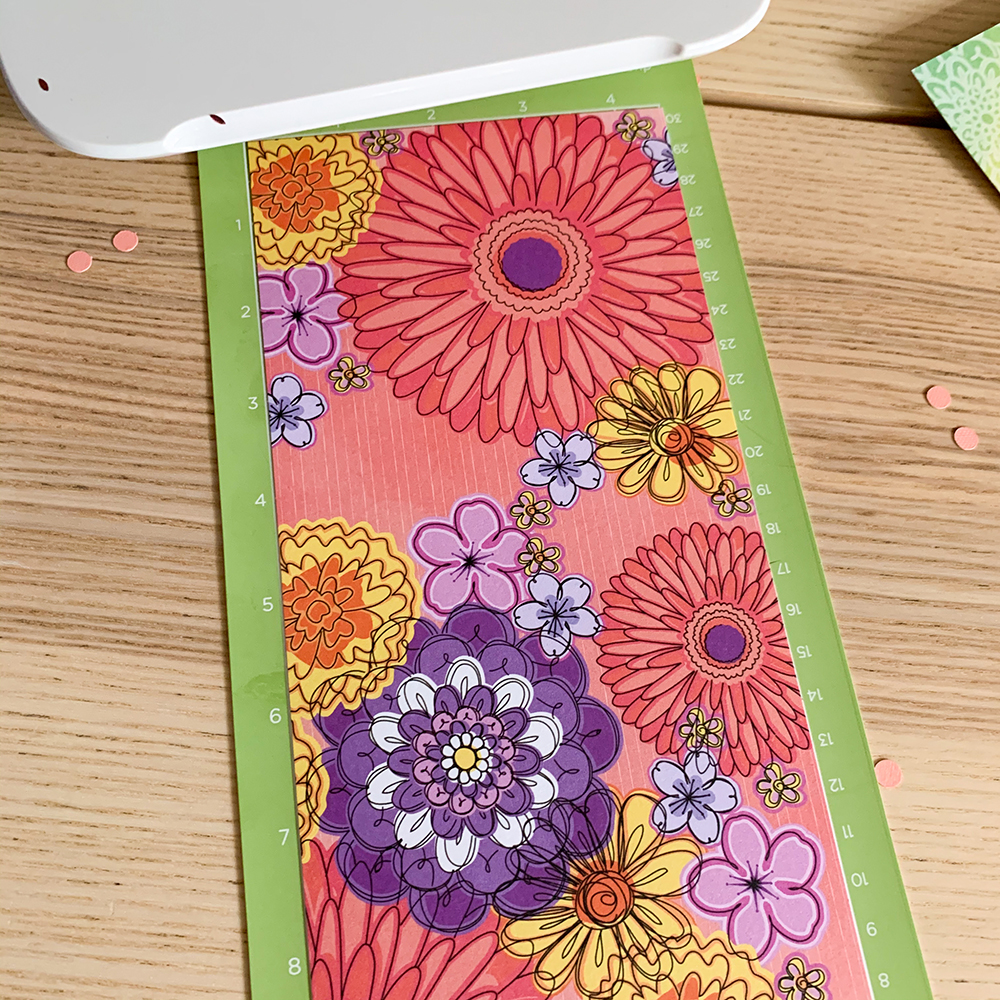
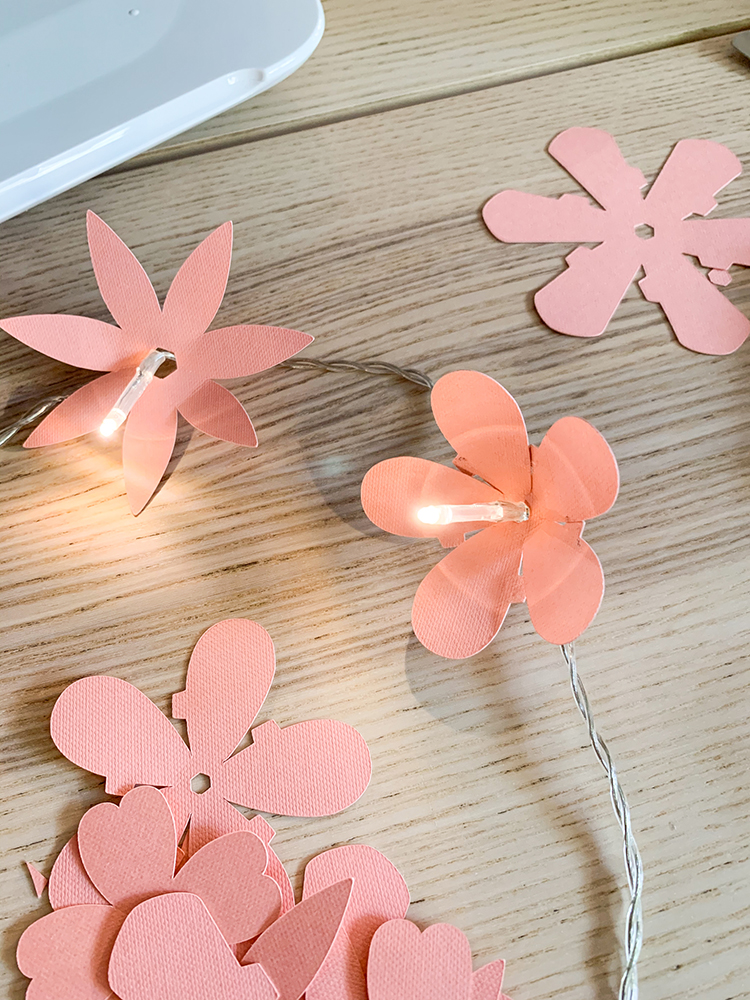
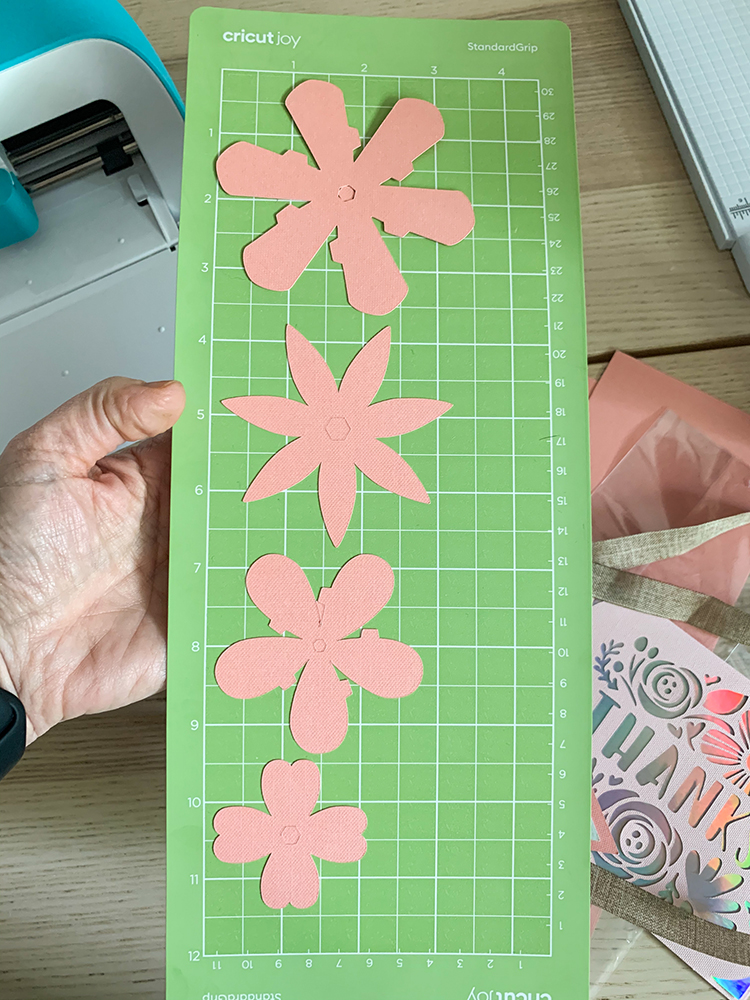
PROJECT number FOUR: Flower Garland
Grab your glue gun, a mini light string, and your cardstock. Here is the cutest project for your party pack:
In Design Space, search under projects Flower Garland – J Goode Designs. If you’d like all four flowers out of the same cardstock, customize by changing the colors of the flowers on the canvas. When you have the flowers the size you want (shrink them a bit to fit the Joy mat), click “Make” and cut out your flowers.
Using the little tabs, glue your flower petals together. Place your flowers onto your light string. I actually glued the base of my flowers onto the light string. It’s the best part of your party pack!!
I grabbed a cellophane bag in which to place all of my projects, and added a fun ribbon.
Now you can send your party packs to your bridesmaids!!!
What I learned from my FOUR PROJECTS with my CRICUT JOY:

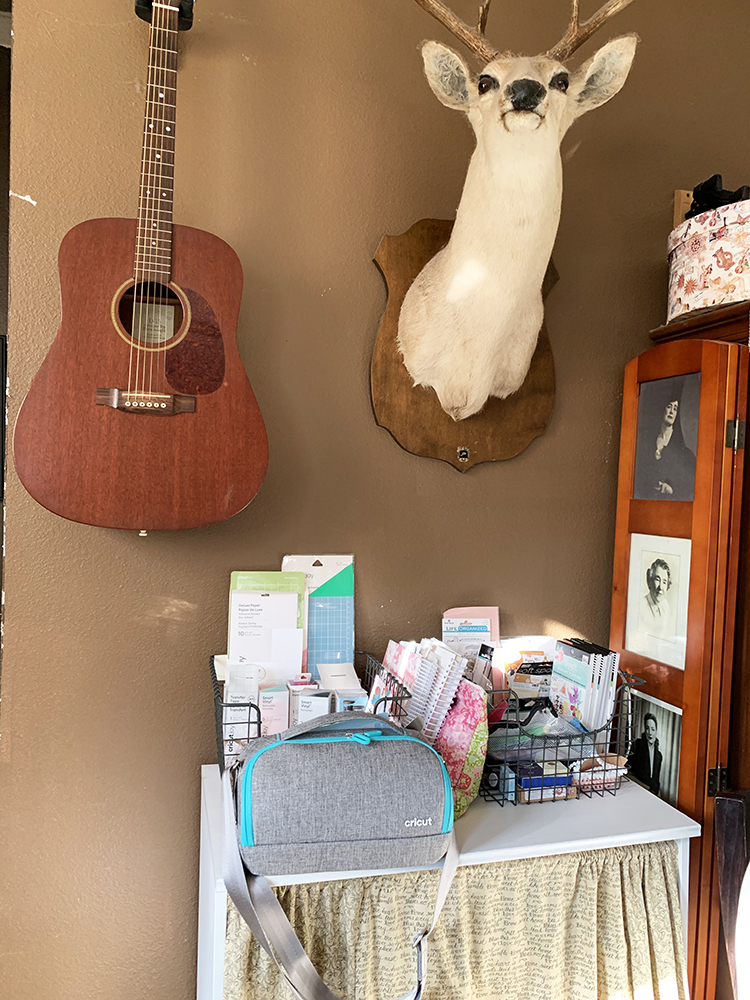
First: I love that the Cricut Joy can be put away in plain sight and grabbed to whip up a quick project with little to no mess and takes up very little space while stored. Isn’t that Cricut Joy Tote sharp looking? And very practical – where performance meets beauty!
Second: Ohhhhh, this machine cuts and draws. And the drawing could be in different line weights because of the different Cricut pens. I love the Cricut Joy.
Third: Because of the Insert Cards, my making time is shaved down to manageable time blocks!! I love all of the Cricut Design Space card options, too. So beautiful!!! (Stay tuned for lots more examples in the future!)
Fourth: The ability to personalize anything (see labels above!) opens up the possibilities to a pretty much endless list! (again, stay tuned for lots more examples in the future!)
Fifth: Ohhh the Smart Materials are soooo great!!! What if my mats are old? No worries…there’s Cricut Joy Smart Material!
What’s stopping you from getting a Cricut Joy? If you already have a Makeror an Explore, this is the perfect tool to keep in that small spot where your Maker or Explore can’t fit. You won’t make a big mess while using the Joy. And you will love how fast the projects are!!!
The Joy is available online RIGHT HERE for purchase in a bundle ON SALE with many of the materials you can use with it! It is an amazing deal!!
What other kind of projects would you include in your Home Party Packs?? We’ve got some other ideas up our sleeve…especially wedding-themed!!
Stay tuned…More Cricut Joy coming soon!!!
Blessings,