
This is a sponsored conversation written by me on behalf of Cricut. The opinions and text are all mine.
Last Wednesday, I introduced you to my new toy, my Cricut BrightPad. And I showed you how I could use it for mainly weeding vinyl.
It’s a delightful way to weed vinyl, for sure. And really, that reason alone would make me purchase a BrightPad right now!!
But that’s not the first reason I wanted a BrightPad. And it’s not the only use I have for this awesome tool. I have three other ways I use my BrightPad:
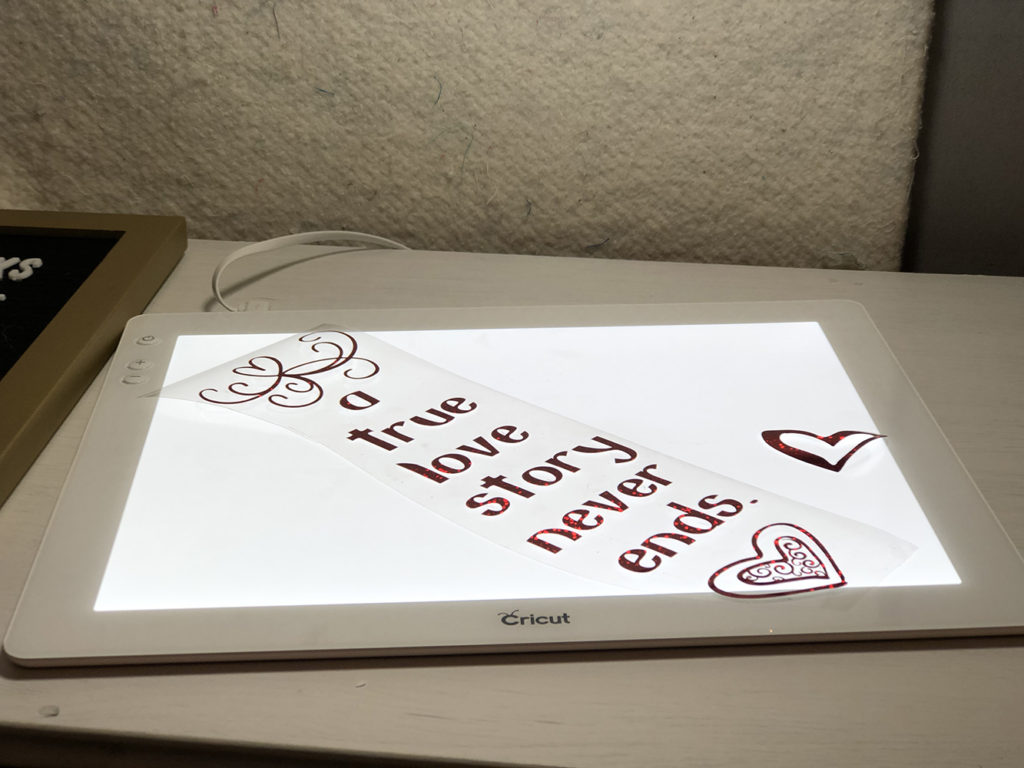
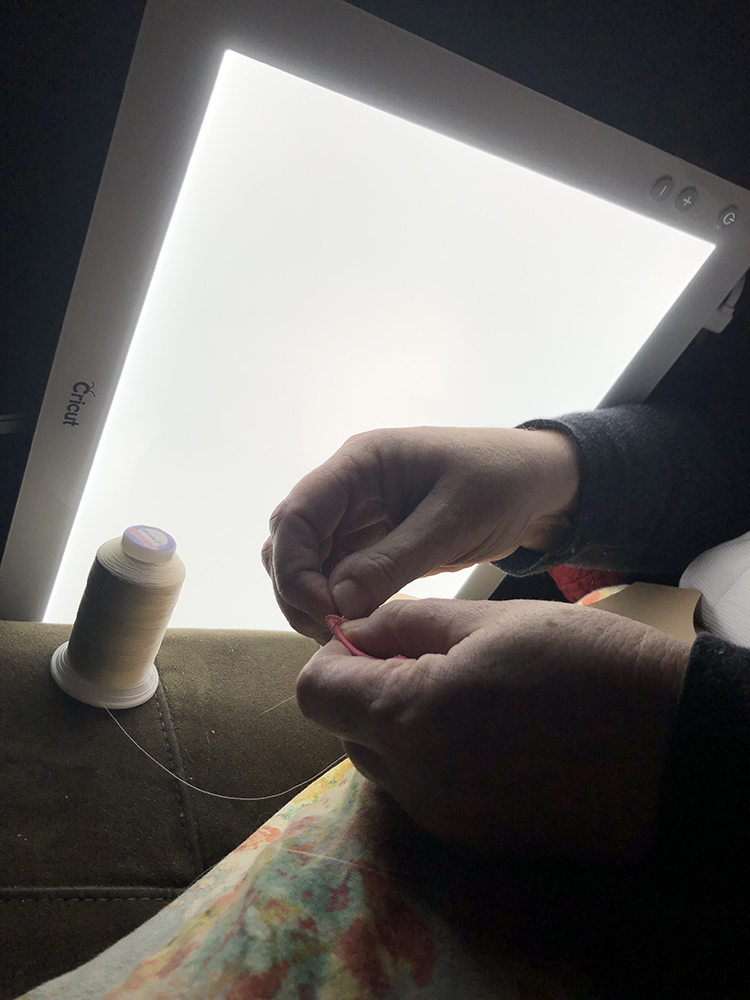
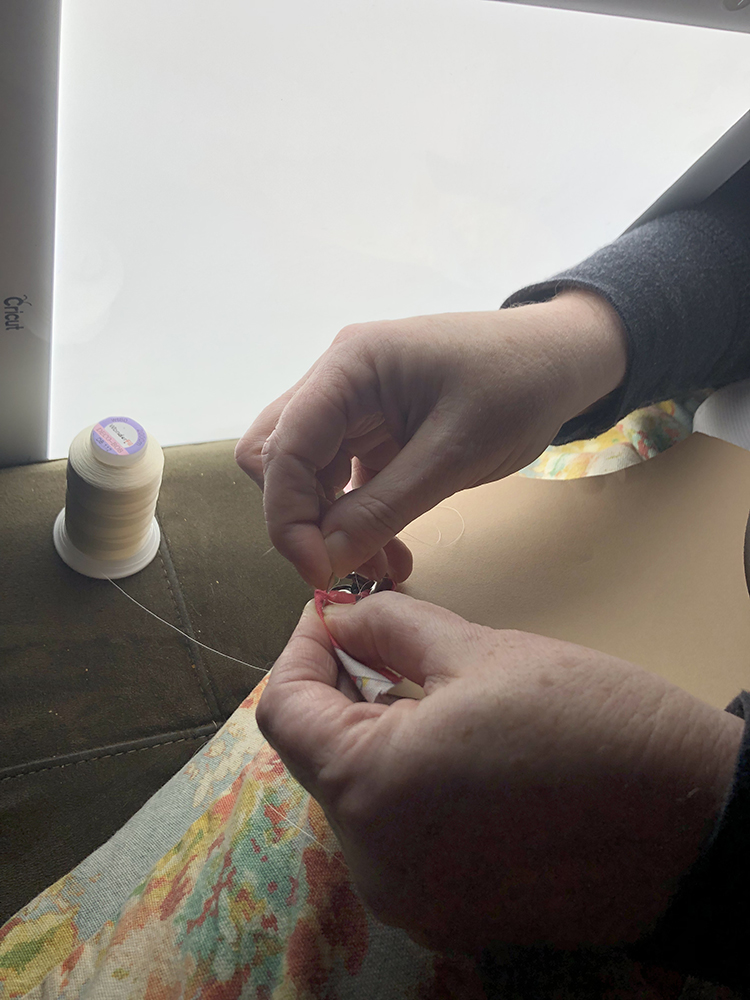
1.Tracing
Tracing is
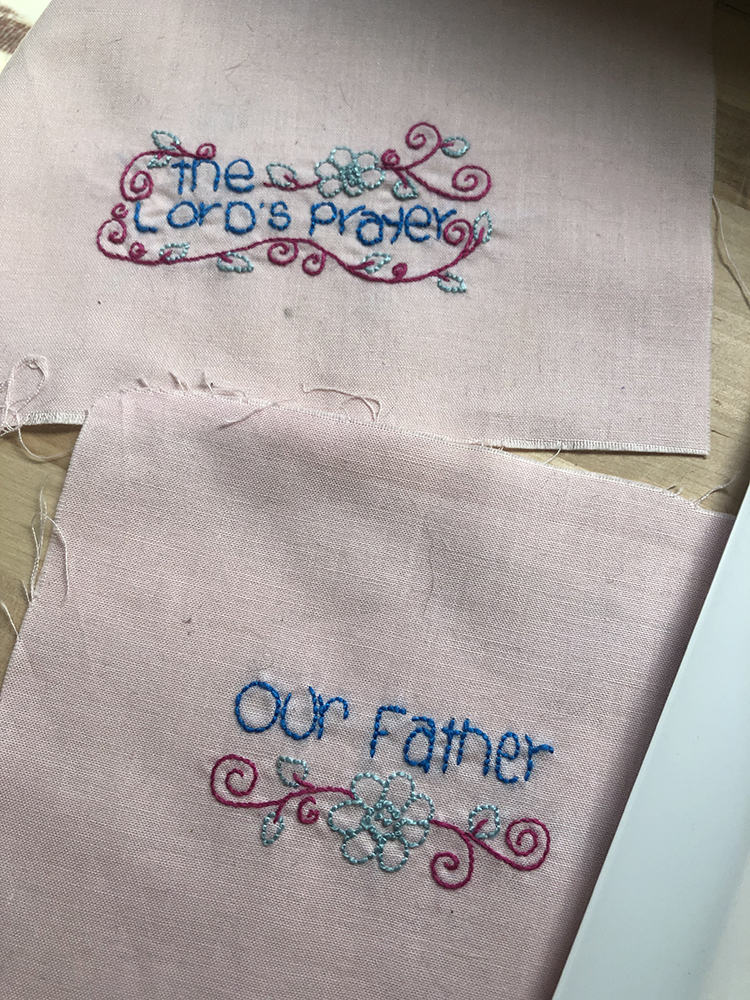


Pretty awesome, huh? Especially for us embroiderers!!!
2. Illumination
This is a very fun use, and I have really been enjoying this. In the evenings, I’ve been watching tv with my family. Everyone in the house except me likes for all of the lights to be out while watching. I have a lamp from Ikea that I use while doing handwork in the dark, but it’s just not that portable! Enter the BrightPad!! It’s thin, bright, portable, reduces my eye strain, and is extremely durable.
I know it’s quite goofy, but it has really been working for me!!

3. Quilt piece placement
This is one of my very favorite projects for which I got the BrightPad. Laser Cut Quilts is an awesome company that has kits that you can put together in a day and have a beautiful quilt!! I got this kit from my LQS It Seams to Be Sew…this is Mr. Gorgeous’s Valentine’s present. And for us, it’s the year of the cow and deer!! 🙂
I’m going to walk you through each step to show how valuable the BrightPad is to this kind of project:


In this particular quilt, there were 79 pieces. I took one afternoon to sort the pieces, take them off of the sheets, and write their numbers on the backs.
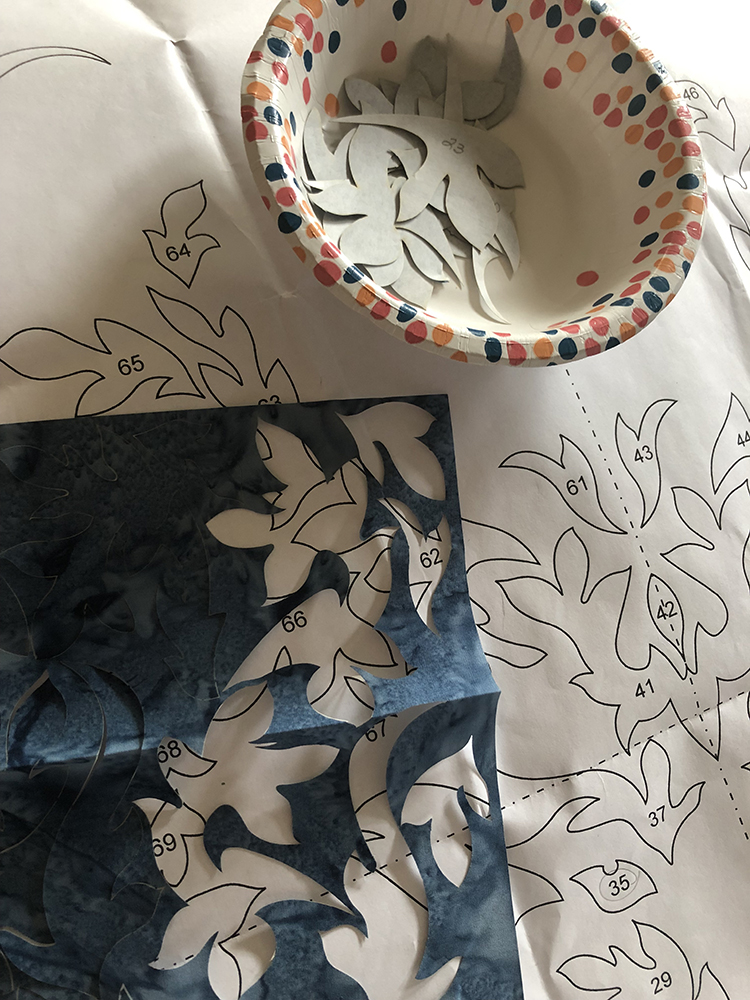
I folded my background fabric in half horizontally and in half vertically. Then using the BrightPad, I put those fold lines on the dotted middle lines on the pattern. Those were my main guide lines for the whole quilt.

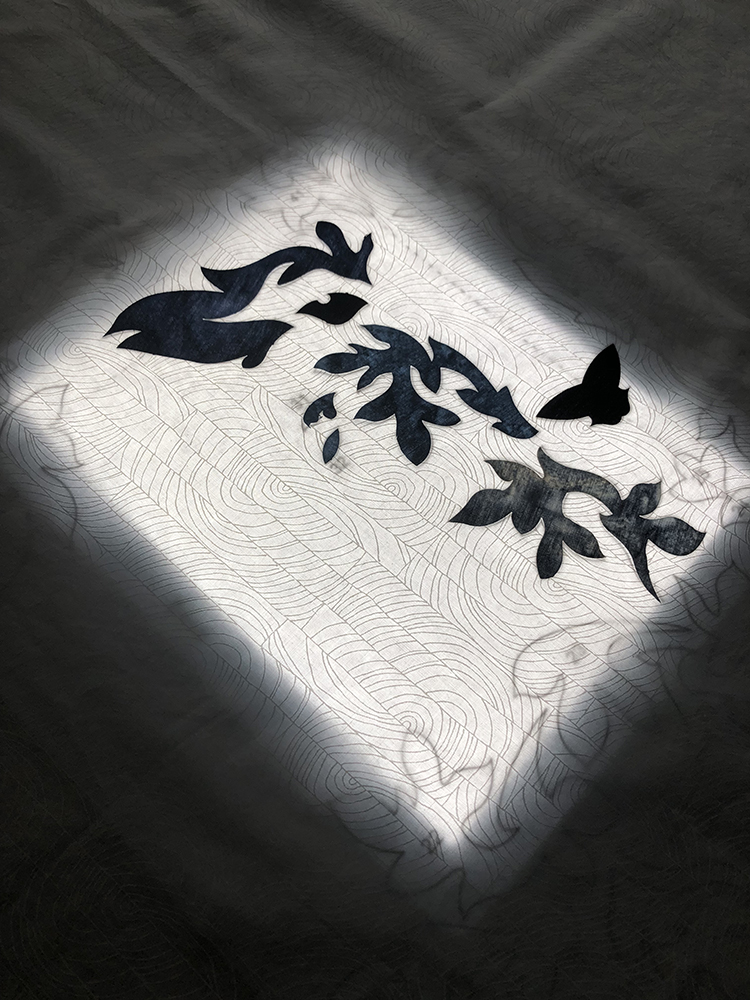
With each group, I would match the pieces, pull the BrightPad out of the way, then iron the pieces down. BTW, don’t iron on the BrightPad. It is not heat resistant.

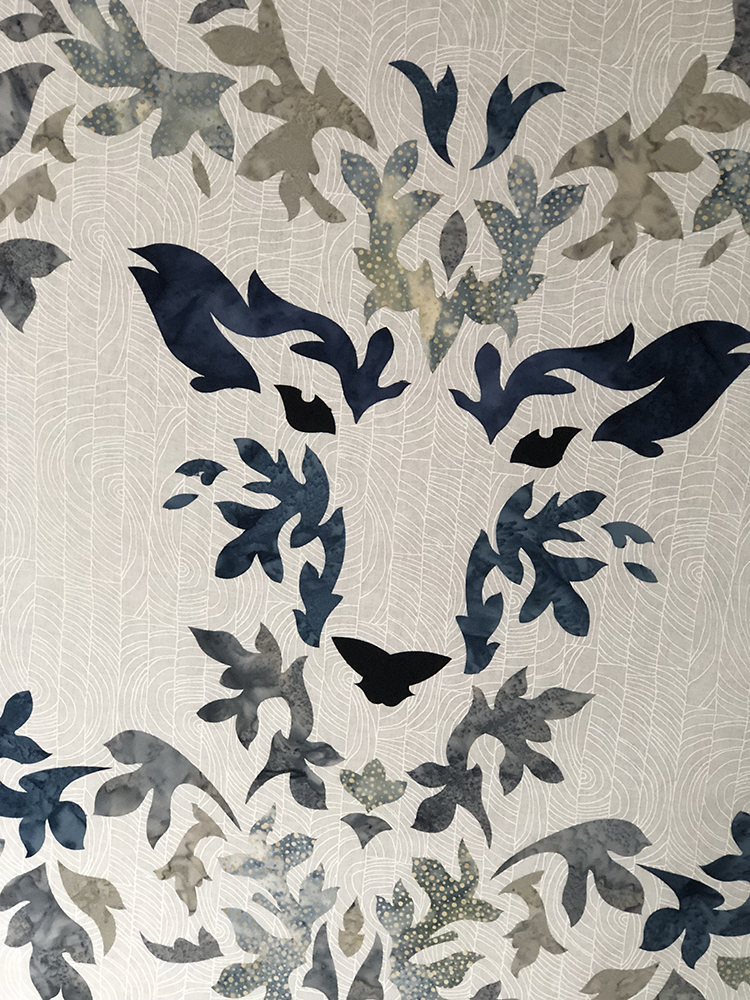
I just continued to follow those steps until the whole quilt was put together:
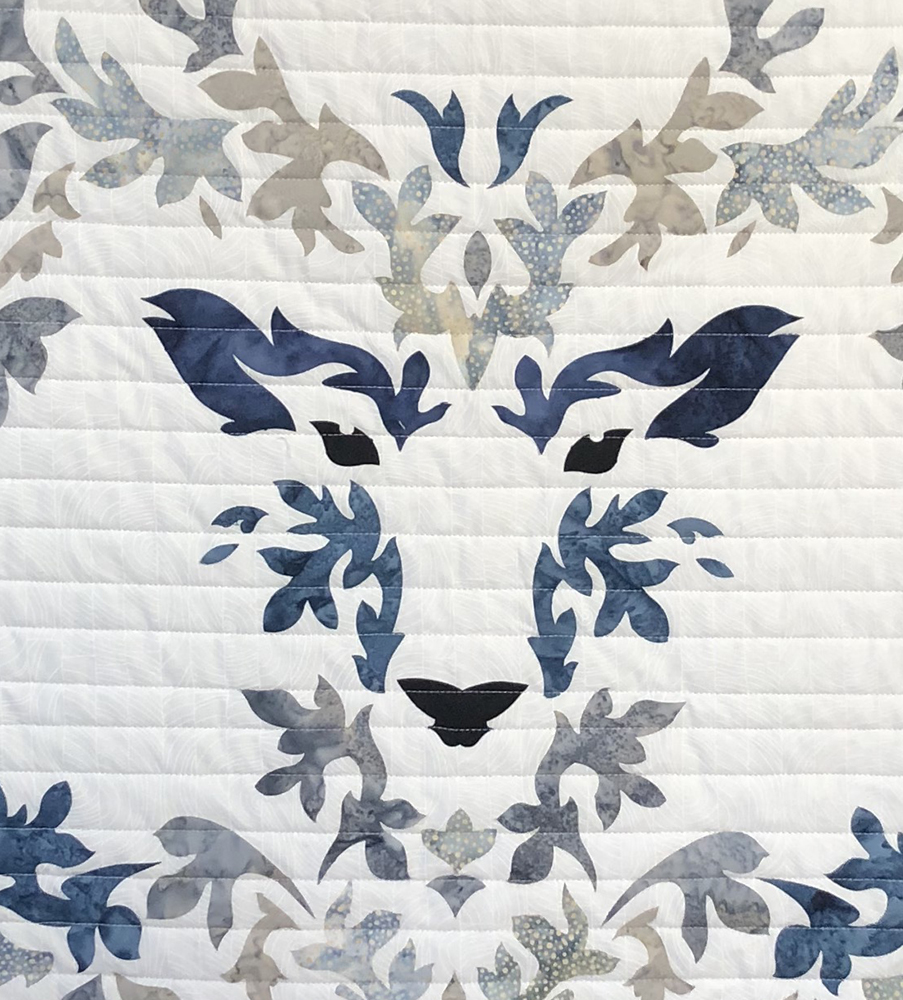
I sent the top with batting and backing to a friend (Libby’s Quilting Creations) to quilt it with straight lines. Straight line quilting is a great way to cover most of the edges of raw-edged applique.
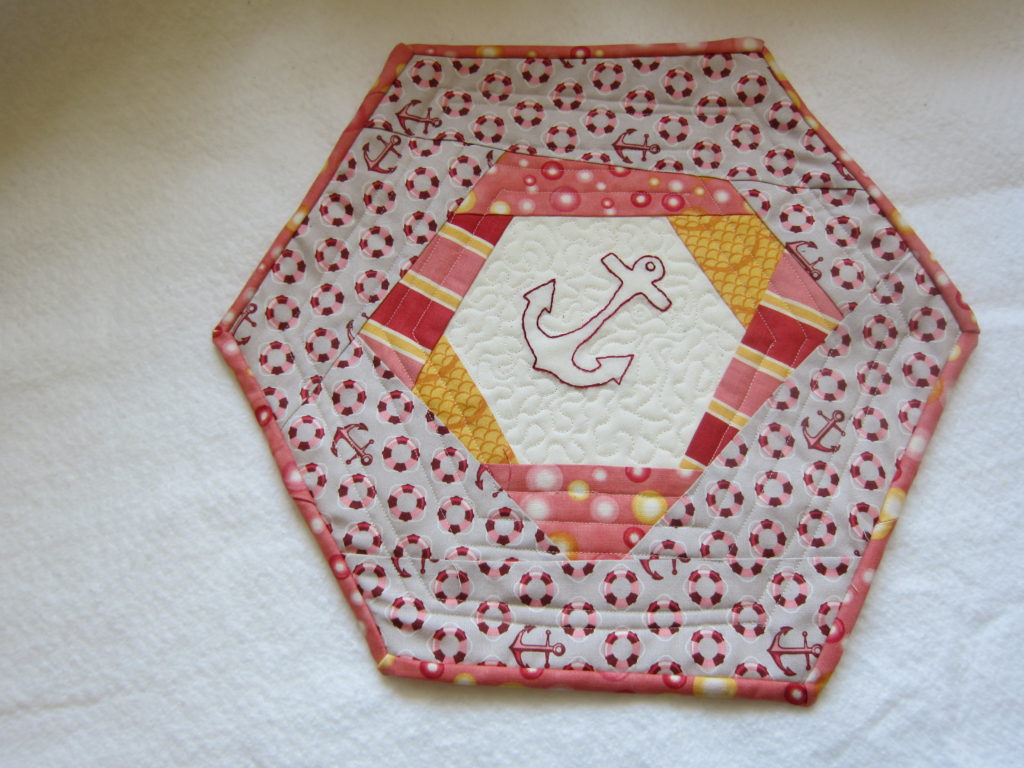
And here is my finished product, quilted and bound:
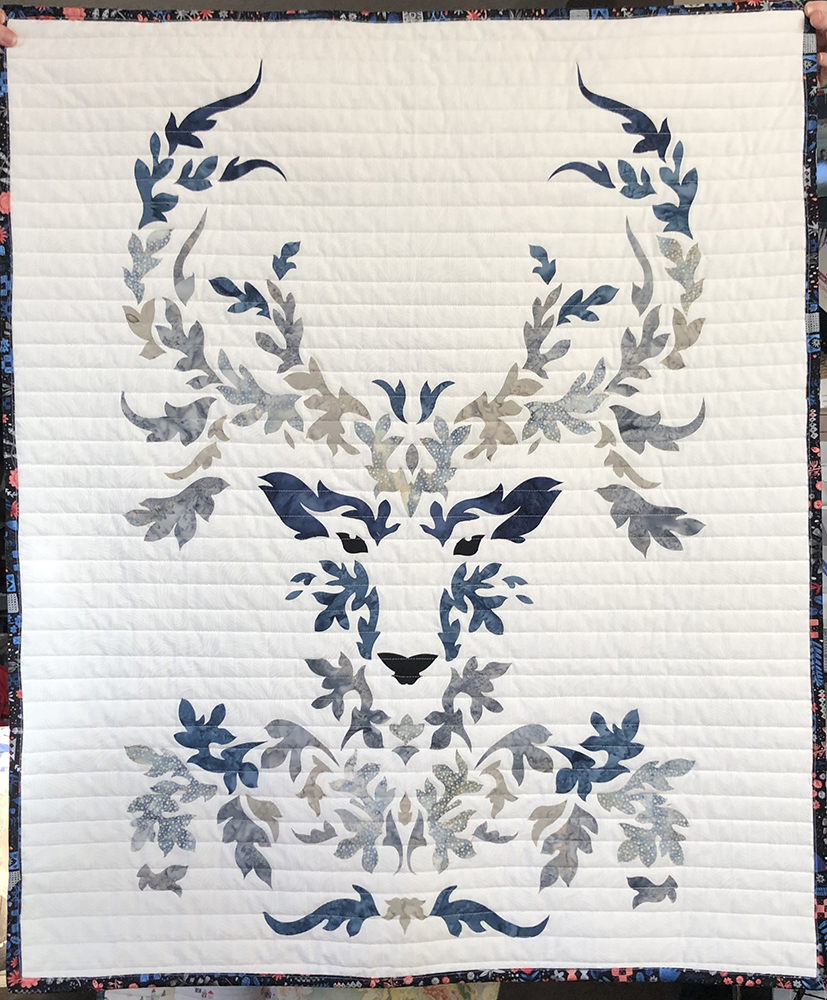
Mr. Gorgeous is going to love it!!! 🙂

There are even more uses for the BrightPad that I’m still discovering…like paper piecing, embroidery pattern placing, and the all-illumined selfie helper…

Which way would you use the BrightPad the most? Click on any link in this post to the BrightPad and get you one!! It’s truly worth it!
Next week, I’m going to show you some new fun projects I’m making with my Cricut Maker. And don’t forget to come back this Friday for my Friday’s Fun Five!! You’ll love them. I promise!
I’m linking up with Busy Hands Quilts this week!
Blessings,