I’m excited for August because not only is it my birthday month. but it’s my month to host the #SuperAwesomeQuiltBee2017!!
I picked a fun block that I thought was a bit different for the gals in my bee.
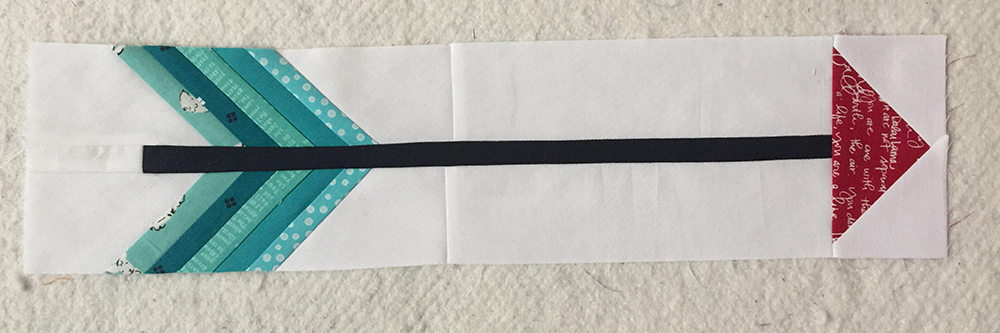
It’s an 4.5″ x 18.5″ block that will go together with a bunch of other arrows splendidly!!
I am posting a specific tutorial for the bee based on Carla’s arrow tutorial HERE at Grace and Favour. Let’s sew!!!
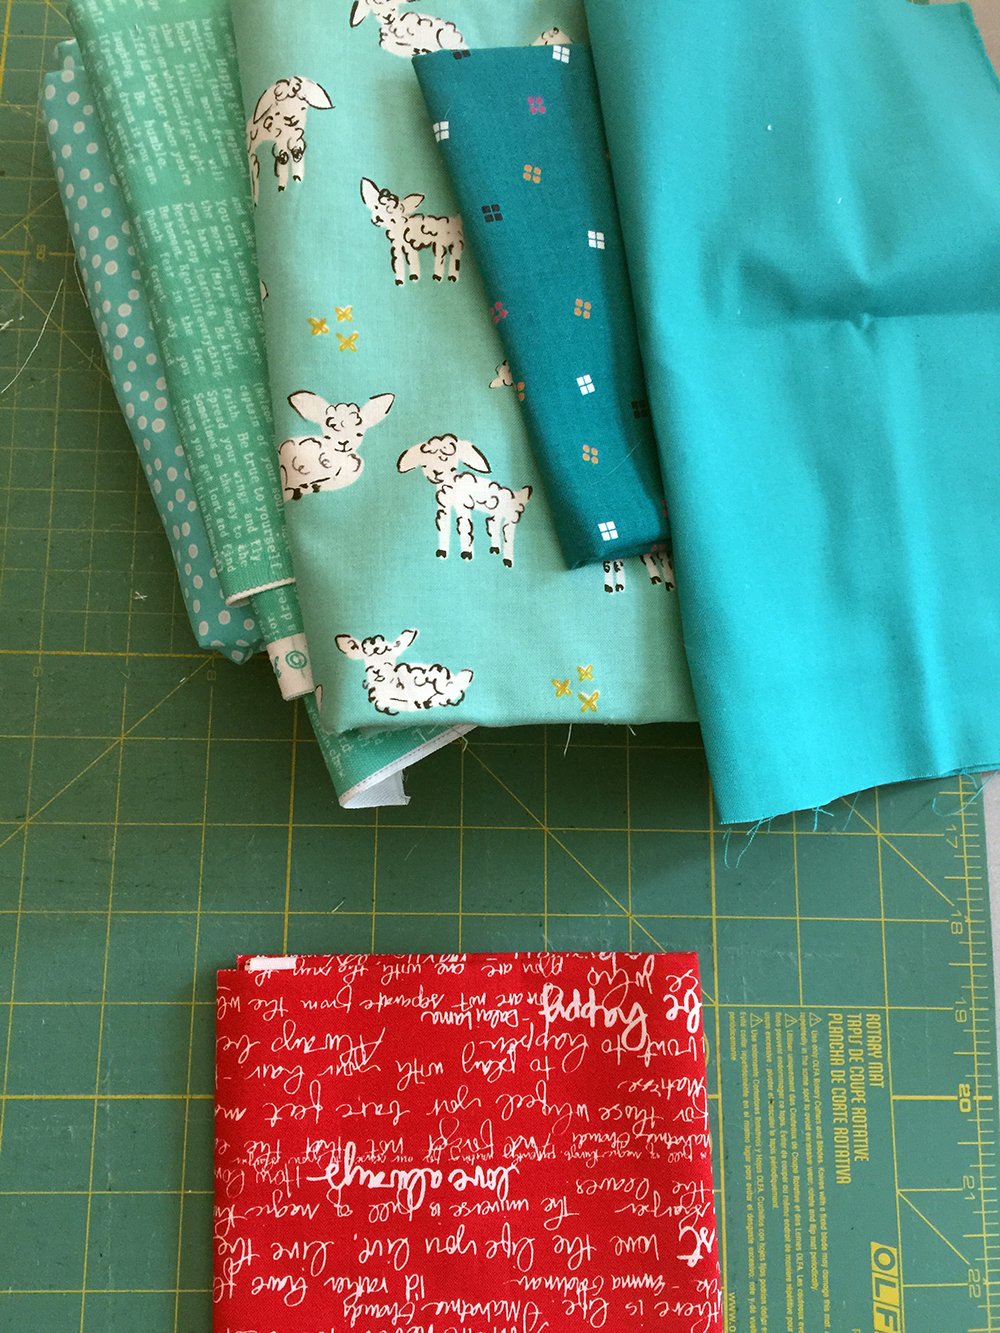
For my block, I would love any combination of red and teal. For the background, Kona Snow, and for the arrow shaft, either Kona Pepper or Kona Silver (your choice, bee gals!).

Cutting:
Arrow: teal and/or red fabrics:
5 strips measuring around 20″ x 1″ (feathers)
1 strip 2.5″ x 4.5″ (arrow head)
Kona Pepper OR Kona Silver
1 strip 1″ x 14.5″ (arrow shaft)
Background: Kona Snow
2 strips – 3″ x 20″
2 strips – 2.25″ x 8.5″
2 squares – 2.5″ (for arrowhead)
1 – 1″ x 2.5″ (end of shaft)
Sewing:
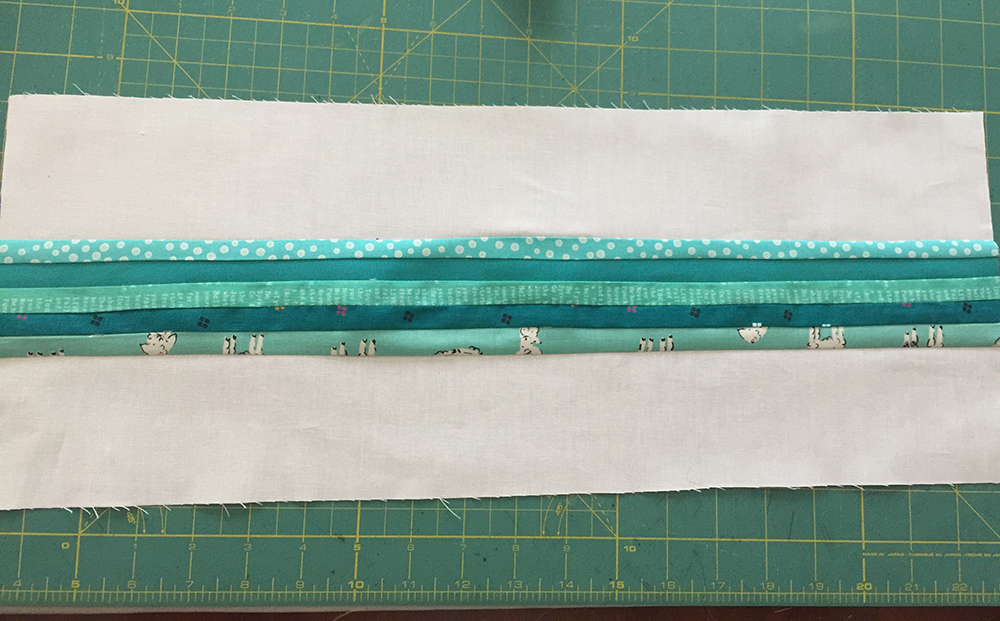
- 1.Sew your five strips together, then sew your white strips on the top and bottom of your five strips.
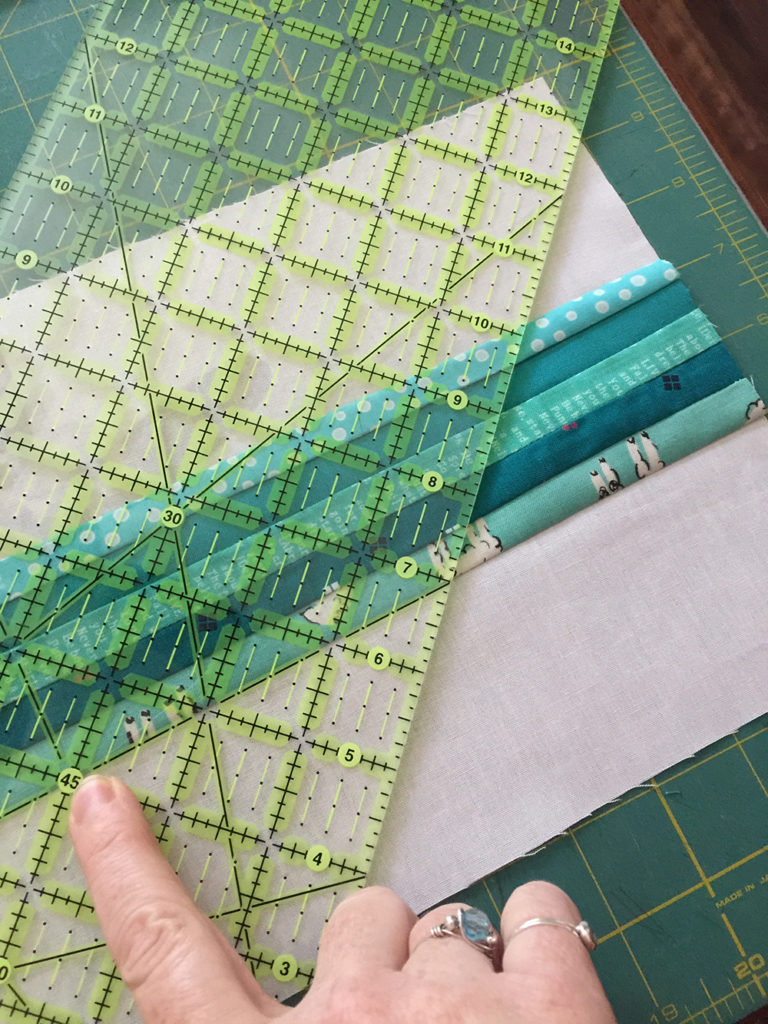
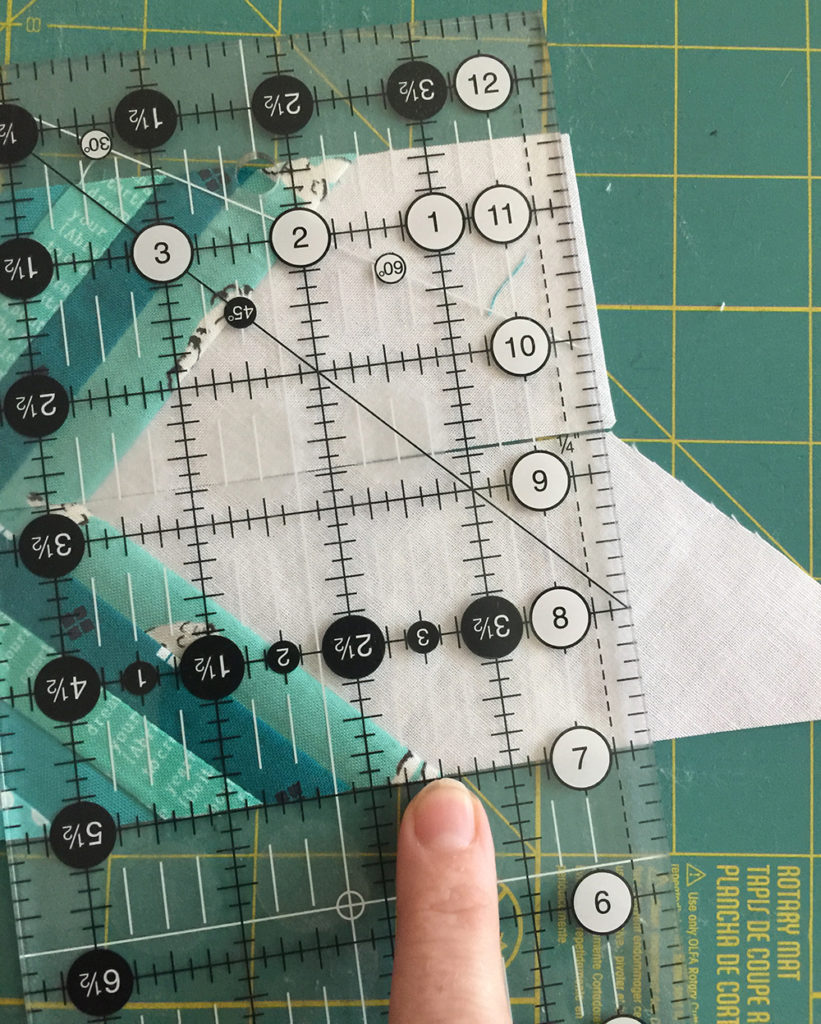
- 2. Place your ruler with the 45degree line on the bottom of your colored strips creating a 45 degree angle. As Carla says in her tutorial, it’s okay your ruler is below your top right corner. Slice that piece off.
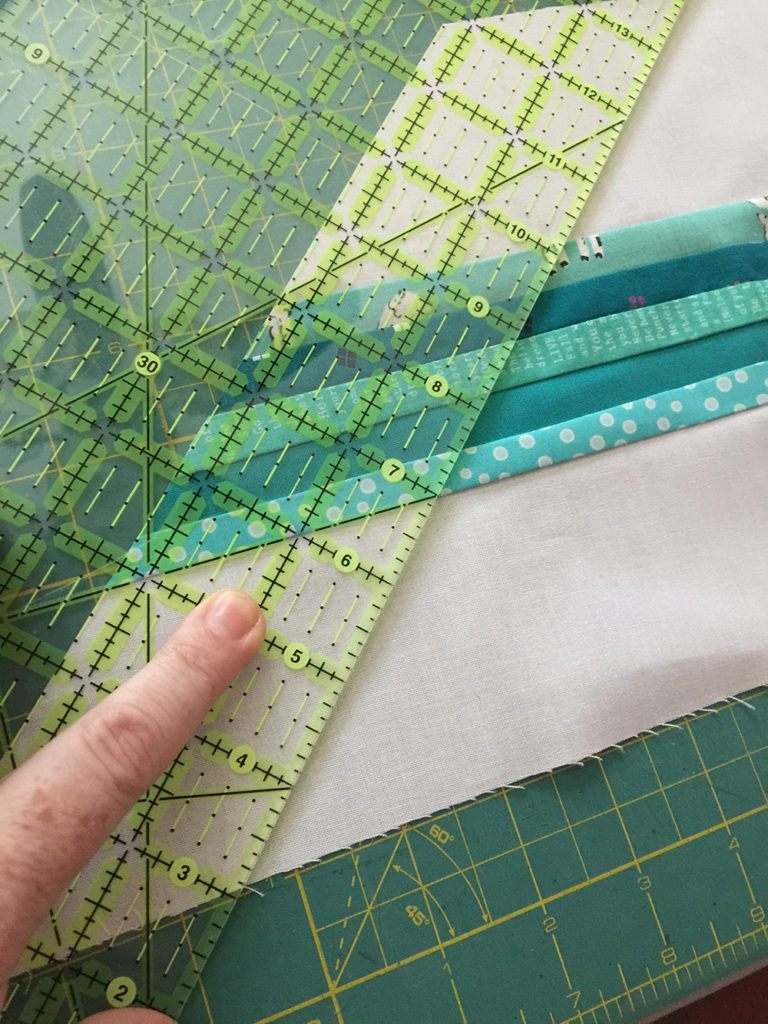
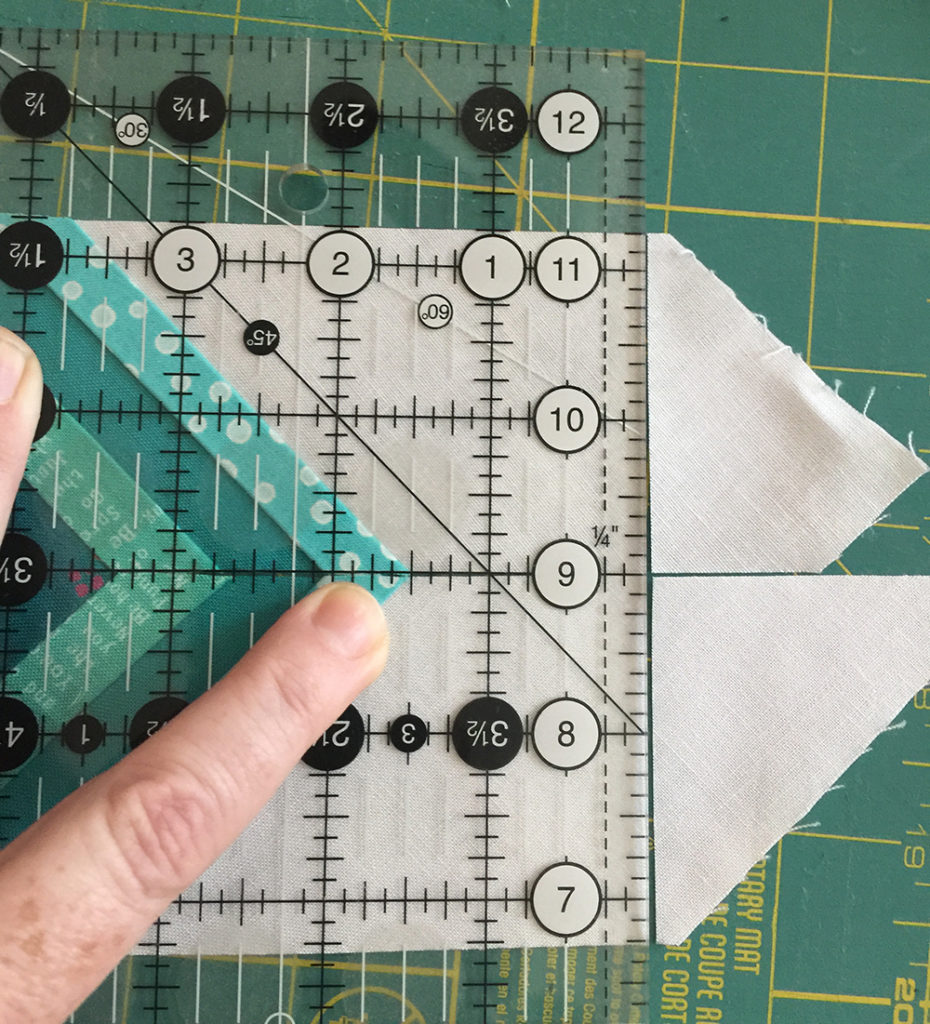
- 3. Flip your strip piece over and place your ruler again with the 45 degree line on the bottom of your strips, but measuring 2.25″ from the edge. On my pictures, you can see my lamby fabric upside down on the first pic and right side up on the next photo (above!) Slice your 2.25″ strip and set aside.

- 4. Keep your strips the same direction and place your 45 degree line on the top of your colored strips and your ruler meeting the top corner of your strips. Slice this piece off.
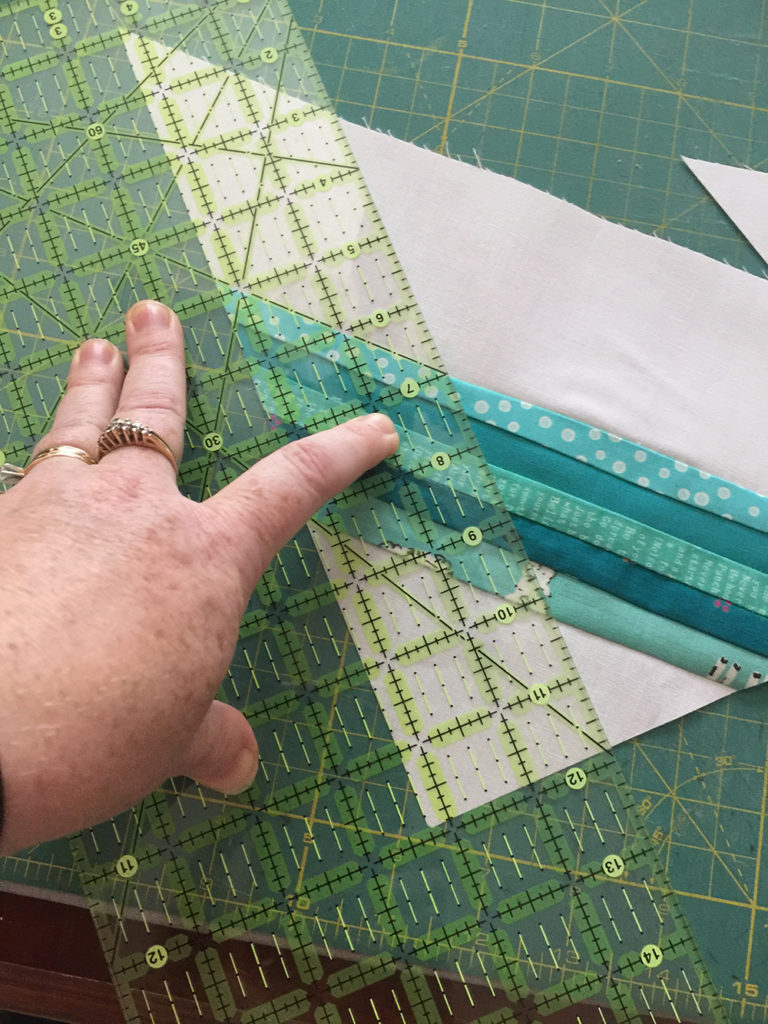
- 5. Flip your strip piece over again and measure (still putting your 45 degree line on the top of your colored strips) a 2.25″ strip and slice it off.

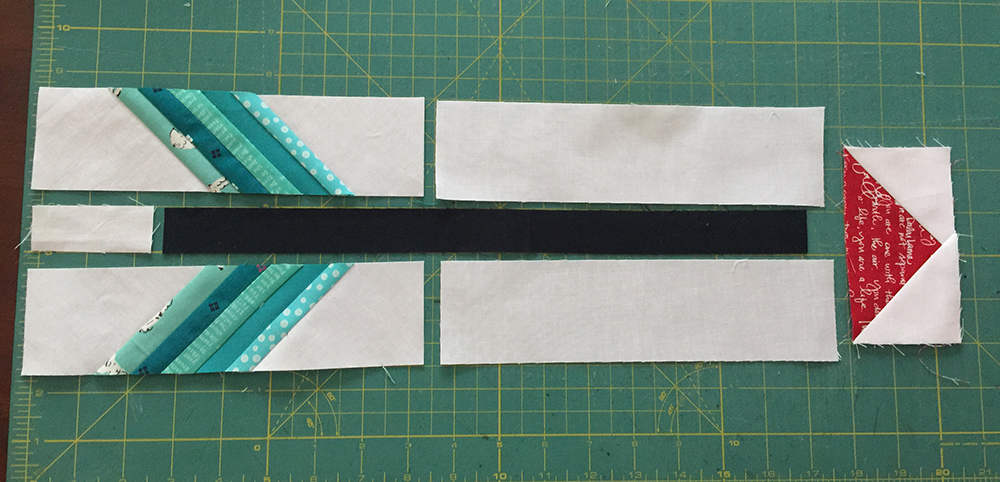
- This will be what you have with your two strips (above!).
- 6. With your raw edges together trim each side of your feather pieces. Trim both ends so that there is 1.5″ of background material left. (See above and below!)
- 7. Sew your 2.5″ background squares onto your 4.5″ x 2.5″ strip of a colored fabric to make a flying geese (or is it goose???)(your arrowhead). Place all of your pieces on your design wall or table to see it as it should be sewn together…
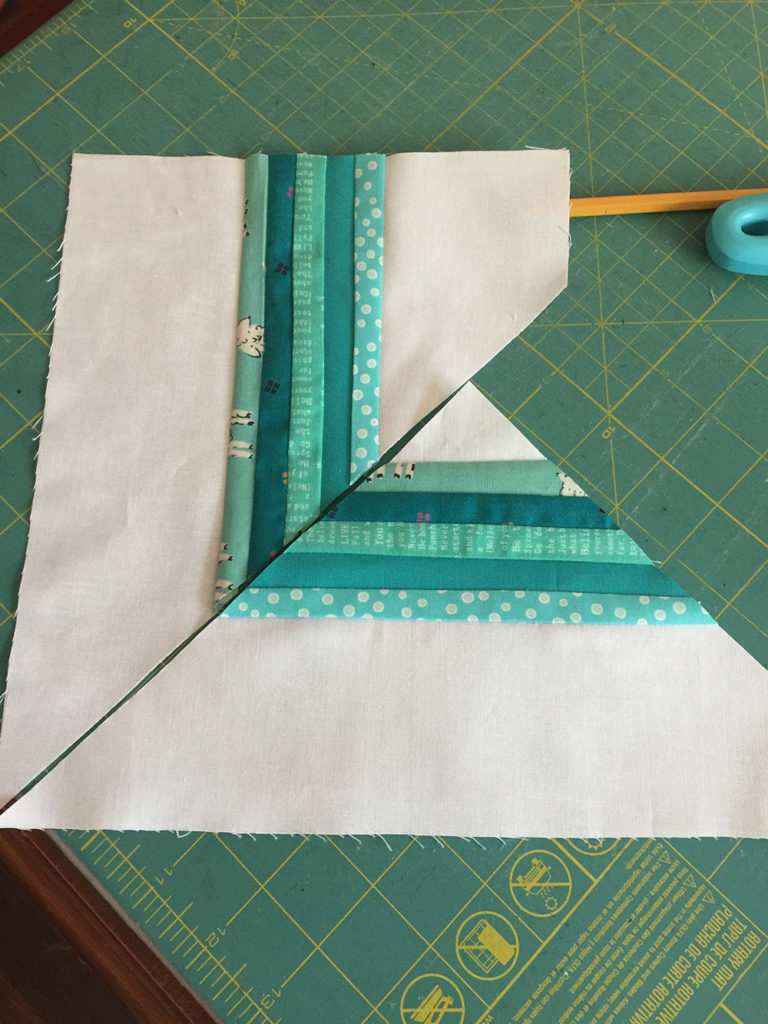
 8. Sew your top two strips, your middle two strips, and then your bottom two strips together, then sew your three rows top to bottom together. Then sew your arrowhead onto your big strip!
- 9. If you need to trim, trim it down to 4.5″ x 18.5″.
- You will have leftovers. Use them for one of your future projects, or if they are crowding your space, feel free to send them to me with your arrow.
- Have fun sewing!!! Any questions, just email me! sally AT sallysangelworks DOT com
- Blessings!!!